Werewolf: The Apocalypse 5th Edition is a tabletop RPG set in the World of Darkness, where players embody Garou, defenders of nature against supernatural threats.
1.1 Overview of the Game and Its Setting
Werewolf: The Apocalypse 5th Edition is a tabletop RPG where players take on the roles of Garou, werewolf warriors fighting to protect the natural world from supernatural threats. Set in the World of Darkness, the game explores themes of environmentalism, spirituality, and the struggle between humanity and the wild. The PDF format allows for easy access to rules, character creation, and lore, enhancing gameplay and storytelling.
1.2 Key Features of the 5th Edition
Werewolf: The Apocalypse 5th Edition introduces refined gameplay mechanics, enhanced character creation, and expanded lore. The Storyteller System emphasizes narrative-driven gameplay, while interactive PDF character sheets and Roll20 integration enhance digital play. New sourcebooks like Shattered Nation and Scent of Decay deepen the World of Darkness setting, offering fresh storylines and character development opportunities. The 5th Edition also includes updated rules for combat, gifts, and character advancement, enriching the Garou experience.
1.3 Importance of the PDF Format for Players
The PDF format of Werewolf: The Apocalypse 5th Edition offers unparalleled accessibility and convenience for players. Interactive character sheets streamline character creation and management, while digital tools like Roll20 integration enhance virtual tabletop experiences. PDFs also provide easy updates, ensuring players always have the latest rules and content. This format allows for seamless sharing and accessibility across devices, making it indispensable for modern tabletop gaming.
Core Rulebook Details
The 5th Edition core rulebook is a 300-page comprehensive guide, utilizing the Storyteller system for character creation and storytelling within the World of Darkness universe.
2.1 Core Mechanics and Gameplay System
The 5th Edition employs the Storyteller system, emphasizing narrative-driven gameplay and strategic combat. Players utilize a dice pool system, combining attributes and skills to determine success. The core mechanics focus on balancing storytelling with tactical decisions, allowing Garou to transform into various forms, each with unique abilities. Combat is dynamic, blending physical prowess with supernatural gifts, creating a rich and immersive experience for players.
2.2 Character Creation and Development
Character creation in Werewolf: The Apocalypse 5th Edition offers a detailed system, allowing players to craft unique Garou with distinct tribes, auspices, and breeds. Attributes and skills are allocated to shape abilities, while touchstones and renown provide depth. Players can customize their characters’ strengths and weaknesses, with development opportunities through experience points, enabling advancement in powers and influence within the Garou Nation.
2.3 The Storyteller System in the 5th Edition
The 5th Edition of Werewolf: The Apocalypse utilizes the Storyteller System, a narrative-driven mechanic that emphasizes storytelling and player agency. The system uses a dice pool of d10s, with successes determining outcomes. Storytellers guide the narrative, creating immersive chronicles within the World of Darkness. The PDF format enhances accessibility, offering clear rules and introductory stories to help new players and Storytellers alike craft compelling experiences.
Sourcebooks and Expansions
Werewolf: The Apocalypse 5th Edition offers expansions like Shattered Nation, detailing Garou Nation’s ruins, and Scent of Decay, introducing new chronicles. The Deepest of Wounds provides a free Month of Darkness story, enriching the World of Darkness experience for players and Storytellers.
3.1 Shattered Nation Sourcebook
The Shattered Nation sourcebook explores the remnants of the Garou Nation, offering detailed settings and plot hooks. It delves into the political landscape, allowing players to leverage Renown for influence; The book provides opportunities for characters to navigate the aftermath and rebuild, making it a rich resource for both players and Storytellers seeking to deepen their chronicles.
3.2 Scent of Decay Chronicle Book
The Scent of Decay Chronicle Book introduces The Deepest of Wounds, a free story for Werewolf: The Apocalypse 5th Edition released during Month of Darkness 2023. This narrative-driven addition enriches the Garou’s struggle, offering a compelling plot that explores the supernatural threats in the World of Darkness. It is designed to enhance storytelling and provide players with immersive experiences, making it a valuable resource for both newcomers and seasoned fans.
3.4 The Deepest of Wounds (Month of Darkness 2023)
The Deepest of Wounds is a free story released for Werewolf: The Apocalypse 5th Edition during the 2023 Month of Darkness. This narrative-driven supplement adds depth to the Garou’s struggle, offering a chilling tale that explores the World of Darkness. It provides rich storytelling hooks and atmospheric elements, enhancing the gameplay experience for both players and Storytellers alike.
Character Sheets and Resources
Interactive PDF character sheets and Roll20 integration enhance gameplay, while community-created resources expand customization options for players seeking tailored Werewolf 5th Edition experiences.
4.1 Interactive PDF Character Sheets
Interactive PDF character sheets for Werewolf: The Apocalypse 5th Edition offer detailed customization, including attributes, skills, and gifts. The Abomination character sheet, available as a free PDF, exemplifies these features, providing a comprehensive template for players. These sheets streamline character creation and management, enhancing gameplay efficiency. Additionally, the Core Rulebook is available in both PDF and hardcover, ensuring players have access to all necessary resources for their Garou journeys.
4.2 Roll20 Integration and Virtual Tabletop Use
Roll20 integration enhances Werewolf: The Apocalypse 5th Edition gameplay, offering virtual tabletop capabilities for remote play. While official Roll20 sheets are anticipated, players currently use Vampire 5th Edition sheets as substitutes. Community-created resources, like the Abomination interactive PDF, provide functional templates. Virtual tabletops streamline gameplay, allowing digital dice rolls, character management, and real-time collaboration, making it easier for global groups to immerse themselves in the World of Darkness.
4.3 Community-Created Resources
The community has developed numerous resources for Werewolf: The Apocalypse 5th Edition, including custom character sheets, touchstone guides, and lore expansions. Notable examples like the Werewolf 5th Edition Classic 5-Page Abomination Interactive PDF offer detailed templates for attributes, skills, and gifts. These fan-made tools enhance gameplay and provide creative solutions for players and Storytellers alike, enriching the World of Darkness experience.

Setting and Lore
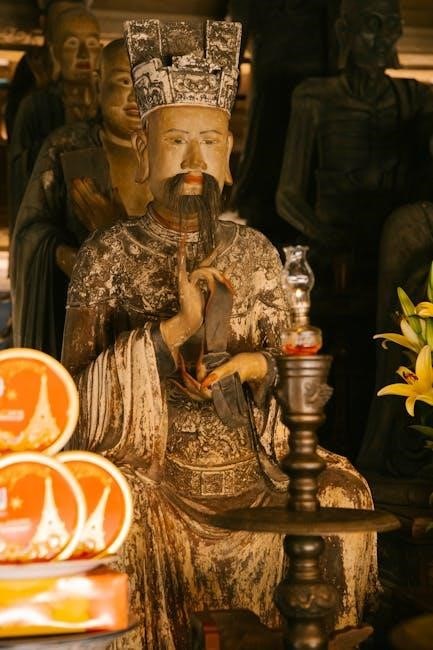
Werewolf: The Apocalypse 5th Edition is set in the World of Darkness, where players embody Garou, defenders of nature and spirit against corruption and supernatural threats.
5.1 The Garou Nation and Its History
The Garou Nation, comprised of various werewolf tribes, has a rich history as guardians of the natural world. Their origins trace back to ancient times, with legends of the First Pack and the Fall of the White Howlers shaping their identity. The Garou have long been divided by internal conflicts and external threats, yet they remain united in their mission to protect the Earth from the forces of the Wyrm.
5.2 The World of Darkness and Its Impact
The World of Darkness is a gothic-punk setting where supernatural forces dominate, creating a bleak and corrupted reality. This backdrop intensifies the Garou’s struggle, as they battle against the Wyrm’s influence and other malevolent entities. The setting’s dark atmosphere heightens the stakes, emphasizing the Garou’s role as protectors of the natural world and the delicate balance between humanity and the wild.
5.3 The Role of Touchstones and Renown
Touchstones and Renown are crucial in Werewolf: The Apocalypse 5th Edition. Touchstones, such as loved ones or sacred places, anchor Garou to their humanity, preventing corruption. Renown, earned through deeds, measures a Garou’s influence and status within the Nation, affecting their political power and ability to lead. Together, they balance the Garou’s dual nature and societal role, shaping their journey and legacy in the World of Darkness.

Game Mechanics and Combat
The 5th Edition introduces refined combat mechanics, enhancing gameplay with a fluid system that balances strategy and intensity, maintaining the World of Darkness’s dark, atmospheric experience;
6.1 Combat System and Tactics
The combat system in Werewolf: The Apocalypse 5th Edition emphasizes tactical depth, blending physical prowess with supernatural abilities. Players utilize Gifts, lunar forms, and coordinated pack tactics to outmaneuver foes. The system balances brutality with strategy, rewarding clever use of abilities and teamwork. Storytellers can craft dynamic encounters, leveraging the World of Darkness atmosphere to heighten tension and immersion in every battle.
6.2 Gifts, Forms, and Abilities
In Werewolf: The Apocalypse 5th Edition, Garou wield unique Gifts, supernatural abilities granted by spirits, enhancing combat and problem-solving. Players can shift between forms—Lupus, Homid, and Crinos—each offering distinct strengths. Abilities like Stamina, Strength, and Dexterity define a werewolf’s prowess, while Gifts provide strategic advantages. This system allows for diverse playstyles, blending brute power with tactical finesse, making each Garou a versatile and formidable force in the World of Darkness.
6.3 Character Advancement and Experience
Character advancement in Werewolf: The Apocalypse 5th Edition is driven by experience points (XP), earned through completing stories and overcoming challenges. Players allocate XP to enhance attributes, skills, and Gifts, allowing their Garou to grow stronger and more versatile. The Storyteller awards XP based on performance and narrative impact, ensuring personalized development. This system encourages strategic growth, enabling players to craft unique and powerful werewolf characters over time.
Digital Availability and Downloads
The Werewolf: The Apocalypse 5th Edition PDF is available through platforms like Renegade Game Studios, DriveThruRPG, and Amazon, offering convenience for digital players worldwide.
7.1 Official PDF Releases
The official Werewolf: The Apocalypse 5th Edition PDF is available through platforms like Renegade Game Studios and DriveThruRPG. These official releases provide the complete core rulebook, sourcebooks, and accessories in digital format. Players can purchase and download them for use in virtual tabletops or personal reference. The PDFs are optimized for digital devices, offering features like interactive character sheets and quick access to rules and lore.
7.2 Free and Paid Resources
Players can access both free and paid resources for Werewolf: The Apocalypse 5th Edition. Free resources include community-created character sheets and introductory guides, while paid options offer official PDFs, expansions, and interactive tools. Platforms like DriveThruRPG host official releases, while community sites provide fan-made content. These resources enhance gameplay and provide depth for both new and experienced players exploring the World of Darkness.
7.3 Platforms forDownloading the 5th Edition PDF
7.3 Platforms for Downloading the 5th Edition PDF
The Werewolf: The Apocalypse 5th Edition PDF is available on platforms like DriveThruRPG, Renegade Game Studios, and Amazon. Official releases, including the core rulebook and sourcebooks, can be purchased directly from these sites. Additionally, community sites and forums may offer free or fan-created resources. Virtual tabletop platforms like Roll20 also provide integrated content for online play, making it easy to access and utilize the game’s materials digitally.

Community and Reviews
The community shares mixed reviews on Werewolf 5th Edition, with enthusiasts praising its immersive storytelling and critics noting inconsistencies. Digital formats enhance accessibility, fostering online discussions and gameplay.
8.1 Player and Reviewer Feedback
Players and reviewers share mixed opinions on Werewolf 5th Edition. Many praise the game’s immersive storytelling and updated mechanics, while others criticize its complexity. The PDF format is lauded for its accessibility, allowing easy reference during gameplay. However, some fans express disappointment, comparing it unfavorably to earlier editions. Despite this, the game remains popular, with enthusiasts appreciating its deep lore and engaging combat systems.
8.2 Comparisons with Previous Editions
Werewolf 5th Edition is often compared to earlier versions, with fans noting both improvements and drawbacks. The new Storyteller System streamlines gameplay, while some lament the loss of certain mechanics from past editions. The PDF format enhances accessibility, but critics argue it lacks the depth of previous rulebooks. Overall, it strikes a balance between modernizing the game and maintaining its core identity.
8.3 Reception in the RPG Community
The RPG community has mixed opinions on Werewolf 5th Edition. Fans praise the Storyteller System for streamlining gameplay and enhancing storytelling. However, some critics feel it lacks the depth of earlier editions. The PDF format is commended for its accessibility, but others argue it diminishes the tactile experience. Overall, it maintains a loyal fanbase while sparking debates about its direction in the World of Darkness series.
Werewolf 5th Edition offers engaging gameplay and rich lore, making it a compelling choice for fans of the World of Darkness. The PDF format enhances accessibility, allowing players to embrace their roles as Garou seamlessly.
9.1 Final Thoughts on Werewolf 5th Edition
Werewolf 5th Edition is a well-crafted addition to the World of Darkness series, offering a fresh take on the Garou’s struggle. The PDF format ensures easy access and usability, enhancing the overall experience. With its engaging mechanics and immersive lore, it stands as a testament to the enduring appeal of the Werewolf legacy in modern tabletop gaming.
9.2 Future Prospects for the Game
Werewolf 5th Edition shows promising potential with upcoming sourcebooks like Shattered Nation and chronicles such as The Deepest of Wounds, expanding lore and gameplay. Digital enhancements, including Roll20 integration and interactive PDFs, will likely improve accessibility. Community feedback highlights both praise and areas for refinement, suggesting a balanced approach to future updates. The game’s future looks bright, with a focus on enriching the World of Darkness experience.
9.3 Encouragement for New Players
New players are encouraged to dive into Werewolf 5th Edition with its accessible core rulebook and introductory story. The game’s rich lore and engaging mechanics make it an exciting entry into the World of Darkness. Interactive PDFs and Roll20 integration simplify character creation and gameplay. With a thriving community and digital resources, newcomers can easily join the fight as Garou, embracing their role as nature’s protectors in this immersive RPG experience.