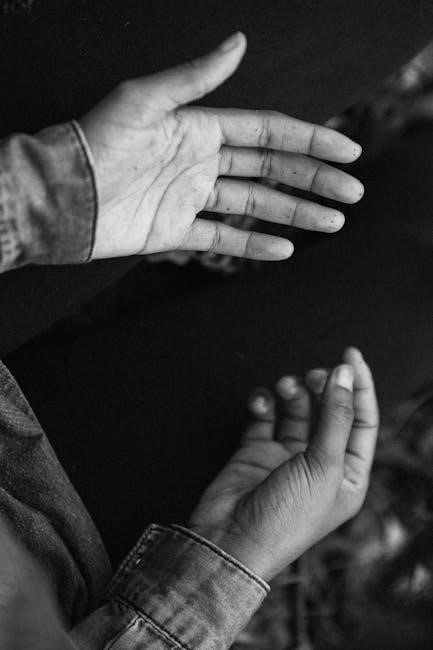
suit coat size guide

A well-fitting suit coat is essential for a polished appearance․ This guide helps you understand measurements‚ size charts‚ and tips to ensure a perfect fit tailored to your body type․

1․1 Understanding the Importance of Proper Fit

A proper-fitting suit coat enhances confidence‚ professionalism‚ and comfort․ It ensures optimal mobility and a polished appearance‚ making it essential for both formal and business-casual settings․ A well-fitting jacket avoids restrictive shoulder movement‚ prevents gapping at the chest‚ and maintains a balanced proportion with your body type․ Ill-fitting suits can detract from your overall look‚ while the right fit boosts self-assurance and style․ Understanding the importance of proper fit is the first step in selecting a suit coat that flatters your physique and meets your needs․

1․2 Brief Overview of Suit Jacket Measurements

Suit jacket measurements focus on chest circumference‚ shoulder width‚ and sleeve length․ Chest size is the primary factor‚ determining the jacket’s overall fit․ Shoulder measurements ensure the jacket sits naturally without sagging or tightness․ Sleeve length should allow a quarter-inch of shirt cuff to show‚ balancing style and functionality․ These measurements vary between slim-fit and classic-fit styles‚ catering to different body types and preferences․ Understanding these key measurements helps in selecting a jacket that offers comfort‚ proportion‚ and a tailored appearance‚ making it essential for achieving a polished look․

Key Measurements for Determining Suit Coat Size

Chest circumference is the primary measurement‚ ensuring a comfortable fit․ Shoulder measurements ensure the jacket sits naturally‚ while sleeve length allows a quarter-inch of shirt cuff to show․ These measurements vary between slim-fit and classic-fit styles‚ catering to different body types and preferences for a polished appearance․

2․1 Chest Circumference: The Primary Measurement

The chest circumference is the most critical measurement for determining suit coat size․ It ensures the jacket fits comfortably around your torso without being too tight or loose․ To measure accurately‚ wrap a tape measure around the broadest part of your chest‚ keeping it level and parallel to the floor․ The size corresponds directly to your chest measurement‚ with standard sizes reflecting chest inches․ For example‚ a 40-inch chest typically fits a 40R or 40S jacket․ Proper fit ensures buttons close smoothly and the fabric lies flat‚ avoiding strain or excessive fabric․ This measurement is the foundation for achieving a tailored look and ensures optimal comfort and aesthetics․

2․2 Shoulder Measurements: Ensuring a Natural Fit

Shoulder measurements are crucial for a natural‚ tailored fit․ The jacket’s shoulders should align with your natural shoulder line‚ avoiding a boxy or overly tight appearance․ For classic fits‚ the shoulders may be slightly padded‚ while slim-fit jackets offer a more structured‚ fitted look․ Proper shoulder fit ensures the sleeve length is balanced‚ with cuffs resting just above the wrist bone․ A well-fitted shoulder enhances posture and overall aesthetics‚ making it essential for achieving a polished‚ professional look․ Different body types may prefer soft or structured shoulders‚ depending on comfort and style preferences‚ ensuring the suit coat drapes naturally without restriction․

2․3 Sleeve Length: The Perfect Balance

Sleeve length is a critical factor in achieving a well-tailored look․ The jacket’s sleeves should end just above the wrist bone‚ allowing a subtle glimpse of shirt cuff—about 1/4 inch․ This balance ensures the suit appears neither too long nor too short․ Proper sleeve length complements the chest and shoulder fit‚ creating a harmonious silhouette․ For taller individuals‚ slightly longer sleeves may be necessary‚ while shorter men benefit from proportionally shorter lengths․ Correct sleeve length ensures the jacket drapes naturally‚ avoiding a boxy or overly tight appearance‚ and contributes to a polished‚ professional aesthetic that enhances overall comfort and style․

How to Read a Suit Coat Size Chart

Understanding suit coat size charts involves matching chest measurements‚ sleeve lengths‚ and shoulder fits to your body dimensions‚ ensuring a perfect fit for any style․

3․1 Standard Size Charts: Understanding Numbers and Letters

Standard size charts use a combination of numbers and letters to denote fit and size․ Numbers typically represent chest measurements‚ while letters indicate fit styles‚ such as S‚ M‚ L‚ or XL․ These charts are standardized across brands‚ making it easier for shoppers to find their size․ However‚ variations can occur‚ so checking specific brand guidelines is essential․ Understanding these codes ensures a more accurate fit‚ whether shopping online or in-store․ Always refer to the chart provided by the retailer to make informed purchasing decisions․

3․2 Slim Fit vs․ Classic Fit: What’s the Difference?

Slim fit and classic fit suit coats cater to different body types and preferences․ Slim fit suits are tailored closer to the body‚ offering a modern‚ streamlined look with narrower shoulders and a more fitted silhouette․ They are ideal for those with a slimmer build or who prefer a contemporary style․ Classic fit suits‚ however‚ provide a looser‚ more traditional cut with a relaxed fit around the chest and shoulders‚ making them comfortable for broader frames or those who value timeless appeal․ Both styles ensure a polished appearance‚ but the choice depends on personal style and body proportions․

Measuring Yourself for the Perfect Fit

Use a flexible tape measure to determine your chest‚ shoulder‚ and sleeve measurements․ Keep the tape level and snug but not overly tight for accurate sizing․

4․1 How to Measure Your Chest

To measure your chest for a suit coat‚ wrap a flexible tape measure around the fullest part of your chest‚ keeping it level and parallel to the floor․ Stand upright with your arms at your sides․ The tape should be snug but not tight․ If your measurement is an odd number‚ round up to the nearest even number․ This ensures accurate sizing and a proper fit‚ as the chest measurement is the primary factor in determining your suit coat size․ Consistency is key‚ so consider having someone assist you for precise results․

4․2 How to Measure Your Shoulders

To measure your shoulders for a suit coat‚ locate the tips of your shoulders by feeling the bony parts at the top․ Place a flexible tape measure across these points‚ ensuring it is parallel to the floor and neither too tight nor too loose․ Stand up straight to maintain proper posture․ If possible‚ have someone assist you for accuracy․ The measurement should be used alongside your chest size to determine the best fit․ If your measurement doesn’t align with standard sizes‚ alterations may be necessary․ For precision‚ use a sewing tape measure; a string and ruler can be less accurate․ Measure annually to account for any physical changes․

4․3 How to Measure Sleeve Length

To measure sleeve length‚ stand straight and relaxed․ Place the tape measure at the center of your back‚ just below the base of your neck․ Extend the tape over your shoulder‚ down to your wrist bone․ Ensure the tape is not too tight or loose․ The ideal sleeve length should allow a quarter-inch of shirt cuff to show․ If measuring an existing jacket‚ lay it flat and measure from the seam at the shoulder to the cuff․ Double-check the measurement for accuracy․ Proper sleeve length ensures a balanced and polished look‚ avoiding sleeves that are too short or overly long․

Common Mistakes to Avoid When Choosing a Suit Coat

Ignoring fabric type‚ not considering body proportions‚ and assuming sizes are universal across brands are common errors․ Ensure proper fit by measuring accurately and consulting size charts․

5․1 Ignoring Fabric Type and Its Impact on Size

One common mistake is overlooking the fabric type‚ as it significantly affects how a suit coat fits․ Thicker fabrics like wool or tweed may require a slightly larger size‚ while stretchy or slim fabrics like polyester blends can fit more snugly․ Natural fibers tend to drape differently than synthetic ones‚ influencing the overall silhouette․ Additionally‚ some fabrics‚ such as linen‚ may have more give or shrink slightly after tailoring․ Neglecting to consider fabric type can lead to a coat that feels too tight or too loose‚ regardless of the measured size․ Always check the fabric composition before finalizing your purchase․

5․2 Not Considering Body Type and Proportions

Your body type plays a crucial role in determining the ideal suit coat fit․ For example‚ broader shoulders may require a larger size‚ while a slimmer build might call for a tailored fit․ Ignoring body proportions can result in an ill-fitting coat that looks boxy or overly tight․ Shorter men should opt for shorter jackets to maintain balance‚ while taller individuals may need longer styles․ Additionally‚ muscular builds may need adjustments in chest and shoulder measurements․ Failing to account for these factors can lead to a coat that doesn’t flatter your physique‚ making it essential to choose styles that complement your body type․

Tips for Buying a Suit Coat Online

Buying a suit coat online requires careful consideration․ Use size estimator tools and customer reviews to ensure accuracy․ Check fabric details and sizing charts for the best fit․

6․1 Using Size Estimator Tools

Size estimator tools are invaluable for online suit shopping․ These calculators use your measurements to recommend sizes‚ reducing guesswork․ Simply input your chest‚ waist‚ and height for tailored suggestions․ Many retailers offer this feature‚ ensuring a better fit without in-person measurements․ By leveraging these tools‚ you can confidently select the right size‚ minimizing returns and exchanges․ They often include options for slim or classic fits‚ catering to different body types and style preferences․ This technology bridges the gap between online shopping and personalized tailoring‚ making it easier to find your perfect suit coat size․

6․2 Checking Customer Reviews for Fit Feedback

Customer reviews provide valuable insights into how a suit coat fits․ Many shoppers share detailed feedback about sizing accuracy‚ comfort‚ and proportions․ By reading reviews‚ you can identify common themes‚ such as whether a style runs large or small․ This helps you adjust your size choice accordingly․ Look for comments from users with similar body types or measurements to yours for more relevant advice․ Reviews often highlight specific features like sleeve length and chest fit‚ ensuring you make an informed decision․ This real-world feedback enhances your online shopping experience and improves your chances of finding the perfect fit․

Finding the perfect suit coat size is achievable with careful measurements and understanding size charts․ By avoiding common mistakes and considering body type‚ you can ensure a tailored fit․ Use online tools and customer reviews to guide your choices․ Remember‚ proper fit enhances both comfort and style․ Take the time to measure accurately and explore options like slim or classic fits․ With patience and the right resources‚ you’ll confidently find a suit coat that flatters your frame and meets your needs․

butterfly garden instructions

A butterfly garden is a vibrant space designed to attract these beautiful pollinators, offering a welcoming habitat for their life cycle and a chance to observe their beauty․

1․1 Why Create a Butterfly Garden?

Creating a butterfly garden offers a chance to attract these stunning pollinators, fostering biodiversity and supporting local wildlife․ It provides a vibrant, dynamic space where you can observe butterfly behavior and enjoy their beauty․ By planting nectar-rich flowers and host plants, you contribute to their survival and create a haven for these delicate creatures․ It’s also an educational opportunity to learn about their life cycle and ecological importance, while adding beauty and tranquility to your outdoor space․

1․2 Benefits of a Butterfly Garden

A butterfly garden enhances biodiversity by supporting pollinators and wildlife․ It creates a serene environment for relaxation and enjoyment of nature․ By attracting butterflies, you contribute to their conservation and the health of local ecosystems․ Additionally, these gardens encourage educational opportunities, teaching about the life cycle of butterflies and the importance of native plants․ They also add aesthetic value to your yard, making it a vibrant and welcoming space for both wildlife and people to thrive in harmony․

Choosing the Right Location

Select a sunny spot with well-drained soil, as butterflies thrive in warmth and dry conditions․ Ensure the area receives at least 6-8 hours of direct sunlight daily․

2․1 Selecting a Sunny Spot

A sunny spot is crucial for a butterfly garden, as butterflies are cold-blooded and rely on warmth to fly․ Choose a location that receives at least 6-8 hours of direct sunlight daily․ Avoid shaded areas, as they may not attract butterflies․ Ensure the spot is also protected from strong winds, which can deter these delicate creatures․ Proper sunlight exposure ensures vibrant blooms and active butterfly visits, making your garden a thriving habitat․

2․2 Ensuring Proper Drainage

Proper drainage is essential for a thriving butterfly garden․ Butterflies prefer well-drained soil, as waterlogged areas can harm plants and deter these insects․ Ensure your garden slopes slightly to prevent water accumulation․ Incorporate organic matter like compost to improve soil structure and drainage․ Avoid low-lying areas where water may pool, as this can lead to root rot and unhealthy plant growth․ Good drainage promotes healthy plants, which in turn attract more butterflies to your garden․

Selecting Butterfly-Friendly Plants

Creating a butterfly garden involves several key steps to attract these pollinators and support their life cycle:

Select Butterfly-Friendly Plants: Choose native plants that provide nectar for adult butterflies and host plants for caterpillars․ Research lists of plants that are attractive to butterflies and suitable for your local climate․

Choose a Sunny Location: Butterflies are cold-blooded and need warmth to fly, so select a spot that receives plenty of sunlight, preferably at least six hours a day․

Ensure Proper Drainage and Soil Quality: Test your soil to determine its pH level and amend it if necessary․ Well-drained soil is crucial to prevent waterlogged areas that can harm plants and deter butterflies․

Provide a Water Source: Include a shallow water dish or puddle with fresh water to attract butterflies․ Change the water regularly to keep it clean and free of bacteria․

Design the Garden Layout: Arrange plants thoughtfully, possibly grouping them by height or complementary species․ Consider a mix of annuals and perennials for year-round interest․
Maintain the Garden: Water plants appropriately, mulch to retain moisture and suppress weeds, and protect against pests․ Prune plants as needed to maintain health and appearance․

Support the Butterfly Life Cycle: Incorporate host plants that cater to the dietary needs of caterpillars, ensuring that your garden supports the entire life cycle of butterflies․

Add Features for Butterflies: Include rocks for landing and basking, and consider adding structures that provide shelter from wind and predators․
By following these steps, you can create a welcoming environment that attracts butterflies and supports their well-being, enhancing your yard’s biodiversity and beauty․

3․1 Nectar-Rich Flowers

Nectar-rich flowers are essential for attracting adult butterflies, as they provide the energy needed for flight and survival․ Choose plants like butterfly weed, milkweed, and passionflower, which are known for their abundant nectar production․ Incorporate a variety of flowers that bloom at different times to ensure a constant nectar source throughout the season․ Consider plants with multiple florets, as they produce more nectar, making them particularly attractive to butterflies․ Group nectar-rich flowers together to create a welcoming feeding area for these pollinators․

3․2 Host Plants for Caterpillars

Host plants are vital for butterfly gardens, as they provide food for caterpillars, the larval stage of butterflies․ Different species rely on specific plants, such as milkweed for monarchs and passionflower for zebra longwings․ Plant native species that cater to local butterfly populations․ Include plants like dill, fennel, or aster, which support various caterpillars․ Group host plants together to create a nurturing environment for larvae․ Allow spent foliage to remain, as it often serves as overwintering habitats for pupae, ensuring the cycle continues uninterrupted․

Designing Your Butterfly Garden

A well-designed butterfly garden features plants at varying heights, ensuring a visually appealing layout․ Incorporate open spaces for flight paths and structural elements like rocks or shelters to enhance the habitat․

4․1 Layout and Plant Arrangement

Arrange plants in layers, with taller species at the back and shorter ones in the front․ This creates a diverse habitat and ensures visibility․ Incorporate open spaces for butterflies to fly freely․ Group nectar-rich flowers in clusters to attract pollinators, while host plants can be scattered․ Consider a meandering path to encourage exploration․ Native plants are ideal, as they naturally attract local butterfly species․ This design promotes biodiversity and supports the entire butterfly life cycle effectively․

4․2 Incorporating Structural Elements

Add water sources like shallow dishes or birdbaths with fresh water and rocks for perching․ Include flat stones for butterflies to bask on, as they regulate their body temperature․ Consider adding a butterfly house or nectar feeders as supplementary food sources․ Native plants and open spaces are essential, while boulders or logs provide shelter and resting spots․ These elements enhance the garden’s functionality and create a welcoming habitat for butterflies, ensuring their comfort and attracting more species to your garden․

Maintaining Your Butterfly Garden

Regular watering, soil care, and avoiding pesticides are crucial․ Embrace imperfection, leaving spent flowers and stems for overwintering habitats to support butterfly life cycles and biodiversity․

5․1 Watering and Soil Care

Watering and soil care are essential for maintaining a thriving butterfly garden․ Keep the soil consistently moist but not waterlogged, as butterflies prefer well-drained areas․ Avoid overwatering, which can harm roots and attract pests․ Use compost or well-rotted manure to enrich the soil, ensuring it remains fertile and conducive for plant growth․ Mulching helps retain moisture and suppress weeds, while proper drainage prevents root rot․ Regular soil maintenance ensures healthy plants, which in turn support butterfly populations throughout the seasons․

5․2 Managing Pests and Diseases

Managing pests and diseases is crucial for a healthy butterfly garden․ Avoid harsh chemicals, as they can harm butterflies and other pollinators․ Instead, use natural methods like neem oil or soap solutions to control pests․ Encourage beneficial insects, such as ladybugs, to balance the ecosystem․ Regularly inspect plants for signs of disease or damage, and remove infected areas promptly․ Maintain good air circulation and avoid overwatering to prevent fungal issues․ Healthy plants are better equipped to resist pests and diseases, creating a safe habitat for butterflies and other wildlife․

Additional Features to Enhance Your Garden

Enhance your garden with water sources, rocks for warmth, and shelters, creating a welcoming habitat for butterflies and adding aesthetic charm to your space naturally․

6․1 Adding Water Sources

Butterflies need water for drinking and to regulate their body temperature․ Include shallow dishes, birdbaths, or ponds with fresh water and rocks for perching․ Change water regularly to prevent stagnation and mosquito breeding․ Adding a few drops of sugar water or fruit can attract more butterflies․ Ensure the water source is accessible and free from predators․ This simple addition enhances the garden’s appeal and functionality for these delicate creatures․

6․2 Creating Shelter and Resting Areas

Butterflies need shelter from strong winds and predators; Incorporate native shrubs, trees, or grasses to provide natural refuge․ Rocks and boulders offer perches for sunbathing, while shady spots like gazebos or trellises protect from intense heat․ Plant dense foliage to create hiding spots and ensure year-round cover․ A mix of vertical structures and open spaces creates a balanced habitat, encouraging butterflies to linger and thrive in your garden․

Monitoring and Enjoying Your Garden

Observe butterfly behavior, track species, and keep a journal to document growth and visitors․ Continuous plant care ensures a thriving habitat for pollinators to enjoy year-round․

7․1 Observing Butterfly Behavior

Observe butterflies to understand their feeding, mating, and resting patterns․ Note species diversity and life stages․ Create a quiet, shaded area for better viewing․ Use binoculars to avoid disturbing them․ Track their favorite nectar sources and host plants․ Record behaviors like puddling or migration․ Learning their habits enhances your connection to these pollinators and aids in maintaining a welcoming habitat․ Regular observation helps identify species and monitor ecosystem health․

7․2 Keeping a Garden Journal

A garden journal is a valuable tool for tracking the growth and evolution of your butterfly garden․ Document the types of butterflies you observe, the plants they favor, and seasonal changes․ Record planting dates, bloom times, and weather patterns․ Note which species visit most frequently and any challenges faced․ This log helps identify patterns, plan improvements, and reflect on successes․ Sketches or photos can enhance your entries, creating a personalized record of your garden’s journey․

Encouraging Wildlife Beyond Butterflies

By incorporating diverse plants and features, your garden can attract pollinators, birds, and other wildlife, fostering a thriving ecosystem that supports biodiversity and ecological balance․

8․1 Attracting Pollinators and Birds

To create a wildlife-friendly garden, incorporate nectar-rich flowers and native plants that attract pollinators like bees and hummingbirds․ Add bird feeders or water sources, such as shallow dishes or birdbaths, to draw birds․ Native shrubs and trees provide berries and shelter, while diverse plant heights and structures attract various pollinators․ This approach fosters a balanced ecosystem, supporting both birds and butterflies while enhancing biodiversity in your garden․

8․2 Creating a Biodiverse Ecosystem

A biodiverse ecosystem thrives when native plants, shrubs, and trees are incorporated, providing habitat for various wildlife․ Layer plants at different heights to cater to diverse species․ Include host plants for caterpillars and nectar-rich flowers for adult butterflies․ Add water sources, like shallow ponds, and sheltered areas with rocks or logs․ This diversity attracts pollinators, birds, and small mammals, fostering a vibrant and self-sustaining environment that supports local wildlife throughout the year․

cata classic leatherworking guide

Leatherworking is a primary profession in Cataclysm Classic, allowing players to craft leather and mail armor, ideal for classes like Rogues and Druids. Max skill level is 525, offering self-sufficiency through Skinning synergy. This guide provides a step-by-step approach to mastering Leatherworking efficiently, covering essential recipes, materials, and strategies for skill progression.

1.1 Overview of Leatherworking as a Profession

Leatherworking is a primary profession in Cataclysm Classic that enables players to craft leather and mail armor, which are essential for classes like Rogues, Druids, and Shamans. It allows the creation of belts, gloves, and other gear, making it a valuable skill for both self-use and selling on the Auction House. The profession is closely tied to Skinning, as it relies heavily on materials such as hides and leather. With a maximum skill level of 525, Leatherworking offers a wide range of recipes, from basic items for leveling to advanced endgame gear. It provides a balance between utility and profitability, making it a popular choice for many players.

1.2 Synergy with Skinning Profession

Leatherworking in Cataclysm Classic is deeply intertwined with the Skinning profession, as it relies on the hides and leather gathered from skinned mobs. This synergy allows players to craft high-quality gear without relying on the Auction House, making it a cost-effective and self-sufficient combination. Skinning provides the raw materials needed for Leatherworking, enabling the creation of leather and mail armor, belts, and other essential items. By pairing these professions, players can efficiently progress through the leveling process while crafting gear tailored to their needs or for sale. This dual-profession approach is particularly beneficial for classes like Rogues and Druids, who heavily rely on leather-based equipment.

1.3 Profession Bonuses and Specializations

In Cataclysm Classic, Leatherworking offers unique profession bonuses and specializations that enhance gameplay. Specializations like Elemental Leatherworking allow crafting of items with enhanced stats, such as increased stamina or spell power. These bonuses make Leatherworking gear highly desirable for specific classes and playstyles. Specializations also enable the creation of rare leather types, such as Earthen Leather, which are invaluable for high-end crafting. Players can choose to specialize in areas that align with their class needs, making Leatherworking a versatile and rewarding profession. These bonuses and specializations add depth to the profession, ensuring crafted gear remains competitive in both PvE and PvP environments. This customization is a key strength of Leatherworking in Cataclysm Classic.

Leveling Guide: 1-525 Leatherworking

Master Leatherworking from 1-525 with efficient recipes and materials. This guide breaks down skill levels into segments, ensuring cost-effective progression and optimal experience gains for crafters.

2.1 Leveling from 1-300: Recipes and Materials

Leveling Leatherworking from 1-300 focuses on crafting basic items like Light Armor and Gloves. Use materials such as Light Leather, obtained through Skinning or the Auction House. Early recipes like Emerald Gloves and Agile Gloves provide consistent skill gains. Crafting these items ensures cost-effectiveness and steady progression. Prioritize recipes with high experience returns to minimize material waste. As you advance, incorporate Medium Leather for higher-level items. This phase builds the foundation for advanced crafting, so focus on efficiency and resource management to maintain low costs while leveling.

2.2 Leveling from 300-425: Advanced Recipes

From 300-425, Leatherworking shifts to advanced recipes requiring heavier materials like Heavy Leather and Thick Leather. Craft items such as Reinforced Gloves and Stormscape Boots for consistent skill gains. These recipes use more refined materials, ensuring higher experience returns. Incorporate Furious and Heavy Borean Leather for late-stage crafting. Focus on creating gear with added stats, such as Agility or Stamina, to enhance functionality. This phase introduces more complex patterns, preparing you for endgame crafting. Optimize material usage to maintain cost efficiency while progressing through these advanced recipes.

2.3 Leveling from 425-525: Endgame Crafting

Reaching 425 marks the final stretch to 525, focusing on endgame crafting. Recipes now require rare materials like Chimera Leather and Elemental Scales. Craft high-demand items such as 22-slot Bags and Epic leather armor for maximum experience. These recipes often yield multiple skill points, accelerating progression. Concentrate on creating gear with high Agility or Stamina for raiding classes. Utilize the Auction House to acquire rare materials efficiently. Optimize crafting orders to minimize material waste and maximize skill gains. This phase prepares you for crafting top-tier gear, making Leatherworking a valuable asset for both personal use and selling on the Auction House.

Crafting Strategies and Cost Efficiency

Optimize material usage by focusing on high-demand items like bags and belts. Use Auction House wisely to purchase cheap materials. Craft in bulk to minimize waste and maximize efficiency.

3.1 Cost-Effective Recipes for Skill Gains

To level Leatherworking efficiently, focus on crafting recipes with high skill gain per resource. Early on, items like Heavy Savage Leather gloves and Emblazoned Leather boots provide consistent experience. Use materials like Savage Leather and Knothide Leather, which are readily available through Skinning or the Auction House. Crafting multiple stacks of these items ensures steady progress without excessive material waste. Prioritizing recipes with low material costs and high demand helps maintain cost efficiency. This approach minimizes gold expenditure while maximizing skill gains, making it ideal for players aiming to reach 525 quickly. Always check Auction House prices to ensure materials are purchased at the lowest cost.

3.2 Utilizing Auction House for Materials

The Auction House is a vital resource for acquiring materials efficiently in Cataclysm Classic Leatherworking. By monitoring prices, you can purchase leather, threads, and other components at competitive rates, often cheaper than farming them. Regularly check the AH for bulk listings of materials like Savage Leather or Heavy Savage Leather, which are essential for crafting. Setting up buy orders for rare or high-demand materials ensures you stock up without overpaying. This method saves time compared to farming, allowing you to focus on crafting and leveling your profession. Additionally, selling crafted items on the AH can offset material costs, making your progression more sustainable and profitable.

3.3 Optimizing Crafting for Maximum Experience

To maximize experience gains in Cataclysm Classic Leatherworking, focus on crafting recipes that offer the highest XP returns relative to material costs. Prioritize crafting multiple lower-level items in bulk to quickly accumulate experience before moving to higher-level recipes. Use materials efficiently by crafting gear that can later be sold or used, reducing waste. Time management is key—craft during off-peak hours when materials are cheaper. Additionally, consider crafting in batches to minimize downtime and maintain a steady workflow. By strategically selecting recipes and managing your crafting sessions, you can accelerate your progression and reach max level efficiently. This approach ensures consistent skill gains while minimizing resource waste.

Gear and Equipment Crafting

Leatherworking in Cataclysm Classic allows crafting versatile leather and mail armor, ideal for classes like Rogues, Druids, and Shamans. This section explores creating gear for specific roles and enhancing items for optimal performance.

4.1 Leather and Mail Armor Crafting

In Cataclysm Classic, Leatherworking allows players to craft a wide variety of leather and mail armor, essential for classes like Rogues, Druids, Shamans, and Hunters. Leather armor offers agility and flexibility, while mail provides higher defense. Popular items include chestpieces, gloves, and boots, crafted using materials like strong leather, heavy hide, and enchanted threads. These armors can be enhanced with gems and enchants for improved stats. Crafting armor sets ensures character progression and raid readiness, with many recipes available as the skill level increases. This section details the best patterns for each class, ensuring optimal performance in PvE and PvP scenarios.

4.2 Gear Enchants and Enhancements

In Cataclysm Classic, Leatherworking allows for further customization through gear enchants and enhancements, boosting stats like agility, stamina, or spirit. These enhancements are applied to crafted armor using materials like Infinite Dust or Greater Celestial Essence. Enchants such as +10 Agility or +15 Stamina can significantly improve a character’s performance in both PvE and PvP. Leatherworkers can also add specialized enhancements like Fur Lining, which increases critical strike rating. These customizations make Leatherworking gear highly desirable, especially for classes relying on agility or stamina. Properly enchanting and enhancing your crafted armor ensures optimal performance, making it a key part of character optimization in Cataclysm Classic.

4.3 Crafting for Specific Classes (Rogues, Druids, etc.)

Leatherworking in Cataclysm Classic excels at crafting gear tailored for specific classes. Rogues benefit from agility-focused leather armor, while Druids in feral forms utilize stamina and agility-enhanced pieces. Shamans and Hunters also benefit from crafted mail armor, which complements their agility and stamina needs. Key items like Leather Belts and Mail Chestpieces are optimized for these classes, providing essential stats. Crafting for specific classes ensures gear effectiveness in both PvE and PvP, making Leatherworking a valuable profession for enhancing class performance and adaptability in Cataclysm Classic.

Mastery of Cataclysm Classic Leatherworking requires balancing skill progression with material efficiency. Always monitor Auction House prices and craft high-demand gear to maximize your gold income.

5.1 Summary of Key Strategies

To master Cataclysm Classic Leatherworking, focus on leveling from 1-525 by utilizing cost-effective recipes and materials. Pairing Leatherworking with Skinning ensures self-sufficiency, reducing reliance on the Auction House. Prioritize crafting high-demand items like leather and mail armor for classes such as Rogues and Druids. Regularly check Auction House prices to optimize profit and minimize costs. Always craft items that provide the best experience gains per material. Specialize in gear enhancements to further increase the value of your crafted items. By following these strategies, you can efficiently level your Leatherworking skill and maintain long-term profitability in the game.

5.2 Maintaining Efficiency in the Long Term

To maintain efficiency in Cataclysm Classic Leatherworking, regularly assess your inventory and focus on crafting items with consistent demand. Keep your materials organized and avoid overstocking, as this can tie up valuable gold. Stay updated on Auction House trends to adjust your crafting priorities accordingly. Continuously refine your crafting list to prioritize high-demand items like leather and mail armor for popular classes. Invest time in optimizing your crafting schedule to minimize material waste and maximize profit. By adopting these habits, you can ensure long-term efficiency and profitability in your Leatherworking journey, making it a sustainable and rewarding profession.

canon a 1 manual

The Canon A-1, introduced in 1978, is a legendary 35mm film SLR camera designed for professionals and hobbyists alike. This manual guides users through its advanced features, ensuring optimal performance and creative control, making it an essential resource for mastering the camera’s capabilities.

1.1 Overview of the Canon A-1 Camera

The Canon A-1, introduced in 1978, is a highly regarded 35mm film SLR camera known for its durability and advanced features. Designed for both professionals and enthusiasts, it offers aperture priority and manual modes, compatibility with Canon FD lenses, and a built-in metering system, making it a versatile and popular choice among photographers.

1.2 Importance of the Manual for Optimal Use

The Canon A-1 manual is essential for unlocking the camera’s full potential. It provides detailed guidance on mastering advanced features, troubleshooting common issues, and understanding best practices for film photography. By following the manual, users can optimize their shooting experience, ensuring precise control over exposure, focus, and creative techniques, making it indispensable for both beginners and experienced photographers.

Key Features of the Canon A-1

The Canon A-1 boasts an advanced built-in metering system, aperture priority, and manual modes, offering precise control. Its compatibility with Canon FD lenses enhances versatility for various photography needs.

2.1 Built-in Metering System

The Canon A-1 features a sophisticated built-in metering system, providing accurate light measurements for optimal exposures. It supports both aperture priority and manual modes, ensuring precise control over lighting conditions. This system is essential for achieving professional-quality results, making it a standout feature for photographers seeking reliability and creative flexibility.

2.2 Aperture Priority and Manual Modes

The Canon A-1 offers Aperture Priority and Manual modes, catering to both automatic and manual shooting preferences. In Aperture Priority, users set the aperture, and the camera adjusts the shutter speed. Manual mode allows full control over both aperture and shutter speed, enabling precise artistic expression and technical accuracy, ideal for experienced photographers seeking creative freedom.

2.3 Compatibility with Canon FD Lenses

The Canon A-1 is compatible with a wide range of Canon FD lenses, offering exceptional optical quality and versatility. From wide-angle to telephoto and macro lenses, the FD series provides photographers with numerous creative options. This compatibility ensures the A-1 can adapt to various shooting scenarios, making it a reliable choice for diverse photography needs and preferences.

Getting Started with the Canon A-1

Welcome to the Canon A-1! This section guides you through unboxing, initial setup, and understanding basic camera controls to ensure a smooth start with your photography journey.

3.1 Unboxing and Initial Setup

Unboxing your Canon A-1 is an exciting experience. Carefully inspect the camera for any damage or defects. Attach the lens, ensuring it clicks securely into place. Familiarize yourself with the camera’s layout, including the shutter dial, aperture ring, and metering switch. Before use, load film and install the batteries. These steps ensure your camera is ready for optimal performance.

3.2 Basic Camera Controls and Functions

The Canon A-1 features intuitive controls for seamless operation. The shutter speed dial sets exposure time, while the aperture ring adjusts lens opening. The metering switch toggles between ambient and flash modes. The film advance lever moves to the next frame, and the self-timer ensures hands-free shooting. Familiarizing yourself with these controls enhances your shooting experience and ensures precise results.

Loading Film in the Canon A-1

Load film by opening the camera back, aligning the film cartridge, and advancing the film to the take-up spool. Ensure the film is properly seated and threaded through the sprocket teeth for accurate frame spacing. Always handle film in low-light conditions to prevent exposure.

4.1 Step-by-Step Film Loading Process

Open the camera back by pulling the release latch. Insert the film cartridge, aligning it with the spool; Gently pull the film leader to the take-up spool, ensuring it fits securely. Advance the film by turning the rapid rewind knob until it stops. Close the back, then wind the film to the first frame. Check the frame counter to confirm loading.

4.2 Tips for Proper Film Handling

  • Always store film in a cool, dry place to prevent degradation.
  • Avoid exposing film to direct sunlight to minimize fogging.
  • Handle film gently, avoiding contact with the emulsion side to prevent scratches.
  • Load film in low-light conditions to reduce exposure to light.
  • Use film before its expiration date for optimal quality.
  • Store unused film in its original packaging, ideally in the refrigerator.

Understanding the Exposure System

The Canon A-1’s exposure system balances aperture, shutter speed, and ISO, utilizing its built-in light meter to ensure precise control over lighting conditions for optimal image results.

5.1 Aperture, Shutter Speed, and ISO

Aperture regulates light entry, shutter speed controls exposure duration, and ISO sets film sensitivity. Balancing these elements ensures proper exposure. The Canon A-1’s built-in meter aids in precise adjustments, allowing users to achieve desired creative effects by manually or automatically controlling these settings for optimal results in various lighting conditions.

5.2 Using the Built-in Light Meter

The Canon A-1 features a built-in light meter for precise exposure calculation. It measures ambient light and provides accurate readings, allowing users to adjust aperture and shutter speed manually or automatically. The meter ensures optimal exposure in various lighting conditions, simplifying the process of capturing well-balanced images with minimal effort.

Lens System and Accessories

The Canon A-1 utilizes the FD mount, offering compatibility with a wide range of Canon FD lenses, from wide-angle to telephoto; Popular accessories include flashes and remote shutters for enhanced functionality.

6.1 Overview of Canon FD Lenses

Canon FD lenses are renowned for their exceptional optical quality and versatility. Available in a wide range of focal lengths, from wide-angle to telephoto, these lenses offer manual focusing and aperture control. Designed for the FD mount, they seamlessly integrate with the Canon A-1, providing precise control and compatibility for both professional and enthusiast photographers.

6.2 Recommended Accessories for the Canon A-1

Essential accessories for the Canon A-1 include high-quality lens cleaning kits to maintain optical clarity, a remote shutter release for minimizing camera shake, and a durable camera strap for secure handling. Additional items like a lens hood and filters enhance functionality, while a sturdy camera bag protects the equipment during transport, ensuring longevity and optimal performance of the camera and its lenses.

Maintenance and Care

Regular maintenance ensures the Canon A-1’s longevity. Clean the camera and lenses with a soft cloth and avoid harsh chemicals. Store the camera in a dry, cool place to prevent damage and extend its lifespan.

7.1 Cleaning the Camera and Lenses

Regular cleaning is essential for maintaining the Canon A-1’s performance. Use a soft, dry cloth to wipe the camera body and avoid harsh chemicals. For lenses, gently remove dust with a microfiber cloth or a lens brush. Avoid touching the lens surface to prevent smudges. Proper cleaning ensures clear images and prolongs the camera’s lifespan.

7.2 Regular Maintenance Tips

Regular maintenance ensures the Canon A-1 operates smoothly. Check and clean the mirror and viewfinder periodically. Lubricate moving parts if necessary, but avoid over-lubrication. Store the camera in a cool, dry place to prevent moisture damage. Replace the battery every five years to avoid corrosion. Proper care extends the camera’s functionality and ensures reliable performance for years to come.

Advanced Techniques

The Canon A-1 offers advanced techniques like manual mode, aperture priority, and creative exposure control, enabling precise and artistic photography for professional results.

8.1 Using Manual Mode Effectively

Manual mode on the Canon A-1 offers full control over aperture and shutter speed, enabling precise adjustments for creative photography. Use the built-in light meter to guide settings, ensuring optimal exposure in various lighting conditions. This mode is ideal for experienced photographers seeking to experiment with artistic techniques and achieve desired visual effects in their work.

8.2 Creative Photography with the Canon A-1

The Canon A-1 excels in creative photography, offering precise control over aperture and shutter speed to capture unique effects. Experiment with depth of field, motion blur, and low-light scenarios using its manual capabilities. Pair it with Canon FD lenses for stunning results, from portraits to landscapes. Its portability and reliability make it ideal for photographers seeking to push creative boundaries and explore artistic expression.

Troubleshooting Common Issues

The Canon A-1 may experience issues like shutter malfunctions or metering inaccuracies. Regular cleaning, recalibrating, and consulting the manual can often resolve these problems effectively.

9.1 Resolving Shutter and Metering Problems

Shutter issues may arise from dirt or worn curtains. Clean gently with a soft brush. Metering problems often result from incorrect settings or low battery. Ensure proper battery installation and check aperture/shutter speed alignment. If problems persist, recalibrate the metering system or consult a professional technician for precise adjustments to restore functionality. Always refer to the manual for detailed troubleshooting steps.

9.2 Addressing Film Loading and Advancement Issues

Film loading issues often occur due to improper alignment or failure to secure the film properly. Ensure the film is correctly seated on the spool and advanced to the first frame. If the film doesn’t advance, check for obstructions or dirty rollers. Partially exposed rolls can be rewound using the rewind knob. Always refer to the manual for detailed film handling procedures to avoid damage.

craftsman lt1500 manual

Welcome to the Craftsman LT1500 Manual, your essential guide for operating and maintaining the LT1500 riding lawn mower. This manual provides detailed instructions, safety guidelines, and troubleshooting tips to ensure optimal performance. Download the PDF version from Sears Parts Direct for free and explore sections on safety, maintenance, and warranty details to get the most out of your equipment.

1.1 Overview of the LT1500 Model

The Craftsman LT1500 is a reliable riding lawn mower designed for efficient cutting and durability. Featuring a 17.5 HP engine and a 42-inch mowing deck, it offers precise cutting and easy maneuverability. With an electric start and 6-speed transaxle, it provides smooth operation. This model is ideal for medium-sized lawns, combining power and comfort. The manual details its features, operation, and maintenance to ensure optimal performance and longevity of the equipment. It is a popular choice for homeowners seeking a balance between power and affordability.

1.2 Importance of Reading the Manual

Reading the Craftsman LT1500 manual is crucial for safe and effective operation. It provides essential safety guidelines, operating instructions, and maintenance tips to prevent accidents and ensure longevity. The manual outlines proper techniques for starting, driving, and mowing, as well as troubleshooting common issues. Understanding the content helps users maximize performance and avoid costly repairs. Failure to follow the manual may void the warranty or lead to equipment damage. Always refer to the guide before operating the mower for the first time or performing maintenance tasks.

Safety Precautions and Rules

Adhering to safety rules is essential. Always read the manual, follow guidelines, wear protective gear, stay alert, and ensure the area is clear before operating.

2.1 General Safety Guidelines

Always read and understand the manual before operating. Wear protective gear like gloves and eyewear. Ensure the area is clear of obstacles and bystanders. Keep children and pets away. Avoid loose clothing that could get caught. Never operate under the influence of alcohol or drugs; Be cautious on slopes and uneven terrain. Follow all safety rules and instructions provided in the manual to ensure safe and effective operation of the Craftsman LT1500.

2.2 Operating Safety Tips

Always start the engine in a well-ventilated area and avoid sudden movements. Use the seatbelt when operating the tractor. Keep the PTO (Power Take-Off) disengaged until ready to mow. Never leave the tractor unattended while it’s running. Be aware of your surroundings and avoid obstacles. Maintain a safe distance from bystanders and pets. Use caution when reversing and ensure the mowing deck is lowered properly. Follow these tips to ensure safe and efficient operation of the Craftsman LT1500.

Understanding the LT1500 Tractor

The Craftsman LT1500 is a versatile riding lawn tractor designed for efficient mowing. It features a 17.5 HP engine, 42-inch mowing deck, and 6-speed transaxle for smooth operation. The electric start and ergonomic design enhance user comfort, while the durable construction ensures long-lasting performance. This section provides key insights into the tractor’s components and features to help you maximize its capabilities.

3.1 Key Features of the LT1500

The Craftsman LT1500 boasts a powerful 17.5 HP engine, a 42-inch mowing deck, and a 6-speed transaxle for smooth operation. It features an electric start system for easy ignition and an ergonomic design for comfort during long mowing sessions. The tractor is built with durable materials to withstand regular use and harsh weather conditions. Additional features include a sturdy steel frame, adjustable cutting heights, and a reliable transmission system, making it ideal for maintaining large lawns efficiently and effectively.

3.2 Controls and Components Overview

The LT1500 features a user-friendly control panel with an ignition switch, throttle lever, and steering wheel for easy maneuverability. The choke and gear selector are conveniently located for straightforward operation. The mowing deck controls, including the blade engagement lever and height adjustment, ensure precise cutting. Additional components include a reliable brake system, clutch, and dashboard indicators for monitoring vital functions. The 6-speed transaxle and electric start system enhance performance and convenience, making the LT1500 a versatile and efficient lawn tractor.

Operating the LT1500

Learn how to start the engine, drive, and maneuver the LT1500 safely. Follow proper mowing techniques and adjust settings for optimal performance. Always refer to safety guidelines for efficient and secure operation;

4.1 Starting the Engine

  1. Ensure the transmission is in neutral and the parking brake is engaged.
  2. Check that the PTO (Power Take Off) is disengaged and the mowing deck is raised.
  3. Verify the seat switch is functioning properly; the engine will not start if the operator is not seated.
  4. Insert the key into the ignition and turn it clockwise to the “Start” position.
  5. Allow the engine to warm up briefly before engaging the PTO or moving the tractor.

Refer to the manual for detailed steps and safety precautions to ensure a smooth startup.

4.2 Driving and Steering Techniques

Mastering the driving and steering techniques of your Craftsman LT1500 ensures safe and efficient mowing. Always maintain a firm grip on the steering wheel and keep your eyes on the path ahead. Use the foot pedals to control acceleration and braking smoothly. For turns, gradual steering is recommended to maintain stability. When mowing slopes, drive uphill with the mower deck engaged and avoid sharp turns. Practice in an open area to familiarize yourself with the tractor’s handling and response.

  1. Start on level ground to get accustomed to the controls.
  2. Use the brake pedal gently to avoid skidding.
  3. Shift gears according to terrain and load.
  4. Avoid sudden movements to maintain control.

4.3 Mowing and Cutting Procedures

For efficient mowing, start by adjusting the mowing height to suit the grass length. Engage the PTO (Power Take Off) slowly and maintain steady forward motion. Overlap passes slightly to ensure an even cut; Avoid mowing in the same pattern repeatedly to prevent soil compaction; For cleaner results, mow when the grass is dry and at the recommended height. Use the mulching feature for finer clippings or the bagger for collecting cut grass. Always clear debris from the mowing deck after use for optimal performance.

  • Adjust mowing height based on grass type and length.
  • Engage the PTO gradually to avoid sudden starts.
  • Maintain a steady pace for consistent cutting results.
  • Overlap passes to cover all areas evenly.
  • Clear debris from the mowing deck regularly.

Maintenance and Care

Regular maintenance ensures optimal performance. Lubricate moving parts, check tire pressure, and sharpen blades. Store the mower in a dry place during winter to prevent rust.

5.1 Regular Maintenance Schedule

Regular maintenance is crucial for the longevity and performance of your Craftsman LT1500. Schedule oil changes every 50 hours of operation and replace the air filter annually or as needed. Check tire pressure monthly and ensure proper inflation. Sharpen mower blades every 25 hours to maintain cutting efficiency. Clean the mower deck after each use to prevent debris buildup. Inspect and grease moving parts seasonally. Follow the recommended maintenance schedule in the manual to keep your tractor running smoothly and efficiently.

5.2 Lubrication and Tune-Up Instructions

Proper lubrication and tune-ups are essential for maintaining the performance of your Craftsman LT1500. Lubricate the front axle, mower deck, and transmission regularly. Change the engine oil every 50 hours and clean or replace the air filter as needed. Inspect and sharpen the mower blades for optimal cutting efficiency. Refer to the manual for specific lubrication points and tune-up procedures. Regular maintenance ensures smooth operation and extends the lifespan of your tractor, while also maintaining warranty coverage.

5.3 Storage and Winterization Tips

Proper storage and winterization are crucial for maintaining your Craftsman LT1500 tractor. Clean the tractor thoroughly, especially the mower deck and blades. Drain the fuel tank or use a fuel stabilizer to prevent degradation. Disconnect the battery and store it in a cool, dry place. Check the tire pressure and store the tractor in a dry, protected area to prevent rust and damage. Cover the tractor to protect against dust and pests. Regular maintenance during storage ensures your tractor is ready for the next season.

Troubleshooting Common Issues

This section helps identify and resolve common problems with the Craftsman LT1500, ensuring efficient operation. It covers engine, transmission, and mowing deck issues effectively.

6.1 Diagnosing Engine Problems

Diagnosing engine issues in your Craftsman LT1500 involves checking fuel, oil, and air systems. Ensure the fuel tank is full and the filter is clean. Check oil levels and condition. A faulty spark plug or clogged air filter can cause poor performance. If the engine won’t start, verify the ignition switch and battery connections. For rough running, inspect the carburetor and muffler. Refer to the manual for detailed troubleshooting steps and solutions to restore engine efficiency and reliability.

6.2 Addressing Transmission and Brake Issues

For transmission problems, check the fluid level and ensure the filter is clean. Inspect for any signs of contamination or wear. If the tractor doesn’t move smoothly, adjust the gear engagement or replace worn belts. Brake issues often involve adjusting the brake cables or replacing worn pads. Ensure proper alignment and functionality to maintain safety. Consult the manual for specific adjustment procedures or contact Sears support for professional assistance if problems persist.

6.3 Solving Mowing Deck and Blade Problems

Common mowing deck issues include uneven cutting, blade imbalance, or obstruction. Check blade balance by removing and weighing them. Sharpen or replace dull blades to ensure clean cuts. Clear debris from the deck regularly to prevent blockages. Lubricate pivot points for smooth operation. If vibration occurs, tighten loose bolts or replace worn parts. For persistent issues, refer to the manual or contact Sears Craftsman support for professional assistance.

Warranty and Support

Craftsman LT1500 offers a two-year warranty covering parts and repairs when properly maintained. Contact Sears Craftsman support at 1-800-659-5917 for assistance or warranty-related inquiries.

7.1 Warranty Coverage Details

The Craftsman LT1500 is backed by a two-year limited warranty, effective from the purchase date. This warranty covers defects in materials and workmanship for parts and components when the tractor is properly maintained, lubricated, and serviced as outlined in the owner’s manual. During this period, Sears will repair or replace defective parts free of charge. The warranty applies to the original purchaser and is non-transferable, ensuring protection for the specified duration under normal residential use.

7.2 Contacting Sears Craftsman Support

For assistance with your Craftsman LT1500, contact Sears Craftsman Support at 1-800-659-5917, available Monday through Saturday from 5 AM to 5 PM (PT). Representatives are ready to address questions, warranty inquiries, or repair needs. Additionally, visit the Sears Parts Direct website for online support, manuals, and parts ordering. This resource ensures you can troubleshoot or resolve issues efficiently, keeping your LT1500 in peak condition.

Additional Resources

Access the Craftsman LT1500 manual as a PDF download. Explore online parts, user guides, and specifications on Sears Parts Direct for comprehensive support.

8.1 Accessing the PDF Manual

The Craftsman LT1500 manual is readily available as a downloadable PDF. Visit Sears Parts Direct or official Craftsman websites to access the document. The PDF manual includes detailed instructions for operation, maintenance, and troubleshooting. Model-specific guides, such as the LT1500, ensure accurate information tailored to your equipment. Download the manual to explore sections on safety, warranty, and parts diagrams. This resource is essential for owners seeking to optimize their mower’s performance and address any issues efficiently. Ensure you have the latest version for the most accurate guidance.

8.2 Online Parts and Manuals

For convenient access, Sears Parts Direct offers a comprehensive collection of parts and manuals for the Craftsman LT1500. Users can easily search and download the PDF manual or browse through detailed part diagrams. This online resource ensures quick identification and purchase of replacement parts. Additionally, Sears provides free shipping on orders over $45, making maintenance and repairs hassle-free. Explore the online catalog to find everything needed to keep your LT1500 running smoothly and efficiently throughout the mowing season.

icebreaker.pdf

Icebreaker activities are engaging exercises designed to help people relax and connect. They foster creativity‚ teamwork‚ and communication in professional and social settings‚ making interactions enjoyable and productive.

What Are Icebreaker Activities?

Icebreaker activities are interactive exercises designed to help individuals relax‚ connect‚ and engage with one another in various settings. They are often used at the beginning of meetings‚ workshops‚ or social gatherings to ease tension and foster participation. These activities encourage creativity‚ teamwork‚ and open communication‚ making them ideal for breaking down barriers among people who may not know each other well. Examples include writing exercises‚ group discussions‚ and physical games that prompt interaction and collaboration. The goal is to create a welcoming environment where participants feel comfortable sharing ideas and building relationships. By incorporating fun and thought-provoking tasks‚ icebreakers set the stage for productive and enjoyable interactions.

The Importance of Icebreakers in Team Building

Icebreaker activities play a crucial role in fostering collaboration and unity within teams. They help establish trust‚ encourage open communication‚ and create a positive atmosphere where individuals feel comfortable interacting. By engaging in these exercises‚ team members can break down initial hesitations and develop stronger interpersonal connections. Icebreakers also promote active participation‚ ensuring that all voices are heard and valued. This leads to improved problem-solving‚ creativity‚ and overall team performance. Furthermore‚ they set the tone for a productive and inclusive environment‚ which is essential for achieving shared goals. Incorporating icebreakers into team-building efforts ensures that individuals are aligned‚ motivated‚ and ready to collaborate effectively.

Types of Icebreaker Activities

Icebreaker activities come in various forms‚ catering to different preferences and goals. They include creative writing exercises‚ question-based discussions‚ physical games‚ and health-focused exercises‚ fostering team bonding and collaboration.

Creative Writing Exercises

Creative writing exercises are designed to foster creativity and self-expression among participants. These activities often involve writing prompts or challenges that encourage individuals to share personal reflections or imaginative ideas. For example‚ participants might write their names on cards along with a unique fact or future aspiration‚ then discuss their choices with the group. Another popular exercise is group storytelling‚ where each person adds a sentence to a shared narrative‚ promoting collaboration and laughter. These exercises not only break the ice but also provide insights into participants’ personalities‚ values‚ and creative thinking. They are particularly effective in settings where teamwork and innovation are valued‚ helping to establish a connection among individuals in a fun and engaging way.

Question-Based Discussions

Question-based discussions are effective icebreakers that encourage participants to share their thoughts and opinions. These exercises often involve open-ended questions that prompt meaningful conversations. For example‚ participants might discuss their favorite hobbies‚ future aspirations‚ or unique experiences with a partner or in small groups. Questions can be tailored to the setting‚ such as asking about preferred sports‚ fun activities‚ or personal ideas of enjoyment. This approach fosters connection‚ encourages active listening‚ and helps individuals learn about each other’s perspectives. By engaging in these discussions‚ participants build rapport and establish a foundation for collaboration. Such activities are particularly useful in team-building settings‚ as they promote communication and create a relaxed environment for interaction.

Physical and Interactive Games

Physical and interactive games are dynamic icebreakers that involve movement and teamwork. These activities are designed to break the ice while encouraging collaboration and laughter. Examples include line-up exercises where participants arrange themselves based on questions like favorite sports or hobbies. Partner discussions and movements‚ such as moving across the room to find someone with similar interests‚ also fall into this category. Games like puzzle-solving‚ where participants find matching pieces‚ promote teamwork and problem-solving. These activities are ideal for fostering connections‚ as they require interaction and often lead to shared experiences. They are particularly effective in large groups‚ helping to create a relaxed and engaging environment. Physical games ensure active participation‚ making them memorable and impactful for team-building purposes.

Health and Well-Being Focused Activities

Health and well-being focused activities are designed to promote physical and mental relaxation while fostering connections. These exercises often involve gentle movements‚ such as stretching or yoga‚ to help participants unwind. They may also include discussions about self-care routines‚ stress management‚ or gratitude practices. For example‚ activities might ask participants to share their favorite ways to stay active or how they prioritize mental health. These exercises create a supportive environment‚ encouraging employees to feel appreciated and valued. By incorporating well-being into icebreakers‚ organizations can help reduce stress and improve overall morale. These activities are particularly effective in creating a positive and inclusive atmosphere‚ making them a valuable addition to team-building efforts.

Popular Icebreaker Examples

Popular icebreakers include activities like “Two Truths and a Lie‚” “Occupation Prediction‚” and “Partner Discussions.” These engaging exercises encourage interaction‚ helping participants connect and relax quickly.

The “Two Truths and a Lie” Game

The “Two Truths and a Lie” game is a fun and engaging icebreaker where participants share two true statements about themselves and one false statement. The group then guesses which one is the lie. This activity encourages creativity‚ laughter‚ and quick thinking while helping people learn interesting facts about each other. It fosters teamwork as participants work together to uncover the deception. The game is versatile and can be adapted to various settings‚ from casual gatherings to professional meetings. Its simplicity makes it accessible to all ages and backgrounds‚ ensuring everyone feels included and comfortable. It’s an excellent way to break the ice and create a relaxed atmosphere for further interaction and collaboration.

Occupation Prediction Activity

The Occupation Prediction Activity is a unique icebreaker where participants predict the future careers of their peers. Each person writes down the occupation they believe someone else in the group will have someday. These predictions are then shared aloud‚ and the group discusses the reasoning behind each choice. This activity sparks interesting conversations and insights into how others perceive individual strengths and interests. It fosters a sense of curiosity and connection‚ allowing participants to gain a deeper understanding of one another’s aspirations and talents. The exercise is both engaging and thought-provoking‚ making it an excellent way to encourage collaboration and creativity in a group setting. It also helps break down barriers and builds rapport among team members.

Partner Discussions and Line Movements

Partner Discussions and Line Movements is an interactive icebreaker that combines conversation and physical movement. Participants form two lines facing each other and discuss a predetermined question with their partner. After a set time‚ one line shifts positions‚ and new pairs are formed to discuss the same or a new question. This activity encourages dynamic interactions‚ helping people connect with multiple individuals in a short time. It fosters engagement‚ collaboration‚ and a relaxed atmosphere‚ making it ideal for team-building or social events. The movement element adds energy and variety‚ ensuring participants stay focused and enthusiastic throughout the exercise. This method is particularly effective for breaking the ice in larger groups.

Benefits of Incorporating Icebreakers

Incorporating icebreakers fosters connections‚ enhances creativity‚ and improves communication. They boost morale‚ reduce tension‚ and increase productivity‚ creating a positive and collaborative environment for teams and individuals alike.

Enhancing Team Collaboration

Icebreaker activities play a crucial role in strengthening teamwork by encouraging interaction and mutual understanding. They help participants bond over shared experiences‚ fostering trust and camaraderie. By engaging in collaborative exercises‚ individuals learn to communicate effectively‚ listen actively‚ and appreciate diverse perspectives. These activities often involve problem-solving or creative tasks‚ which require teamwork to achieve a common goal. For instance‚ group discussions or physical games promote coordination and reliance on one another. This shared effort cultivates a sense of unity‚ making teams more cohesive and cooperative. Over time‚ icebreakers help teams develop the skills and confidence needed to tackle challenges together‚ leading to improved collaboration and productivity in both professional and social settings.

Improving Communication Skills

Icebreaker activities are highly effective in enhancing communication skills by encouraging individuals to express themselves openly. These exercises often involve sharing thoughts‚ opinions‚ or personal anecdotes‚ which helps participants feel comfortable speaking in a group setting. For example‚ question-based discussions or creative writing tasks prompt individuals to articulate their ideas clearly. Active listening is also fostered as participants engage with others’ responses. By breaking down social barriers‚ icebreakers create an environment where people feel confident to voice their thoughts. This improved communication leads to stronger interpersonal connections and a more collaborative atmosphere. Over time‚ these skills translate into more effective and open dialogue in both professional and social interactions‚ making icebreakers a valuable tool for building strong communication habits.

Boosting Morale and Engagement

Icebreaker activities play a significant role in boosting morale and engagement by creating a positive and lively atmosphere. They help individuals feel more connected and valued‚ reducing stress and fostering a sense of camaraderie. Engaging in fun and interactive exercises encourages participants to step out of their comfort zones‚ promoting a more energetic and motivated mindset. Activities like physical games or creative challenges often bring laughter and excitement‚ which can uplift the mood of the entire group. By incorporating health-focused exercises‚ employees also feel cared for‚ enhancing overall job satisfaction. This increased engagement translates into higher productivity and a more enthusiastic approach to collaborative efforts‚ making icebreakers a powerful tool for maintaining a positive work environment.

Posted in PDF

lux 1500 thermostat instruction manual

The Lux 1500 Thermostat is a programmable electronic device designed for efficient temperature control in residential and commercial settings‚ offering comfort and energy-saving features.

1.1 Overview of the Lux 1500 Thermostat

The Lux 1500 Thermostat is a programmable electronic device designed for efficient temperature control in residential and commercial settings. It offers compatibility with various heating and cooling systems‚ including gas‚ oil‚ electric‚ and single-stage heat pumps. Featuring a user-friendly interface‚ it allows for scheduling and energy-saving options. The thermostat is designed to provide precise temperature management‚ ensuring comfort and energy efficiency. Its programmable nature enables users to set specific temperatures for different times of the day‚ optimizing energy usage and reducing utility bills. This thermostat is a reliable choice for modern heating and cooling needs.

1.2 Importance of Reading the Instruction Manual

Reading the instruction manual for the Lux 1500 Thermostat is crucial for proper installation‚ operation‚ and troubleshooting. It provides essential guidelines for wiring‚ setup‚ and programming‚ ensuring safety and efficiency. The manual details compatibility with various heating and cooling systems‚ helping users avoid potential issues. Understanding the thermostat’s features and settings through the manual enables optimal energy savings and comfort. It also includes troubleshooting tips for common problems‚ making it a vital resource for maximizing the thermostat’s performance. Reviewing the manual carefully before starting ensures a smooth experience and prevents errors.

Installation and Setup

The Lux 1500 Thermostat installation requires careful wiring and setup. Label existing wires‚ follow terminal designations‚ and complete basic settings like time and date configuration.

2.1 Pre-Installation Steps

Before installing the Lux 1500 Thermostat‚ ensure you have the correct tools and materials. Turn off the power to your HVAC system at the circuit breaker. Remove the old thermostat and label each wire according to its terminal designation. This step is crucial to avoid wiring errors during installation. Consult the manual for compatibility with your heating or cooling system. Double-check that all components are included in the packaging. Finally‚ read through the entire installation guide to familiarize yourself with the process and safety precautions. Proper preparation ensures a smooth and safe installation.

2.2 Wiring Information and Terminal Designations

Proper wiring is critical for the Lux 1500 Thermostat to function correctly. Ensure the system is compatible with 24-volt heating‚ cooling‚ or heat pump systems. Label each wire from the old thermostat according to its terminal (e.g.‚ R‚ W‚ Y‚ G‚ C). Refer to the manual for specific terminal designations and their functions. Match the wires to the corresponding terminals on the Lux 1500 to avoid malfunctions. Double-check all connections for tightness and accuracy. If unsure‚ consult a licensed electrician. Correct wiring ensures safe and efficient operation of the thermostat.

Always follow safety guidelines when handling electrical components.

2.3 Mounting the Thermostat

Mount the Lux 1500 Thermostat on a flat‚ vertical surface‚ typically near the location of the old thermostat. Ensure it’s at least 5 feet above the floor for accurate temperature readings. Avoid areas near heating vents‚ radiators‚ or direct sunlight‚ as this may affect temperature accuracy. Use the provided mounting hardware to secure the base plate to the wall. Gently attach the thermostat faceplate to the base plate‚ ensuring it clicks into place. Check for level alignment to ensure proper functionality. After mounting‚ connect the wires to the designated terminals as per the wiring diagram.

Ensure the thermostat is securely fastened and level for optimal performance.

Operating the Thermostat

The Lux 1500 Thermostat features an intuitive interface with buttons or a dial for adjusting settings. The display shows current temperature and setpoints‚ making it easy to monitor and control your environment.

3.1 Setting the Time and Date

To set the time and date on your Lux 1500 Thermostat‚ navigate to the time settings menu using the control buttons or dial. Select the hour and minute using the arrows‚ then confirm your selection. For the date‚ choose the correct day‚ month‚ and year. Ensure the time is set to the correct AM/PM cycle. Properly setting the time and date is essential for accurate scheduling and operation. Follow the on-screen instructions for a seamless setup process to ensure your thermostat functions correctly.

3.2 Understanding Basic Settings and Controls

The Lux 1500 Thermostat features an intuitive interface with buttons or a dial for easy navigation. Key settings include mode selection (Heat/Cool/Off)‚ fan control (Auto/On)‚ and temperature adjustment. The display shows current and set temperatures‚ while arrows allow precise adjustments. A “Hold” feature lets you override schedules temporarily. Familiarize yourself with these controls to optimize comfort and energy efficiency. Proper use of these settings ensures smooth operation and customization of your heating and cooling preferences‚ aligning with your daily needs and preferences for ideal temperature management.

Programming the Thermostat

The Lux 1500 Thermostat allows you to create custom schedules with up to four programming periods daily‚ enabling precise temperature control for enhanced comfort and efficiency.

4.1 Creating Daily Schedules

Creating daily schedules with the Lux 1500 Thermostat is straightforward. Users can program up to four periods per day‚ each with specific start and end times‚ and desired temperatures. This flexibility allows for tailored comfort‚ optimizing energy usage by adjusting settings when the home is occupied or unoccupied. The thermostat’s intuitive interface guides users through setting preferences‚ ensuring a seamless experience. By following the on-screen instructions‚ users can easily customize their schedules to match their lifestyle and preferences‚ enhancing both comfort and efficiency.

4.2 Adjusting Temperature Settings for Different Periods

The Lux 1500 Thermostat allows users to adjust temperature settings for different periods throughout the day. This feature enables customization to match daily routines‚ optimizing comfort and energy efficiency. Users can set specific temperatures for periods such as waking up‚ leaving home‚ returning‚ and sleeping. By following the on-screen instructions‚ temperatures can be easily adjusted for each programmed period. This flexibility ensures that heating or cooling systems operate efficiently‚ reducing energy waste and enhancing overall performance. Proper adjustment of temperature settings is key to maximizing the thermostat’s capabilities.

Features of the Lux 1500 Thermostat

The Lux 1500 Thermostat offers energy-saving capabilities‚ compatibility with various heating and cooling systems‚ and a user-friendly interface for easy programming and temperature control.

5.1 Energy-Saving Capabilities

The Lux 1500 Thermostat features advanced energy-saving capabilities designed to optimize heating and cooling usage. By programming specific temperature settings for different periods‚ users can significantly reduce energy consumption. The thermostat allows for four distinct programming periods per day‚ enabling precise control over when the system operates. This functionality helps minimize unnecessary heating or cooling when the space is unoccupied‚ leading to lower utility bills and enhanced environmental efficiency. Additionally‚ the thermostat’s compatibility with various systems ensures optimal performance without compromising comfort.

5.2 Compatibility with Heating and Cooling Systems

The Lux 1500 Thermostat is compatible with a wide range of heating and cooling systems‚ including gas‚ oil‚ electric‚ and single-stage heat pumps. It supports single-stage 24-volt systems and is also suitable for gas millivolt heating systems. This versatility ensures seamless integration with most standard HVAC setups‚ providing reliable temperature control for both residential and commercial environments. Its compatibility extends to various system types‚ making it a universal choice for efficient heating and cooling management. This adaptability ensures optimal performance across different configurations.

Maintenance and Troubleshooting

Regular maintenance ensures optimal performance. Resetting the thermostat using the hardware reset button resolves common issues. Properly labeling wires during installation prevents operational errors.

6.1 Resetting the Thermostat

Resetting the Lux 1500 Thermostat is a straightforward process. Locate the hardware reset button on the circuit board and press it to restore factory settings. This action can resolve common issues like malfunctioning or incorrect temperature settings. However‚ resetting will erase all programmed schedules and custom settings‚ requiring you to reconfigure the device. To avoid unnecessary resets‚ ensure proper installation by labeling wires correctly and following the provided instructions. Regular maintenance and checking wiring connections can prevent most operational issues. Always refer to the manual for detailed reset procedures.

6.2 Common Issues and Solutions

Common issues with the Lux 1500 Thermostat include continuous heating or cooling‚ incorrect temperature readings‚ and display malfunctions. To address these‚ ensure proper wiring and installation‚ as incorrect connections can cause operational problems. If the thermostat fails to respond‚ try resetting it by pressing the hardware reset button on the circuit board. For display issues‚ check the power supply and ensure the thermostat is properly mounted. Refer to the manual for troubleshooting steps‚ and if issues persist‚ contact manufacturer support for assistance. Regular maintenance and updates can prevent many of these problems.

Additional Resources

Access the full Lux 1500 Thermostat manual online or download the PDF for TX1500E and TX1500U models. Contact manufacturer support for additional help and resources.

7.1 Accessing the Full Instruction Manual Online

To access the full instruction manual for the Lux 1500 Thermostat‚ visit the manufacturer’s official website or authorized portals. Download the PDF for models like TX1500E or TX1500U. Ensure to read the manual thoroughly before installation and operation to understand all features and settings. The manual provides detailed guidance on programming‚ troubleshooting‚ and maintenance. For convenience‚ the document is available in multiple formats‚ including text files. Always refer to the official sources to avoid outdated or incorrect information.

7.2 Contacting Manufacturer Support

For assistance with the Lux 1500 Thermostat‚ contact the manufacturer’s support team through their official website or customer service channels. Visit the support page for email‚ phone‚ or live chat options. Ensure to have your model number‚ such as TX1500E‚ ready for accurate help. The support team can address installation‚ programming‚ or troubleshooting issues. Additionally‚ the official website offers downloadable resources‚ including user manuals and troubleshooting guides‚ to aid in resolving common problems. Reach out for professional guidance to optimize your thermostat’s performance and address any concerns effectively.

careless whisper alto sax sheet music pdf

“Careless Whisper” by George Michael is a timeless classic, widely admired for its soulful melody and emotional depth. Its popularity endures, making it a favorite among saxophonists worldwide.

The song’s smooth, melancholic tune translates beautifully to the alto sax, offering musicians a chance to showcase expressive playing. Its enduring appeal lies in its universal themes of love and heartache.

As a result, “Careless Whisper” remains a staple in saxophone repertoire, with many seeking alto sax sheet music PDFs to master its iconic riffs and deliver heartfelt performances.

1.1. Background of the Song and Its Creators

“Careless Whisper” was written by George Michael and Andrew Ridgeley of Wham!, released in 1984. The song became an instant hit, topping charts worldwide and solidifying its place in pop history. Its iconic saxophone riff, paired with heartfelt lyrics, captivated audiences, making it a timeless classic. The song’s enduring popularity has led to numerous covers and arrangements, including alto sax sheet music, cherished by musicians globally.

1.2. Why “Careless Whisper” is a Favorite Among Saxophonists

The song’s soulful melody and emotional depth make it a saxophonist’s delight. Its iconic riff and smooth, melancholic tune allow for expressive playing, showcasing both skill and feeling. The alto sax version, in particular, captures the song’s essence, making it a beloved choice for musicians. Its widespread availability as sheet music further enhances its popularity, enabling saxophonists to master and perform this timeless classic with ease and passion.

Understanding Alto Sax Sheet Music

Alto sax sheet music provides a visual guide for musicians, detailing notes, rhythm, and dynamics. It serves as a crucial tool for learning and performing accurately, ensuring clarity and precision in musical interpretation.

2.1. What is Sheet Music and Its Importance for Musicians

Sheet music is a written representation of musical compositions, detailing notes, rhythms, and harmonies. It provides clear guidance for musicians, enabling accurate performance and interpretation. For alto saxophonists, sheet music is essential, as it offers a structured approach to learning complex pieces like “Careless Whisper,” ensuring precision and artistry in their play. It serves as a foundational tool for both practice and performance.

2.2. Specifics of Alto Sax Sheet Music

Alto sax sheet music for “Careless Whisper” is tailored to the instrument’s range and tone, offering precise notation for melody and improvisation. It often includes dynamics, articulation, and breath marks, ensuring expressive performance. Available in PDF, it can be downloaded from trusted platforms like Scribd or Hal Leonard, with options for solo, duet, or quintet arrangements, catering to various skill levels and musical preferences.

Where to Find “Careless Whisper” Alto Sax Sheet Music in PDF

Trusted platforms like Scribd, Hal Leonard, and Musicnotes offer high-quality “Careless Whisper” alto sax sheet music in PDF format for download. These sites provide easy access to the music.

Additionally, websites such as Sheet Music Plus and Newbury Sax School offer downloadable PDFs, ensuring musicians can find the perfect arrangement for their skill level and performance needs.

3.1. Trusted Online Platforms for Sheet Music Downloads

Trusted platforms like Scribd, Hal Leonard, and Musicnotes offer high-quality “Careless Whisper” alto sax sheet music in PDF format. These sites provide secure downloads and accurate transcriptions.

Hal Leonard offers officially licensed arrangements, while Musicnotes allows transpose and tempo adjustments. Newbury Sax School and Sheet Music Plus also provide reliable resources for alto sax players.

3.2. Free vs. Paid Resources: Pros and Cons

Free resources like Scribd and public forums offer cost-effective access to “Careless Whisper” sheet music. However, they may lack quality or accuracy. Paid platforms such as Musicnotes and Hal Leonard provide high-quality, official arrangements, ensuring precision and legality. While free options save money, paid resources often include additional features like transpose and tempo adjustments, making them ideal for serious musicians seeking professional results.

How to Choose the Right Sheet Music for Your Needs

Assess your skill level and preferences when selecting “Careless Whisper” alto sax sheet music. Opt for arrangements that match your proficiency, whether solo or duet, and ensure the quality aligns with your goals.

Check for reviews and verified sources to guarantee accuracy and avoid errors in the sheet music.

4.1. Selecting the Correct Skill Level

Choosing the right skill level for “Careless Whisper” alto sax sheet music ensures an enjoyable and challenging experience. Look for arrangements labeled as beginner, intermediate, or advanced to match your proficiency.

Advanced versions often include intricate phrasing and vibrato, while simpler arrangements focus on the melody. Select a version that aligns with your current skills to avoid frustration and enhance your learning process.

4.2. Understanding Sheet Music Formats and Arrangements

Sheet music for “Careless Whisper” is available in various formats, including PDFs, interactive scores, and solo or duet arrangements. PDFs are popular for their ease of use and compatibility across devices.

Some arrangements offer transposable sheet music, allowing adjustments to suit different skill levels or preferences. This flexibility ensures musicians can tailor the piece to their needs, enhancing their performance experience.

Tips for Playing “Careless Whisper” on the Alto Sax

Mastering the melody requires precise intonation and smooth phrasing. Focus on breathing techniques to maintain consistent tone and dynamics, enhancing emotional expression in the song.

5.1. Mastering the Melody and Improvisation

Mastering the melody of “Careless Whisper” requires precise intonation and smooth phrasing to capture its emotional depth. Start by practicing the iconic riff slowly, ensuring clarity and control. For improvisation, study George Michael’s vocal nuances and incorporate subtle vibrato to add personality. Begin with simple embellishments, then gradually explore more complex variations while staying true to the song’s essence.

5.2. Breathing Techniques and Tone Control

Mastering breathing techniques is essential for playing “Careless Whisper” on the alto sax. Begin with deep, controlled breaths to support long, smooth notes. Use diaphragmatic breathing to maintain consistent airflow and tone. Practice vibrato control to enhance emotional expression. Study the sheet music for phrasing cues and dynamics, adjusting your tone to match the song’s melancholic essence for a captivating performance.

Advanced Techniques for a Professional Sound

Mastering vibrato and dynamics enhances the emotional depth of “Careless Whisper.” Use subtle vibrato for expressive phrasing and control dynamics to balance soft, melancholic passages with powerful crescendos, creating a polished, professional sound.

6.1. Vibrato and Dynamics in “Careless Whisper”

Vibrato and dynamics are crucial for a professional sound in “Careless Whisper.” Use subtle vibrato to convey emotion, varying its width and speed to match the song’s intensity. Dynamics should be carefully controlled, with soft, delicate passages transitioning seamlessly to powerful crescendos. This nuanced approach ensures a captivating and polished performance, bringing depth to the melody.

6.2. Phrasing and Articulation Tips

Mastering phrasing and articulation is key to capturing the emotional essence of “Careless Whisper.” Focus on smooth, natural phrasing that mirrors the song’s melancholic vibe. Use subtle articulation, blending legato for flowing passages and staccato for crisp accents. Pay attention to breath control to maintain consistent tone and dynamics. Practice phrasing by listening to the original version and experimenting with slight variations to find your unique voice.

The Role of Technology in Learning and Playing

Technology enhances learning and performance of “Careless Whisper” by providing apps, software, and interactive sheet music. These tools offer tempo adjustment, playback features, and practice aids, improving overall performance quality.

7.1. Using Apps and Software for Practice

Apps and software are invaluable for mastering “Careless Whisper” on alto sax. Tools like Tempo Adjuster and NotePerformer allow musicians to slow down or speed up tempos, aiding in precise practice. Interactive sheet music apps enable users to transpose keys, loop sections, and even record performances for self-review. These technologies enhance learning, improve technique, and make practice sessions more efficient and enjoyable for saxophonists of all levels.

7.2. Recording and Sharing Your Performance

Recording your “Careless Whisper” performance allows you to track progress and share your music with others. Use digital audio workstations (DAWs) or mobile apps like Voice Memos or RecForge to capture high-quality audio. Platforms like YouTube, SoundCloud, or Scribd enable easy sharing, while sheet music communities and forums provide spaces to showcase your interpretation. Sharing your performance can inspire others and foster connections within the saxophone community.

Common Mistakes to Avoid When Playing

Common mistakes include pitch errors, timing issues, and improper breathing. Ensure precise intonation, maintain rhythmic accuracy, and practice breath control to deliver a polished performance.

8.1. Avoiding Pitch Errors and Timing Issues

To avoid pitch errors, focus on precise finger placement and embouchure control. Practice challenging passages slowly, ensuring accurate intonation. Use a tuner for feedback and consistency.

For timing issues, emphasize rhythmic accuracy by practicing with a metronome. Break down complex sections and gradually increase tempo. Pay attention to syncopation and phrasing to maintain the song’s groove.

8.2. Managing Nervousness and Performance Anxiety

To manage nervousness, practice relaxation techniques like deep breathing and visualization. Focus on the music’s emotional connection rather than perfection. Regular performance exposure helps build confidence and reduces anxiety.

Rehearse in front of friends or mirrors to simulate real performances. Stay hydrated, warm up thoroughly, and remind yourself that mistakes are part of live music. Positive self-talk and mental preparation are key to overcoming stage fright.

Performance Tips for “Careless Whisper”

Emphasize the song’s emotional depth through phrasing and dynamics. Connect with the audience by conveying the melody’s heartfelt essence, ensuring each note resonates with passion and sincerity.

9.1. Connecting with the Audience Emotionally

To truly captivate your audience, focus on conveying the emotional depth of “Careless Whisper.” Use dynamics and phrasing to express the song’s heartfelt melody, ensuring each note tells a story. Emotional connection is key—play with passion and sincerity to resonate with listeners on a deeper level, making the performance unforgettable and impactful.

9.2. Stage Presence and Confident Delivery

Stage presence is vital for a captivating performance. Maintain confident posture, engage with your audience through eye contact and expressive body language. Practice thoroughly to build self-assurance. A confident delivery enhances the emotional impact of “Careless Whisper,” drawing your audience into the music’s heartfelt melody and creating a memorable experience.

Variations and Arrangements of the Song

“Careless Whisper” exists in multiple arrangements, from solo alto sax renditions to duets and orchestral versions. These variations offer musicians flexibility and creative interpretation of the timeless melody.

10.1. Exploring Different Versions and Styles

“Careless Whisper” is available in various arrangements, from sax duets to orchestral versions. These interpretations offer unique perspectives, allowing musicians to explore different styles while maintaining the song’s essence. The melody’s versatility shines in jazz, instrumental, and solo renditions, providing endless inspiration. Players can choose versions that suit their skill level or creative vision, making the song a timeless canvas for artistic expression and personal interpretation.

10.2. Creating Your Own Unique Interpretation

Embrace creativity by personalizing the melody with your own flair. Experiment with tempo, dynamics, and emotional phrasing to craft a distinctive version. Incorporate improvisation or unique arrangements to reflect your style. High-quality sheet music allows for transposition and tempo adjustments, enabling you to tailor the piece to your artistic vision. Adding personal touches transforms the song into a captivating performance that showcases your individuality and musicality.

Mastering “Careless Whisper” on alto sax is achievable with quality sheet music. Its timeless appeal and emotional depth make it a rewarding piece for musicians of all levels.

Keep practicing, and enjoy the journey of bringing this iconic melody to life with your instrument.

11.1. Final Thoughts on Playing “Careless Whisper”

“Careless Whisper” remains a beloved choice for alto saxophonists, blending emotional depth with a memorable melody. Musicians find fulfillment in its expressive nuances and universal appeal. With dedication, even beginners can master its iconic riffs, while experienced players can refine their technique. The song’s enduring popularity ensures it will continue to inspire saxophonists worldwide to create meaningful performances.

11.2. Encouragement to Keep Practicing and Performing

Embrace persistence and passion while mastering “Careless Whisper.” Every practice session brings you closer to capturing its emotional essence. Share your music with others to inspire and connect, fostering a deeper love for the saxophone. Remember, music is a lifelong journey—keep exploring, growing, and enjoying the process of creating beautiful sounds.

Additional Resources for Further Learning

Explore Scribd, Musicnotes, and Hal Leonard for high-quality sheet music. Check out video tutorials on YouTube and join saxophone forums for tips and inspiration.

12.1. Recommended Books, Videos, and Tutorials

Enhance your learning with books like “The Art of Saxophone Playing” and video tutorials on YouTube. Websites like Saxophone Lessons 365 offer detailed lessons. Explore forums like Reddit’s r/AltoSax for community support. Additionally, platforms like Musicnotes provide interactive tools, while Video Performances of “Careless Whisper” on YouTube inspire and guide your practice.

12.2. Joining Communities and Forums for Support

Joining online communities like Reddit’s r/AltoSax or Facebook groups dedicated to saxophonists provides valuable support. Share your progress, seek feedback, and learn from experienced players. Platforms like Scribd and Pinterest also host forums where musicians exchange tips and resources. Engaging with these communities fosters growth and connects you with fellow enthusiasts, helping you refine your “Careless Whisper” performance.

Final Words of Inspiration

Embrace the joy of playing “Careless Whisper” on alto sax, and let its timeless melody inspire you to share your passion with the world.

13.1. The Joy of Playing “Careless Whisper” on Alto Sax

Playing “Careless Whisper” on the alto sax is a deeply rewarding experience, offering a perfect blend of emotional depth and melodic beauty. The song’s iconic riff and soulful nuances allow saxophonists to express their passion and connect with listeners on a personal level.

Mastering this piece brings a sense of accomplishment and joy, as its timeless melody resonates with audiences worldwide, creating a shared emotional experience between performer and listener.

13.2. Sharing Your Passion with Others

Sharing your passion for “Careless Whisper” on the alto sax can inspire others and create meaningful connections. Whether performing for friends, recording for online platforms, or teaching others, your love for the song becomes contagious and uplifting.

By sharing your music, you not only spread joy but also contribute to the legacy of this beloved melody, fostering a community of saxophonists united by their appreciation for timeless artistry.

black and decker rice cooker instruction manual

The Black and Decker Rice Cooker is a versatile and user-friendly appliance designed to simplify rice preparation․ With models ranging from 3 to 16 cups, it offers automatic cooking, a keep-warm function, and dishwasher-safe parts for easy cleanup․ Perfect for fluffy rice, soups, and steaming vegetables, it combines convenience and efficiency for everyday meals․

Overview of the Appliance

The Black and Decker Rice Cooker is a compact, efficient kitchen appliance designed for effortless rice preparation․ Available in various sizes, including 3-cup and 16-cup models, it caters to diverse household needs․ The cooker features automatic cooking and a keep-warm function, ensuring perfectly cooked rice every time․ Its nonstick cooking bowl and tempered glass lid make cleanup easy, while the cool-touch handles provide safe handling․ Perfect for rice, grains, and steaming, it’s a versatile addition to any kitchen, offering convenience and reliability for daily meals․

Key Features and Benefits

The Black and Decker Rice Cooker boasts a range of features that enhance cooking convenience․ Its automatic keep-warm function ensures rice stays fluffy and ready to serve․ The nonstick cooking bowl is dishwasher-safe, making cleanup effortless․ The cooker also includes a tempered glass lid for easy monitoring and cool-touch handles for safe handling․ With a compact design and versatile capabilities, it allows for cooking rice, grains, and even steaming vegetables, making it a practical and efficient addition to any kitchen setup․

Safety Precautions and Basic Setup

Ensure the rice cooker is placed on a heat-resistant surface, away from flammable materials․ Avoid submerging the base in water and never modify the polarized plug․ Always handle with care to prevent accidents and follow all safety guidelines provided in the manual․

Unpacking and Initial Preparation

Start by carefully unpacking the rice cooker and removing all packaging materials, including stickers and plastic bands․ Wash the cooking bowl, lid, and accessories with warm soapy water, then dry thoroughly; Place the cooking base on a stable, heat-resistant surface, ensuring adequate space around it for proper ventilation․ Avoid positioning it under cabinets or near flammable materials․ Before first use, ensure all parts are clean and dry․ Plug in the unit and familiarize yourself with its controls and features․

Important Safety Guidelines

Always follow safety precautions to minimize risks․ Use the polarized plug correctly, avoiding modification․ Never submerge the cooking base in water or use abrasive cleaners․ Keep the appliance away from flammable materials and ensure proper ventilation․ Avoid overheating by not overfilling the bowl․ Use oven mitts when handling hot surfaces․ Keep children away and never leave the cooker unattended while in use․ Store the appliance with the lid placed upside down to save space and ensure all parts are dry before storage․

Understanding the Components

The Black and Decker Rice Cooker features a nonstick cooking bowl, tempered glass lid, cool-touch handles, and a control panel with cook and warm indicators for easy operation․

Parts of the Rice Cooker

The Black and Decker Rice Cooker includes a nonstick cooking bowl, tempered glass lid, and cool-touch side handles for safe handling․ It also features a steam vent, rice measure, and serving spoon․ The cooking base houses the heating element and control panel․ Removable parts are dishwasher-safe, while the exterior is easy to wipe clean․ The nonstick bowl prevents rice from sticking, and the glass lid allows monitoring of cooking progress․ Metal utensils are not recommended to avoid scratching the bowl․

Control Panel and Indicators

The control panel features simple, intuitive buttons for operation․ It includes a COOK indicator light that illuminates during cooking and switches to WARM once the rice is ready․ The WARM indicator light ensures your rice stays at the perfect temperature․ A basic control switch allows you to toggle between cooking and warming modes․ The steam vent on the lid directs excess moisture away, preventing overflow․ The design is user-friendly, with clear visual cues for monitoring the cooking process․

Preparing and Measuring Ingredients

Use the provided rice measure for accurate portions․ Add optional butter, oil, or seasonings before cooking․ The cooker can handle up to 7 rice measures, yielding 16 cups cooked․

Water-to-Rice Ratio Guidelines

The water-to-rice ratio varies based on rice type․ For white rice, use 1․5 cups water per 1 cup rice․ Brown rice requires slightly more, around 1․75 cups water․ Adjust ratios for firmer or softer texture․ Use broth instead of water for extra flavor․ Ensure water level doesn’t exceed the cooker’s max mark․ Add seasonings or salt as desired․ Proper measurement ensures fluffy, evenly cooked rice every time․

Adding Seasonings and Oils

Enhance the flavor of your rice by adding seasonings, oils, or butter directly to the cooking bowl before adding water․ Use herbs, spices, or broth for extra taste․ For kosher salt, add 1 tsp per cup of uncooked rice․ Mix well to distribute evenly․ Avoid using metal utensils to prevent scratching the nonstick surface․ This step allows for a delicious and aromatic cooking experience, making every meal more enjoyable with the Black and Decker Rice Cooker․

Cooking Instructions

Measure rice and water according to guidelines, plug in, and use the control switch․ The cooker automatically shifts to keep-warm mode after cooking․ Let rice rest for optimal texture․ Suitable for white, brown, and jasmine rice․ Follow specific settings for each type․

Step-by-Step Cooking Process

Measure rice and water using the provided cup, following the recommended ratio․ Add rice, water, and optional seasonings to the cooking bowl․ Place the bowl into the cooker and plug it in․ 2․ Turn the control switch to the “Cook” position․ The cooker will automatically start and switch to “Keep Warm” once done․ 3․ Allow the rice to rest for 15 minutes before serving․ Use the plastic spoon to fluff and serve․ For best results, avoid metal utensils to prevent scratching the nonstick bowl․

Cooking Times for Different Rice Types

White rice typically cooks in 20 minutes, while brown rice takes 40-45 minutes․ Jasmine and basmati rice require similar times to white rice but may need slightly more water․ Allow the rice to rest for 15 minutes after cooking for fluffier results․ The cooker automatically switches to “Keep Warm” mode once done․ Use the provided plastic spoon to serve, avoiding metal utensils to protect the nonstick bowl․ Adjust water ratios for softer or firmer textures as needed․

Beyond Rice: Additional Uses

The Black and Decker Rice Cooker is versatile, doubling as a steamer for vegetables and a cooker for soups, stews, oatmeal, and other grains, expanding meal options․

Cooking Other Grains and Meals

The Black and Decker Rice Cooker excels at cooking various grains and meals beyond rice․ Quinoa, barley, and oats can be perfectly prepared by adjusting the water ratio․ It’s also ideal for soups, stews, and even oatmeal․ Simply add ingredients, season with herbs or broth for extra flavor, and let the cooker work․ The automatic keep-warm function ensures your meal stays ready to serve․ This versatility makes it a must-have for diverse culinary creations․

Using the Rice Cooker as a Steamer

The Black and Decker Rice Cooker doubles as a convenient steamer for vegetables and other foods․ Simply place your vegetables in the steamer basket, add water to the cooking bowl, and let the cooker do the work․ This feature allows for healthy, nutrient-rich meals with minimal effort․ Steam your favorite vegetables to perfection while cooking rice simultaneously, ensuring a balanced and flavorful dish every time․

Maintenance and Troubleshooting

Regular cleaning with mild soap and descaling helps maintain performance․ For stuck rice, adjust water ratios․ Store properly to prevent damage and ensure longevity and performance․

Cleaning and Care Tips

Regular cleaning is essential for maintaining your Black and Decker Rice Cooker․ The nonstick cooking bowl and tempered glass lid are dishwasher-safe for easy cleanup․ Avoid using abrasive cleaners or metal utensils, as they may scratch the surfaces․ After cooking, allow the appliance to cool slightly before cleaning․ For stubborn residue, soak the bowl in hot soapy water and use a nylon scrubber․ Dry all parts thoroughly to prevent water spots․ Proper care ensures optimal performance and longevity of your rice cooker․

Common Issues and Solutions

If rice is undercooked or too crunchy, ensure sufficient water and allow it to rest after cooking․ For overcooked rice, reduce water ratio․ If the rice cooker switches to warm mode prematurely, check the water level and ensure the lid is properly sealed․ Starch buildup on the bowl can be removed by soaking it in hot soapy water․ Avoid using metal utensils to prevent scratching the nonstick surface․ Regular cleaning and proper storage will maintain your rice cooker’s performance and longevity․

The Black and Decker Rice Cooker is a reliable kitchen companion for perfect rice preparation․ For further assistance, visit ManualsLib or the official Black+Decker website․ The user manual provides detailed guides, troubleshooting tips, and warranty information․ Contact customer service at 1-800-231-9786 for any queries․ With proper care and usage, your rice cooker will deliver delicious meals for years․ Explore additional recipes and maintenance tips online to maximize its versatility and performance․

volvo truck fault codes list pdf

The Volvo truck fault codes list PDF provides a comprehensive guide to understanding and interpreting fault codes, essential for diagnosing and troubleshooting issues in Volvo trucks efficiently;

Understanding Volvo Fault Codes

Volvo fault codes are numeric or alphanumeric codes indicating specific issues in Volvo trucks. They help technicians identify problems in systems like the engine, transmission, or ABS. The PDF list organizes these codes for easy reference, enabling efficient diagnostics and repairs.

What Are Parameter IDs?

Parameter IDs are specific codes linked to fault codes, providing detailed information about system malfunctions in Volvo trucks. They help identify the exact parameter or sensor causing the issue, such as engine speed, temperature, or pressure. Each Parameter ID is associated with a particular function or component, allowing technicians to pinpoint the root cause of a fault. For example, a Parameter ID might indicate a faulty sensor or a wiring issue. These IDs are crucial for accurate diagnostics and repairs, as they offer a clear reference point for troubleshooting. The Volvo truck fault codes list PDF organizes Parameter IDs alongside fault codes, making it easier to interpret and resolve issues efficiently.

Understanding FMI Codes

FMI (Failure Mode Identifier) codes are two-digit numbers that describe the type of fault detected in a Volvo truck. They appear alongside Parameter IDs and fault codes, providing specific details about the malfunction. For example, FMI 3 might indicate a high voltage issue, while FMI 4 could signal a low voltage problem. These codes help technicians quickly identify whether the fault is electrical, mechanical, or software-related. By categorizing faults, FMI codes streamline troubleshooting, allowing for faster and more accurate repairs. The Volvo truck fault codes list PDF includes FMI codes, enabling technicians to understand the nature of the issue and address it effectively, minimizing downtime and ensuring safety.

Common Volvo Truck Fault Codes

Common Volvo truck fault codes include issues related to engine performance, transmission malfunctions, and ABS braking system problems. These codes, such as low fuel pressure or faulty sensors, help diagnose specific faults in the vehicle’s systems, guiding technicians to the root cause efficiently.

Engine Control Unit Fault Codes

Engine Control Unit (ECU) fault codes in Volvo trucks are critical for identifying issues within the engine system. These codes, such as MID249 BBM or MID232, often relate to sensor malfunctions, fuel pressure problems, or ignition system faults. For instance, a code like PID21 may indicate excessive fan speed due to voltage issues or wiring faults. Other common ECU codes involve fuel injector problems, air mass meter malfunctions, or crankshaft position sensor errors. These codes help technicians pinpoint the root cause of engine performance issues, such as rough idling, low power, or excessive fuel consumption. Addressing these faults promptly ensures optimal engine operation and reduces downtime for Volvo trucks.

Transmission Fault Codes

Transmission fault codes in Volvo trucks, such as MID136 or MID144, indicate issues with the automatic or manual transmission systems. These codes often relate to problems like solenoid malfunctions, pressure sensor faults, or clutch system errors. For example, a code like PID29 may signal an issue with the additional accelerator sensor, affecting gear shifts. Other common codes involve transmission temperature sensors or torque converter malfunctions. These codes help diagnose symptoms like erratic shifting, slipping gears, or reduced power. Addressing these faults is crucial to maintain smooth transmission operation and prevent costly repairs. Regular monitoring of these codes ensures optimal performance and extends the truck’s lifespan.

ABS and Braking System Codes

ABS and braking system codes in Volvo trucks, such as MID249 or PID29, identify issues with the anti-lock braking system or brake components. These codes often indicate problems like sensor malfunctions, wiring faults, or low brake pressure. For instance, a code might signal a faulty ABS sensor or a malfunction in the electronic brake control module. Symptoms can include the ABS light illuminating, spongy brakes, or reduced braking efficiency. Addressing these codes is critical for safety, as braking system faults can lead to accidents. Regular monitoring ensures proper ABS functionality, maintaining vehicle safety and compliance with regulations. Prompt repairs are essential to prevent further complications.

The Volvo Truck Fault Codes List PDF is a detailed resource that compiles all possible fault codes for Volvo trucks, providing descriptions, causes, and solutions. This document is essential for technicians, mechanics, and fleet operators to diagnose and repair issues efficiently. It covers codes related to the engine, transmission, ABS, and other critical systems. The PDF is widely available for download from official Volvo sources and third-party websites, offering a user-friendly format for quick reference. By referencing this list, professionals can identify faults accurately, reducing downtime and repair costs. It serves as a cornerstone for maintaining Volvo trucks’ performance, safety, and reliability.

Importance of the Volvo Truck Fault Codes List

The Volvo Truck Fault Codes List is a vital resource for maintaining operational efficiency and safety in Volvo vehicles. It provides a standardized system for identifying and diagnosing issues, enabling technicians to quickly address problems. This list minimizes downtime by offering clear, actionable information, reducing repair times and costs. It also enhances safety by highlighting critical issues that require immediate attention. The fault codes list serves as a universal language for technicians, ensuring consistency in troubleshooting and repairs. Regular use of this resource promotes proactive maintenance, preventing minor issues from escalating into major problems. It is indispensable for optimizing fleet performance and reliability.

How to Read Volvo Fault Codes

Connect the scanner to the OBD-II port, turn the ignition on, and retrieve the fault codes using a compatible diagnostic tool or OBD-II scanner.

Using an OBD-II Scanner

Locate the OBD-II port under the dashboard, connect the scanner, and turn the ignition to the ON position without starting the engine. Use the scanner to retrieve active and stored fault codes. The OBD-II scanner displays diagnostic trouble codes (DTCs), which correspond to specific issues in the Volvo truck’s systems. Each code provides details about the malfunction, such as the affected component or system. By referencing the Volvo truck fault codes list PDF, technicians can interpret the codes, identify the root cause, and perform necessary repairs. This process streamlines diagnostics, reducing downtime and ensuring efficient troubleshooting. Regular use of an OBD-II scanner helps maintain vehicle health and performance.

Utilizing Volvo Diagnostic Tools

Volvo diagnostic tools, such as Volvo Tech Tool, provide advanced capabilities for troubleshooting and repairing Volvo trucks. These tools connect to the vehicle’s systems to retrieve detailed fault codes, live data, and system status. They offer comprehensive diagnostics, including real-time monitoring of engine, transmission, and braking systems. Technicians can use these tools to identify specific faults, view repair guidance, and clear codes after fixes. The Volvo diagnostic tools are often used alongside the Volvo truck fault codes list PDF, which provides detailed explanations of codes and potential causes. This combination streamlines the diagnostic process, enabling efficient and accurate repairs. Regular updates ensure compatibility with the latest Volvo models and systems.

Troubleshooting with Volvo Fault Codes

Troubleshooting with Volvo fault codes involves using the Volvo truck fault codes list PDF to identify issues efficiently and guide repairs effectively, enhancing overall performance.

Step-by-Step Diagnostic Process

Begin by connecting a compatible OBD-II scanner or Volvo diagnostic tool to the truck’s OBD-II port, typically located under the dashboard. Turn the ignition to the “ON” position without starting the engine. Use the diagnostic tool to retrieve active and stored fault codes. Analyze the codes using the Volvo truck fault codes list PDF to identify the specific issue. Inspect the affected components and wiring, referencing the PDF for detailed explanations. Perform necessary repairs based on the fault code descriptions. After completing repairs, clear the codes using the diagnostic tool and test the system to ensure the issue is resolved.

Common Causes and Solutions

Common causes of Volvo truck fault codes include wiring issues, sensor malfunctions, and software glitches. Faulty connectors or damaged harnesses often trigger codes related to engine or transmission systems. Sensors, such as those for temperature or pressure, may fail due to corrosion or wear. Solutions involve inspecting and cleaning connectors, replacing damaged wiring, or updating software. For sensor-related issues, cleaning or replacing the sensor is typically required. Referencing the Volvo truck fault codes list PDF helps identify the root cause and provides repair guidance. Addressing these issues promptly ensures optimal performance and prevents further damage. Regular maintenance can help prevent recurring faults.

The Volvo truck fault codes list PDF is an invaluable resource for diagnosing and resolving issues efficiently. By providing detailed fault descriptions and repair guidance, it empowers technicians to address problems swiftly, minimizing downtime and repair costs. Regular use of this document ensures optimal vehicle performance, safety, and reliability. It serves as a comprehensive guide for maintaining Volvo trucks, helping to prevent future issues through proactive maintenance. The PDF is a testament to Volvo’s commitment to supporting its customers with precise and accessible diagnostic tools, making it an essential asset for anyone involved in truck maintenance and repair.

Where to Download the Volvo Truck Fault Codes List PDF

The Volvo truck fault codes list PDF can be downloaded from various reliable sources, including Volvo’s official website, authorized service centers, and trusted automotive forums. Official Volvo portals provide direct access to comprehensive diagnostic resources, ensuring accuracy and relevance. Additionally, third-party websites and forums often host downloadable versions of the list, making it easily accessible for technicians and operators. To ensure authenticity, it is recommended to download the PDF from Volvo-approved platforms or contact local Volvo service centers for assistance. This resource is indispensable for efficient troubleshooting and maintenance of Volvo trucks, offering detailed fault code interpretations and repair guidance.

Practical Applications of the Fault Codes List

The Volvo truck fault codes list PDF is a valuable resource for technicians, offering practical applications in diagnosing and resolving vehicle issues efficiently. It enables quick identification of faults, reducing downtime and repair costs. Technicians can use the list to guide routine maintenance, ensuring trucks operate optimally. The detailed fault codes help pinpoint specific problems, such as engine, transmission, or ABS system malfunctions. This tool also aids in troubleshooting complex issues, providing clear steps for resolution. By referencing the list, operators can enhance safety, improve performance, and plan maintenance schedules effectively. Its practical applications extend to repair planning and parts inventory management, making it indispensable for fleet management and individual truck owners alike.

The Volvo Truck Fault Codes List PDF is a comprehensive guide designed to help technicians and operators diagnose and resolve issues in Volvo trucks efficiently. It provides detailed information on fault codes, including descriptions, causes, and troubleshooting steps. The document is organized logically, making it easy to navigate and reference specific codes. By using this resource, users can identify malfunctions quickly, reducing downtime and repair costs. It also enhances safety and performance by addressing potential issues proactively. The PDF is a valuable tool for anyone involved in maintaining or repairing Volvo trucks, offering clear and actionable insights for optimal vehicle operation.

Posted in PDF