alaska cruise packing list pdf

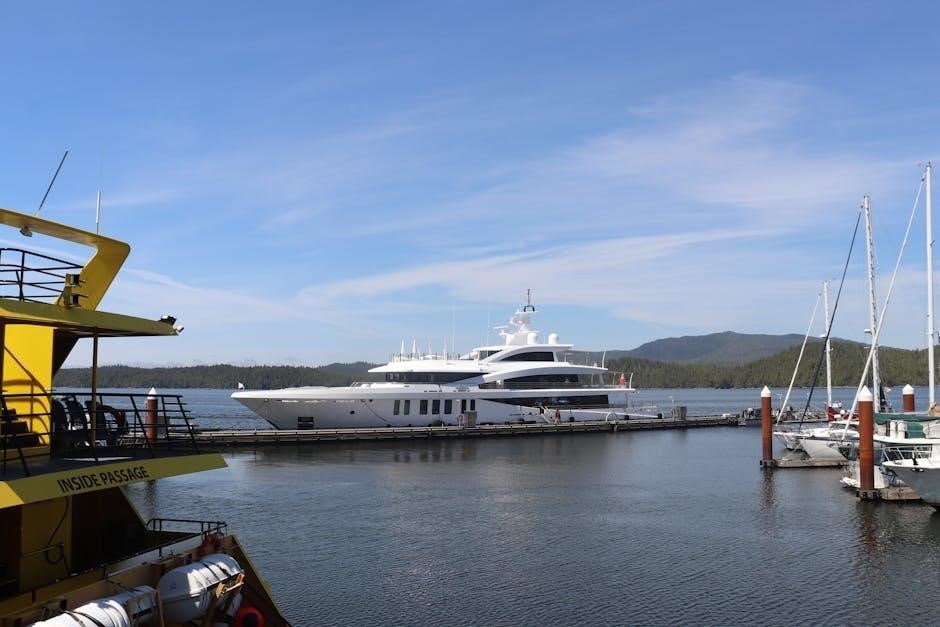
Packing for an Alaska cruise requires careful planning due to variable weather and diverse activities. Ensure you’re prepared with essentials to enjoy scenic views and wildlife safely.

1.1 Importance of Proper Packing for an Alaska Cruise

Proper packing is crucial for an Alaska cruise due to its unpredictable weather and diverse activities. Layers, waterproof gear, and essentials like binoculars ensure comfort and readiness. Without proper preparation, you might face discomfort or miss out on experiences like wildlife viewing or shore excursions. Packing smartly balances style, practicality, and safety, ensuring a seamless adventure in Alaska’s stunning but variable climate. It’s about being prepared for anything while maximizing enjoyment onboard and on land.

1.2 Overview of Key Items to Include

Essential items for an Alaska cruise include versatile clothing like T-shirts, long-sleeve shirts, and a waterproof jacket; Don’t forget accessories such as scarves and touchscreen gloves. Electronics like a camera and binoculars are crucial for capturing memories and wildlife viewing. Toiletries, sunscreen, and insect repellent are must-haves. Miscellaneous items like a backpack and waterproof bag ensure you’re prepared for shore excursions. Always check the cruise line’s packing restrictions and weather forecasts to tailor your list effectively for a seamless adventure.

Clothing Essentials for an Alaska Cruise

Pack versatile clothing, including T-shirts, long-sleeve shirts, a warm jacket, windbreaker, vest, scarves, gloves, and sweaters. Layering is key for unpredictable weather conditions.

2.1 Base Layers: Short- and Long-Sleeve Shirts

Base layers are essential for an Alaska cruise. Opt for breathable, moisture-wicking short- and long-sleeve shirts made from materials like merino wool or synthetic fabrics. These provide comfort in varying temperatures and can be layered under sweaters or jackets. Long-sleeve shirts offer additional warmth and protection from wind or cooler mornings, while short-sleeve shirts are ideal for indoor relaxation or warmer days. Pack a mix to ensure versatility for both onboard relaxation and outdoor adventures.

2.2 Outerwear: Waterproof Jackets, Windbreakers, and Vests

A waterproof jacket is a must for an Alaska cruise, offering protection against rain and wind. Consider a lightweight, breathable option with a hood for versatility. Windbreakers are ideal for milder days, providing wind resistance without bulk. Vests add warmth without restricting movement, perfect for cooler moments. Look for water-resistant materials and adjustable features to ensure comfort. These outerwear pieces are essential for braving unpredictable weather while enjoying deck views or shore excursions.

2.3 Accessories: Scarves, Touchscreen Gloves, and Sweaters

Scarves and sweaters add warmth and style, while touchscreen gloves keep hands functional in cold conditions. These accessories are perfect for layering and adapting to changing temperatures. Sweaters made of materials like fleece or wool provide insulation, and scarves can double as neck protection. Touchscreen gloves ensure you can capture memories without removing your gloves. These items are essential for staying comfortable and enjoying outdoor activities like wildlife viewing or strolling on deck during your Alaska cruise adventure.

Non-Clothing Essentials for Your Cruise

Non-clothing essentials include electronics like cameras and binoculars, toiletries, and practical items such as backpacks and insect repellent to ensure comfort and preparedness during your trip.

3.1 Electronics: Camera, Binoculars, and Chargers

A reliable camera is essential for capturing stunning Alaskan landscapes and wildlife. Binoculars are a must for spotting distant whales, eagles, and glaciers. Don’t forget chargers for your devices, extra memory cards, and a portable charger for long excursions. A waterproof phone case or camera housing is also recommended to protect your gear from rain or sea spray. These electronics will help you document and enhance your unforgettable cruise experience.

3.2 Toiletries and Sunscreen

Don’t forget to pack essential toiletries like toothbrush, toothpaste, shampoo, conditioner, and any personal hygiene items. Sunscreen is crucial, as the Alaskan sun can be strong, even in cooler weather. Consider packing insect repellent to protect against mosquitoes. Travel-sized toiletries are convenient for saving space in your luggage. Remember to include any necessary medications or skincare products. Ensuring you have these basics will keep you comfortable and prepared throughout your cruise adventure.

3.3 Miscellaneous: Backpack, Waterproof Bag, and Insect Repellent

A lightweight, sturdy backpack is ideal for shore excursions and day trips, keeping essentials within reach. A waterproof bag is a must to protect belongings from rain or water activities. Insect repellent is crucial, as mosquitoes and other bugs can be prevalent in Alaskan regions. These items ensure convenience, protection, and comfort, making them indispensable additions to your Alaska cruise packing list.

Travel Documents and Safety Items

Ensure you carry essential documents like passports, driver’s licenses, and travel insurance. Pack a first aid kit and any personal medications to stay safe and prepared during your cruise.

4.1 Passports, Driver’s Licenses, and Travel Insurance

A valid passport is essential for international travel, and ensure it’s valid for at least six months beyond your return date. Carry a driver’s license as a secondary ID. Travel insurance is crucial for unexpected medical or trip cancellations. Keep copies of these documents separate from originals in case of loss or theft. Double-check expiration dates and policy coverage before departure. These items are vital for smooth check-in, border crossings, and emergencies during your Alaska cruise.

4.2 Cruise-Specific Documents and ID

Ensure you have printed or digital copies of your cruise ticket and ID card. Bring a credit card for onboard expenses and a valid photo ID for age verification. Check if your cruise requires additional documents like excursion confirmations or health forms. Keep these items easily accessible in a waterproof pouch to avoid delays during embarkation or shore excursions. Organizing your cruise-specific documents ensures a smooth and stress-free experience throughout your Alaska adventure.

4.3 Health and Safety: Medications and First Aid Kit

Pack all prescribed medications in their original packaging and bring a copy of your prescription. Include over-the-counter remedies like pain relievers and antihistamines. A first aid kit should contain band-aids, antacids, and antibacterial wipes. Don’t forget seasickness remedies, as some passengers experience motion sensitivity. Consider packing motion sickness bands or consult your healthcare provider for recommendations. Ensure your kit is easily accessible and restocked before your trip to maintain health and safety throughout your Alaska cruise adventure.

Additional Packing Tips for an Alaska Cruise

Layering clothing for adaptability, selecting practical luggage, and preparing for unpredictable weather are crucial for maximizing comfort and enjoyment on your Alaska cruise journey.

5.1 Layering Clothing for Versatility

Layering is essential for adapting to Alaska’s unpredictable weather. Start with breathable base layers like short- and long-sleeve shirts made of merino wool or moisture-wicking fabrics. Add insulating mid-layers such as sweaters or fleeces for colder moments. Finally, top with a waterproof and windproof outer layer to protect against rain and gusts. This system allows flexibility, ensuring comfort whether exploring glaciers or relaxing onboard. Choose versatile pieces that can be easily mixed and matched for different activities and conditions.

5.2 Choosing the Right Luggage

Selecting the right luggage for your Alaska cruise is crucial for convenience and comfort. Opt for durable, water-resistant bags with multiple compartments to keep items organized. Consider a medium-sized suitcase with multi-wheel spinners for easy maneuverability. A lightweight, water-repellent backpack is ideal for shore excursions. Ensure your luggage fits the cruise line’s size and weight restrictions. Choose materials like nylon or polyester for longevity. Proper luggage ensures a stress-free journey and adapts to the unique demands of your Alaska adventure.

5.3 Preparing for Variable Weather Conditions

Alaska’s unpredictable weather demands versatile packing. Bring a lightweight rain poncho, moisture-wicking fabrics, and quick-drying items. Include a compact umbrella and waterproof footwear with traction for wet decks. Pack thermal layers for cold mornings and breathable clothing for warmer afternoons. Don’t forget accessories like a warm hat, neck gaiter, and gloves for cooler days. Consider gear with UV protection for sunny moments. Balancing practicality and adaptability ensures you’re ready for any weather scenario during your Alaska cruise adventure.

Bonus Tips for Maximizing Your Cruise Experience

Enhance your Alaska cruise with binoculars for wildlife viewing, comfortable footwear for shore excursions, and cultural-inspired packing to immerse in local traditions and scenic beauty effectively.

6.1 Binoculars for Wildlife Viewing

Binoculars are essential for spotting wildlife like whales, eagles, and bears during your Alaska cruise. Opt for waterproof, 7x or 8x magnification models for clarity in marine environments. Compact binoculars are ideal for easy handling and storage. They enhance your ability to observe distant animals without disturbing them, making every wildlife encounter unforgettable. Ensure they are waterproof to withstand sea spray and rain, allowing you to enjoy unobstructed views throughout your journey.

6.2 Comfortable Footwear for Shore Excursions

Comfortable footwear is crucial for Alaska cruise shore excursions, as activities often involve hiking, exploring uneven terrain, or walking on wet surfaces. Opt for waterproof shoes or sturdy hiking boots with good traction to handle trails and wet landings. Breathable materials and cushioning will keep your feet comfortable during long walks. Pack lightweight sneakers for casual port visits and sandals with a good grip for onboard relaxation. Proper footwear ensures you can fully enjoy both adventurous and leisurely activities during your trip.

6.3 Cultural and Wildlife-Specific Packing

Cultural and wildlife-specific packing enhances your Alaska cruise experience. Bring binoculars for wildlife viewing, such as whales, bears, and eagles. Include a field guide to identify species and learn about local ecosystems. Respect cultural sites by packing modest clothing for shore visits. A reusable water bottle and eco-friendly toiletries support sustainable tourism. Capture memories with a camera and tripod for stunning landscapes and wildlife shots, ensuring you’re prepared to engage with Alaska’s unique culture and natural beauty responsibly and effectively during your journey.

Posted in PDF

the birthmark story pdf

Nathaniel Hawthorne, a 19th-century American writer, was born in Salem, Massachusetts, to a family with Puritan heritage․ His works, like The Birthmark, explore themes of human nature, morality, and the complexities of scientific ambition, blending realism with gothic elements․

1․1․ Biographical Background

Nathaniel Hawthorne was born in 1804 in Salem, Massachusetts, to a family with deep Puritan roots․ His ancestors’ history influenced his writing, exploring moral and ethical dilemmas․ Hawthorne graduated from Bowdoin College in 1825, befriending notable figures like Henry Wadsworth Longfellow․ His works, including The Birthmark, reflect his fascination with human nature and the complexities of scientific ambition․

1․2․ Significance of “The Birthmark” in His Work

“The Birthmark” is a pivotal work in Hawthorne’s oeuvre, showcasing his mastery of blending gothic elements with philosophical inquiry․ It highlights his fascination with human imperfection and the dangers of unchecked ambition, themes central to his exploration of the human condition․ The story’s profound moral and psychological depth solidifies its place as a cornerstone of American literary heritage․

Major Themes in “The Birthmark”

The story explores themes of perfection and obsession, critiquing the pursuit of flawless ideals and the destructive consequences of unchecked ambition, reflecting on human nature and science․

2․1․ The Pursuit of Perfection

In Nathaniel Hawthorne’s The Birthmark, the pursuit of perfection is a central theme․ Scientist Aylmer obsesses over removing a birthmark from his wife Georgiana’s cheek, seeing it as her only flaw․ His relentless quest reflects humanity’s desire to transcend mortality and achieve an unattainable ideal, underscoring the futility, danger, and tragic consequences of such relentless pursuits․

2․2․ The Consequences of Obsession

In The Birthmark, Aylmer’s relentless pursuit of perfection ultimately leads to tragedy․ His obsession with removing Georgiana’s birthmark consumed him, blinding him to the beauty of human imperfection․ The story highlights the destructive power of obsession, as Aylmer’s fixation not only destroys his relationship but also results in Georgiana’s death․ This serves as a cautionary tale about the dangers of unchecked ambition and the loss of humanity in scientific pursuits․

Plot Summary of “The Birthmark”

Aylmer, a scientist, becomes obsessed with removing a birthmark from his wife Georgiana’s cheek, believing it mars her perfection․ His experiments lead to tragic consequences․

3․1․ Main Characters and Their Roles

The story revolves around Aylmer, a brilliant yet obsessive scientist, and his wife Georgiana, whose birthmark symbolizes human imperfection․ Aminadab, Aylmer’s practical assistant, contrasts with Aylmer’s idealism, highlighting the clash between science and reality․ Each character plays a crucial role in exploring themes of perfection, obsession, and the consequences of scientific hubris․

3․2․ Key Events and Plot Development

The story revolves around Aylmer’s obsession with removing Georgiana’s birthmark, symbolizing his quest for perfection․ As the mark disappears, Georgiana dies, highlighting the tragic consequences of Aylmer’s relentless pursuit․ The narrative unfolds through his increasing fixation, failed experiments, and the ultimate realization of his folly, leaving a haunting reflection on human ambition and its costs․

Character Analysis

The story revolves around Aylmer, a scientist consumed by his quest for perfection, Georgiana, his wife bearing a symbolic birthmark, and Aminadab, representing the grounding force of reality․

4․1․ Aylmer: The Scientist’s Dilemma

Aylmer, a brilliant yet obsessive scientist, is driven by the pursuit of perfection․ His love for Georgiana conflicts with his desire to remove her birthmark, symbolizing human imperfection․ This obsession reveals his tragic flaw: the hubris of scientific ambition over nature and love․ His dilemma underscores the consequences of unchecked intellectual pride and the destructive pursuit of an unattainable ideal․

4․2․ Georgiana: The Tragic Heroine

Georgiana, Aylmer’s wife, embodies innocence and beauty, yet her life is overshadowed by the birthmark, a symbol of her humanity․ Her tragic fate stems from Aylmer’s obsessive quest for perfection, which ultimately leads to her death․ This poignant character highlights the destructive nature of obsession and the inevitability of human imperfection․

4․3․ Aminadab: The Symbol of Reality

Aminadab, the laboratory assistant, represents the grounding force of reality amidst Aylmer’s obsessive scientific pursuits․ His practical, skeptical nature contrasts with Aylmer’s idealism, symbolizing the limits of human ambition․ Aminadab’s presence underscores the story’s themes of imperfection and the futility of seeking perfection, offering a counterbalance to the scientist’s misguided endeavors․

Symbolism in “The Birthmark”

The birthmark symbolizes human imperfection and mortality, while the laboratory represents the clash between science and nature․ Light and shadows emphasize moral dilemmas․

5․1․ The Birthmark as a Symbol of Imperfection

The birthmark symbolizes Georgiana’s humanity and individuality, contrasting with Aylmer’s pursuit of perfection․ It represents the inevitable imperfection in nature, highlighting the futility of striving for an unattainable flawless ideal․ The mark serves as a reminder of human limitations, underscoring the tragic consequences of obsession with perfection and the loss of natural beauty in the process․

5․2․ The Laboratory as a Symbol of Science vs․ Nature

The laboratory in “The Birthmark” symbolizes the clash between science and nature, representing Aylmer’s quest for perfection through scientific control․ It serves as a space where human ambition attempts to dominate natural imperfection, highlighting the tension between progress and the unalterable essence of life․ This setting underscores the futility of manipulating nature and the ethical dilemmas of scientific hubris․

Historical and Cultural Context

The story reflects 19th-century America’s scientific revolution and Puritan heritage, influencing its exploration of human imperfection and moral dilemmas through a blend of realism and gothic themes․

6․1․ The Influence of 19th-Century Scientific Revolution

The 19th-century scientific revolution shaped Hawthorne’s exploration of human ambition and ethics in The Birthmark․ The era’s emphasis on scientific progress and perfection inspired Aylmer’s obsessive pursuit of flawlessness, reflecting societal fascination with innovation and its potential consequences․ This context underscores the story’s cautionary themes about the limits of science and human hubris․

6․2․ Puritan Heritage and Its Impact on the Story

Nathaniel Hawthorne’s Puritan heritage deeply influenced The Birthmark, as his ancestral history, including ties to the Salem witch trials, shaped his exploration of guilt, morality, and human imperfection․ The story reflects Puritan values like the pursuit of perfection and the fear of sin, with Aylmer’s obsession mirroring the Puritan belief in eradicating flaws, even at the cost of humanity․

Literary Style and Devices

Hawthorne’s style in The Birthmark combines gothic elements with profound irony, creating a haunting atmosphere that underscores the moral and philosophical dilemmas central to the narrative․

7․1․ Hawthorne’s Use of Gothic Elements

In The Birthmark, Hawthorne employs gothic elements to create an eerie atmosphere, emphasizing the dark, dungeon-like laboratory and the mysterious birthmark․ The story’s foreboding tone, tragic ending, and exploration of obsession and perfection align with gothic traditions, blending psychological depth with supernatural undertones to critique human ambition and scientific hubris․

7․2․ Irony and Foreshadowing

Hawthorne masterfully employs irony and foreshadowing in The Birthmark․ The story’s tragic ending is subtly hinted at through Aylmer’s obsessive pursuit of perfection, while the birthmark itself symbolizes life’s imperfections․ Irony lies in Aylmer’s ultimate failure to achieve his goal, underscoring the futility of human attempts to defy nature․ Foreshadowing is evident in Georgiana’s eerie premonitions and the birthmark’s persistent presence, amplifying the tale’s haunting resonance․

Critical Reception and Analysis

Critics have extensively analyzed The Birthmark, praising its exploration of perfection and obsession; David Baxter’s 1975 perspective highlights its moral complexity․ Modern scholars link it to contemporary issues․

8․1․ Contemporary Reviews of “The Birthmark”

When first published in 1843, The Birthmark received mixed reviews, with critics praising its moral depth while others found its scientific themes unsettling․ Many noted its exploration of perfection and human fallibility, aligning with the era’s fascination with science and ethics․ The story’s dark undertones resonated with readers, cementing its place in Gothic literature․

8․2․ Modern Interpretations of the Story

Modern scholars interpret The Birthmark as a cautionary tale about the dangers of unchecked scientific ambition and the pursuit of perfection․ Feminist critiques highlight Georgiana’s tragic fate, symbolizing the societal pressures on women․ Psychological analyses explore Aylmer’s obsessive personality, while cultural studies connect the story to contemporary debates on ethics and technology․ Educational resources, like PDF study guides, facilitate deeper analysis of these themes․

Comparison with Other Hawthorne Works

Similar themes of guilt and redemption appear in The Scarlet Letter, while Young Goodman Brown explores faith․ The Birthmark uniquely critiques perfection and science․

9․1․ Similar Themes in “The Scarlet Letter”

Both The Birthmark and The Scarlet Letter explore themes of guilt, sin, and redemption, reflecting Hawthorne’s preoccupation with human imperfection․ Both works critique societal judgment and the consequences of obsession, whether in science or morality․ The struggle between individual desire and societal norms is a common thread, highlighting Hawthorne’s nuanced understanding of human nature and its complexities․

9․2․ Contrasts with “Young Goodman Brown”

While both stories explore moral dilemmas, “Young Goodman Brown” focuses on faith and sin, whereas “The Birthmark” examines scientific obsession․ The former critiques Puritan ideals, while the latter questions the pursuit of perfection․ Both feature tragic endings, but Brown’s downfall stems from lost faith, whereas Aylmer’s arises from unchecked ambition, highlighting different facets of human frailty․

Educational Resources and Downloads

Download PDF versions of The Birthmark from sources like Project Gutenberg and Mosses from an Old Manse for easy access and academic study․

These resources are ideal for deeper analysis and educational purposes, offering the complete story and related study materials․

10․1․ Available PDF Versions of “The Birthmark”

PDF versions of The Birthmark are widely available online, including free downloads from Project Gutenberg and Google Books․ Many academic and literary websites offer the story in PDF format, often as part of Mosses from an Old Manse (1846), the collection where it was first published․ These resources are ideal for students and researchers seeking accessible copies of Hawthorne’s work․

10․2․ Study Guides and Lecture Notes

Various PDF versions of The Birthmark are available online, including lecture notes from educational institutions․ Resources like Mosses from an Old Manse offer detailed analyses, while websites such as gutenberg․org provide free access to the story․ Additionally, study guides highlight themes, characters, and symbolic elements, aiding deeper understanding for students and scholars․ These materials are invaluable for academic exploration․

Cultural Impact and Adaptations

“The Birthmark” has influenced literature and education, with its themes appearing in various adaptations and academic resources, making it a timeless piece in both study and discussion․

11․1․ The Story’s Influence on Literature and Film

The Birthmark has significantly influenced literature and film, inspiring works that explore themes of perfection and scientific hubris․ Its gothic undertones and moral complexity have made it a staple in academic studies and adaptations․ The story’s timeless themes continue to resonate, appearing in anthologies and educational resources, ensuring its relevance in modern cultural discourse and scholarly analysis․

11․2․ Modern References to “The Birthmark”

“The Birthmark” remains relevant in modern education, with PDF versions and study guides widely available for academic use․ It is often included in lecture notes and presentations, highlighting its enduring impact on literary studies․ The story’s themes are frequently referenced in discussions about perfection and science vs․ nature, ensuring its continued influence in both literature and education․

Nathaniel Hawthorne’s The Birthmark remains a timeless tale exploring human imperfection and moral dilemmas․ Its enduring relevance underscores Hawthorne’s profound insight into the complexities of human nature․

12․1․ The Timeless Relevance of “The Birthmark”

“The Birthmark” remains a timeless tale due to its exploration of universal themes like the pursuit of perfection, the dangers of obsession, and the clash between science and nature․ Its gothic undertones and moral complexity continue to resonate, making it a subject of modern interpretations and adaptations in literature, film, and cultural discourse, ensuring its enduring relevance․

12․2․ Final Thoughts on Hawthorne’s Legacy

Nathaniel Hawthorne’s legacy endures as a master of exploring human nature, morality, and the complexities of ambition․ His works, like The Birthmark, blend gothic elements with profound psychological insights, leaving a lasting impact on American literature․ His ability to weave timeless themes ensures his stories remain relevant, influencing both literary and cinematic adaptations, cementing his place as a foundational figure in American literary history․

Posted in PDF

call of cthulhu 7th ed rulebook pdf

The 7th Edition Rulebook is a comprehensive guide for Call of Cthulhu, offering streamlined mechanics, eerie atmosphere, and essential tools for both players and Keepers to craft chilling adventures.

1.1 Overview of the 7th Edition

The 7th Edition of the Call of Cthulhu Rulebook offers a refined and modernized take on the classic horror RPG. It introduces streamlined gameplay mechanics, enhanced clarity, and expanded resources for Keepers and players alike. The revised edition maintains the eerie atmosphere and investigative focus that define the game while incorporating feedback from decades of play. With a focus on horror and mystery, it provides tools to craft immersive stories and terrifying encounters, ensuring a fresh yet familiar experience for both newcomers and veterans.

1;2 Key Features of the Revised Rulebook

The 7th Edition Rulebook boasts several key features, including streamlined gameplay mechanics, enhanced character creation options, and revised rules for sanity and combat. It introduces a more intuitive skill system and clarified investigation mechanics, making it easier for new players to dive in while retaining depth for veterans. The rulebook also includes updated spells, rituals, and a vast bestiary of Lovecraftian horrors. Chaosium has refined the content to ensure a darker, more immersive experience, staying true to the eerie atmosphere that defines the Call of Cthulhu legacy.

Structure of the Keeper Rulebook

The Keeper Rulebook is organized into core rules, character creation, and gameplay mechanics, providing a comprehensive guide for crafting immersive, horrifying scenarios and managing investigations.

2.1 Core Rules and Gameplay Mechanics

The 7th Edition Rulebook outlines core mechanics, including task resolution, sanity, and combat systems. It introduces the Luck mechanic and streamlined rules for spellcasting and skill checks, enhancing gameplay flow. The revised edition ensures clarity and consistency, with detailed examples aiding Keepers and players. These mechanics create a suspenseful atmosphere, central to the Lovecraftian experience. The rules are designed to foster storytelling and maintain immersion, making them accessible to new players while offering depth for veterans. The digital PDF format allows easy reference during sessions, enhancing the overall play experience.

2.2 Character Creation and Development

Character creation in the 7th Edition Rulebook emphasizes investigative skills and background, allowing players to craft unique investigators. The revised system includes streamlined attribute allocation, skill selection, and occupation-based bonuses. Characters develop through experience points, enhancing skills and uncovering new abilities. Sanity mechanics are central, reflecting the psychological toll of supernatural encounters. The rulebook provides optional rules for aging and occupational hazards, adding depth to character progression. Digital tools, like PDF character sheets, simplify tracking stats and development, ensuring a seamless experience for players and Keepers alike.

2.3 New Additions in the 7th Edition

The 7th Edition introduces enhanced rules for combat, magic, and sanity, offering a refined gameplay experience. New scenarios and revised sections provide fresh horror elements. Optional rules for modern-day and futuristic settings expand gameplay possibilities. The rulebook also includes a bestiary of classic and new monsters, along with detailed scenario hooks. These additions enhance storytelling and deepen immersion, making the 7th Edition a must-have for both new and veteran players of Call of Cthulhu.

Availability of the 7th Edition Rulebook in PDF Format

The 7th Edition Rulebook is available in PDF format from Chaosium’s official website and other digital platforms, offering convenient access for players and Keepers worldwide.

3.1 Where to Find the Official PDF

The official PDF of the Call of Cthulhu 7th Edition Rulebook can be purchased directly from Chaosium’s official website or through digital retailers like DriveThruRPG. Additionally, it is available for download via platforms such as Bits & Mortar for those who own the physical copy. Ensure you purchase from authorized sources to support the creators and avoid unauthorized versions. Visit Chaosium’s website for the most reliable access to the digital version.

3;2 System Requirements for Digital Access

To access the Call of Cthulhu 7th Edition Rulebook in PDF format, ensure your device meets basic requirements. A PDF reader like Adobe Acrobat or Foxit Reader is essential. The file is compatible with most modern operating systems, including Windows, macOS, and Linux. For mobile access, tablets and smartphones with PDF viewing apps are sufficient. No additional software is needed beyond a standard PDF viewer. Ensure your device has adequate storage to accommodate the file size, typically around 60-70 MB for the core rulebook. Digital copies are available through authorized retailers like Chaosium or DriveThruRPG.

3.3 Benefits of the Digital Version

The digital version of the Call of Cthulhu 7th Edition Rulebook offers enhanced convenience and accessibility. Players and Keepers can easily search for specific rules or scenarios using built-in search functions. Hyperlinks within the document simplify navigation between sections. The PDF format allows for easy sharing among players and can be accessed on multiple devices. Additionally, digital storage saves physical space, and regular updates from Chaosium ensure you always have the latest version. This format is ideal for both new and experienced players seeking a seamless gaming experience.

Monsters and Enemies in the 7th Edition

The 7th Edition expands the bestiary, featuring iconic creatures like Shoggoths and Deep Ones, while introducing terrifying new beings to enhance the cosmic horror experience.

4.1 Classic Creatures from the Cthulhu Mythos

The 7th Edition Rulebook revives iconic horrors from H.P. Lovecraft’s mythos, including Shoggoths, Deep Ones, and the Great Old Ones like Cthulhu. These creatures embody cosmic dread, with detailed stats and lore to enhance gameplay. Their terrifying presence challenges investigators, creating an eerie atmosphere. The rulebook ensures these classic beings remain central to the game’s horror experience, inspiring existential fear and madness. Their inclusion bridges tradition and innovation, offering familiar terrors for veteran players while introducing them to newcomers.

4.2 New Monsters Introduced in the 7th Edition

The 7th Edition expands the Cthulhu Mythos with fresh, terrifying entities, each designed to deepen the horror experience. These new monsters offer unique abilities and disturbing backgrounds, adding variety to encounters. They blend seamlessly with classic creatures, providing Keepers with diverse tools to unsettle investigators. From otherworldly beings to unsettling human cultists, these additions enrich the game’s lore and gameplay, ensuring even veteran players face unexpected terrors. The revised rulebook’s bestiary is a testament to the enduring appeal of Lovecraftian horror, keeping the Mythos alive and evolving.

Compatibility with Previous Editions

The 7th Edition maintains backwards compatibility with earlier versions, ensuring seamless integration of older content while introducing refined mechanics and new features for enhanced gameplay consistency.

5.1 Backwards Compatibility Explained

The 7th Edition of Call of Cthulhu is designed to be fully compatible with earlier editions, allowing players to use existing content seamlessly. Conversion guidelines are provided to adapt older scenarios, characters, and monsters to the new system. Stat blocks and rules have been updated for clarity, but core mechanics remain familiar. This ensures that Keepers and players can integrate decades of existing material without rewriting entire campaigns, making the transition to the 7th Edition smooth and accessible for veterans and newcomers alike.

5.2 Conversion Guidelines for Older Content

The 7th Edition provides detailed conversion guidelines to adapt older scenarios, characters, and monsters to the new system. These guidelines help Keepers update beloved content while maintaining compatibility. Adjustments focus on character stats, skill systems, and monster balance. The core gameplay remains consistent, ensuring a smooth transition. Players can easily integrate older supplements and scenarios with minimal adjustments, preserving decades of rich content for continued use in the 7th Edition, enhancing playability and accessibility for both new and veteran players alike.

Additional Resources and Supplements

The 7th Edition offers a variety of additional resources, including official supplements, scenarios, and character sheets, enhancing gameplay and providing extensive content for both Keepers and players.

6.1 Official Supplements and Scenarios

The 7th Edition is supported by a wide array of official supplements and scenarios, offering diverse storylines and settings. These include classic adventures, modern-day horrors, and historical scenarios like Cthulhu Invictus, set in Ancient Rome. Digital versions of these supplements are readily available, providing instant access to new content. Chaosium also releases periodic updates and expansions, ensuring fresh material for Keepers and players alike. These resources enhance gameplay, offering richer narratives and deeper immersion into the eerie world of Cthulhu.

6.2 Quick-Start Rules and Starter Sets

The 7th Edition offers Quick-Start Rules and Starter Sets, perfect for newcomers to dive into the eerie world of Call of Cthulhu. These resources provide streamlined rules, pre-generated investigators, and introductory scenarios, making it easy for players and Keepers to begin their horror-filled adventures. Available as free or low-cost PDFs, these starter sets are a gateway to the full game, ensuring a smooth transition into the immersive universe of cosmic horror and mystery.

6.3 Character Sheets and Digital Tools

Official character sheets for the 7th Edition are available as downloadable PDFs, helping players organize their investigators’ stats, skills, and backstories. Digital tools like PDF rulebooks offer convenience, with features such as bookmarks and search functionality. These resources enhance gameplay by providing quick access to rules and character management, ensuring a smoother experience for both players and Keepers in their cosmic horror adventures.

Posted in PDF

bosch 4100 table saw manual

Bosch 4100 Table Saw Manual Overview

The Bosch 4100 table saw manual provides essential guidance for safe operation, assembly, and maintenance. It includes detailed instructions for setup, troubleshooting, and optimal performance.

1.1 Key Features of the Bosch 4100 Table Saw

The Bosch 4100 table saw is a powerful tool featuring a 15-amp motor for robust performance. It includes a 10-inch blade, ideal for ripping and cross-cutting lumber. The digital rip fence ensures precise measurements, while the Gravity-Rise stand offers portability and easy setup. With a 30-inch rip capacity, it handles large materials effortlessly. The saw also includes safety features like a blade guard and anti-kickback pawls. Its durable construction and versatile design make it suitable for both professionals and DIY enthusiasts, providing reliable results in various woodworking projects.

1.2 Importance of Reading the Manual

Reading the Bosch 4100 table saw manual is crucial for understanding its operation, safety features, and maintenance requirements. The manual provides detailed instructions for assembling and installing the saw, ensuring proper setup and functionality. It outlines essential safety precautions to prevent accidents and highlights troubleshooting tips for common issues. By following the manual, users can optimize the saw’s performance, extend its lifespan, and make the most of its advanced features. Familiarizing yourself with the manual also helps in addressing warranty-related queries and accessing customer support effectively. It serves as a comprehensive guide for both professionals and DIY enthusiasts to use the tool safely and efficiently.

1.3 Where to Download the Bosch 4100 Manual

The Bosch 4100 table saw manual is readily available for download from authorized sources. Sears Parts Direct offers free PDF downloads of the manual, providing easy access to operating instructions and safety guidelines. Additionally, Bosch’s official website and other trusted online platforms host the manual for free. Ensure you download from reputable sites to avoid unauthorized versions. The manual is essential for understanding the saw’s features, assembly, and maintenance. By downloading it, users can access detailed diagrams and troubleshooting tips, ensuring optimal performance and safety while operating the Bosch 4100 table saw.

Safety Instructions and Precautions

Always wear protective gear and follow safety guidelines to prevent accidents. Keep loose clothing tied and avoid overreach. Bosch 4100 specific safety notes ensure safe operation.

2.1 General Safety Guidelines for Table Saws

General safety guidelines for table saws emphasize wearing protective gear like safety glasses and a dust mask; Ensure blade guards are in place and functioning correctly. Keep loose clothing and long hair tied back to avoid entanglement. Maintain a clean and stable work environment, free from distractions. Never operate the saw with wet hands or while fatigued. Use push sticks for small or narrow workpieces to maintain control. Always disconnect the power source before making adjustments. Familiarize yourself with emergency stop procedures. Keep children and bystanders at a safe distance. Properly install blades as per the manual for safe operation.

2.2 Specific Safety Notes for the Bosch 4100 Model

The Bosch 4100 table saw manual highlights specific safety precautions to ensure safe operation. Always ensure the blade guard is properly installed and functioning. Never use damaged or dull blades, as they can cause kickback. Keep the work area clean and free from debris to prevent accidents. Avoid overreaching or leaning over the saw while cutting. Always use the provided digital rip fence correctly and ensure it is locked in place. Disconnect the power source before making any adjustments or blade changes. Follow Bosch’s guidelines for proper blade installation and alignment to maintain optimal performance and safety.

Assembly and Installation

Mount the Bosch 4100 table saw to the TS2100 stand following manual instructions for stability. Ensure all bolts are securely tightened for safe operation and accuracy.

3.1 Mounting the Bosch 4100 Table Saw to the TS2100 Stand

Mounting the Bosch 4100 table saw to the TS2100 stand ensures stability and portability. Begin by aligning the saw’s base with the stand’s mounting brackets. Use the provided bolts to secure the saw firmly. Tighten all connections to prevent vibration and ensure level placement. Follow the manual’s assembly instructions for precise alignment. Once mounted, check the saw’s level and adjust if necessary. Ensure the stand is locked in place before use. Proper installation ensures safe operation and optimal performance. Always refer to the manual for specific torque specifications and safety precautions.

3.2 Step-by-Step Assembly Instructions

Begin by unpacking and inventorying all components, including the table saw, stand, and accessories. Attach the TS2100 stand to the saw base using the provided hardware, ensuring all bolts are securely tightened. Next, install the digital rip fence by aligning it with the table’s edge and securing it with screws. Align the blade with the rip fence for accurate cuts. Attach the miter gauge and other accessories according to the manual. Finally, test the saw at a low speed to ensure proper function. Refer to the manual for torque specifications and safety guidelines during assembly.

Operating the Bosch 4100 Table Saw

Start with rip cuts or cross cuts using the digital rip fence for precision. Adjust the blade angle and height for specific materials. Utilize the outfeed support table for efficient cutting.

4.1 Making Rip Cuts and Cross Cuts

Making rip cuts and cross cuts with the Bosch 4100 table saw is straightforward. For rip cuts, align the material with the rip fence and feed it smoothly. Cross cuts require using a miter gauge or crosscut sled for accuracy. Always maintain control and keep hands away from the blade. Use proper push sticks or accessories for safer operations. The digital rip fence ensures precise measurements, enhancing the quality of both rip and cross cuts. Regularly inspect the fence alignment for optimal results.

4.2 Using the Digital Rip Fence for Precision

The digital rip fence on the Bosch 4100 table saw enhances precision and control. It allows for accurate measurements and smooth adjustments, ensuring consistent results. The self-aligning design simplifies setup, while the large, clear display provides easy readability. With a rip capacity of up to 25 inches, it accommodates a wide range of materials. Users can quickly lock and unlock the fence for versatility. This feature is ideal for both rip cuts and cross cuts, reducing errors and improving overall accuracy. Regularly checking the fence alignment ensures optimal performance and maintains the tool’s precision capabilities.

Maintenance and Troubleshooting

Regular cleaning and blade inspection ensure optimal performance. Check for dust buildup and proper belt tension. Address common issues like uneven cuts by aligning the fence and verifying blade sharpness. Schedule periodic maintenance for longevity and reliability;

5.1 Regular Maintenance Tips for Optimal Performance

Regular maintenance ensures the Bosch 4100 table saw operates at its best. Clean the table and fence regularly to prevent dust buildup. Inspect and replace the blade when dull, as a sharp blade improves accuracy and reduces strain. Lubricate moving parts, such as the fence mechanism and motor bearings, to maintain smooth operation. Check the belt for wear and align the rip fence properly. Store the saw in a dry, clean environment and avoid exposure to extreme temperatures. Proper care extends the tool’s lifespan and ensures consistent performance.

5.2 Common Issues and Solutions

Common issues with the Bosch 4100 table saw include uneven cuts, misaligned fence, and motor overheating. For uneven cuts, ensure the blade is sharp and properly aligned. If the fence is misaligned, recalibrate it according to the manual. Motor overheating can occur due to dust buildup or excessive load; clean the saw regularly and avoid overloading. Blade wobbling may require tightening the arbor nut or replacing the blade. Addressing these issues promptly ensures optimal performance and safety. Always refer to the manual for specific solutions and troubleshooting steps to maintain your tool’s efficiency and longevity.

Accessories and Upgrades

The Bosch 4100 table saw can be enhanced with accessories like the outfeed support table kit and other optional upgrades for improved functionality and productivity.

6.1 Bosch Table Saw Outfeed Support Table Kit

The Bosch Table Saw Outfeed Support Table Kit is designed to enhance productivity by providing additional support for large workpieces. Compatible with models like the TS1008 and TS1016, this accessory helps manage materials more efficiently during cutting. It is especially useful for handling long or heavy boards, ensuring precise cuts and reducing the risk of accidents. The kit integrates seamlessly with the Bosch 4100 table saw, offering a stable and durable solution for woodworking projects. Proper installation is essential to maximize its benefits and maintain optimal performance during operations.

6.2 Optional Accessories for Enhanced Functionality

Beyond the outfeed support kit, several optional accessories can enhance the Bosch 4100 table saw’s functionality. These include a gravity-rise wheeled stand for portability, a digital rip fence for precise cuts, and a dado insert for specialized joints. Additionally, a table saw stand with wheels offers easy mobility, while a miter gauge ensures accurate crosscuts. Other accessories like a push stick or safety guards can improve safety and control. These additions allow users to customize their setup for specific tasks, making the Bosch 4100 table saw a versatile tool for various woodworking projects. They are available separately and can be installed according to the manual’s instructions.

Warranty and Customer Support

The Bosch 4100 table saw comes with a comprehensive warranty program, ensuring coverage for defects in materials and workmanship. Bosch customer support provides assistance for inquiries and repairs.

7.1 Understanding the Bosch Warranty Program

The Bosch warranty program for the 4100 table saw offers protection against defects in materials and workmanship. The warranty period varies by product and region, typically covering one to two years for most components. Registration may be required to activate warranty benefits. The program ensures repair or replacement of faulty parts, excluding wear and tear. For detailed terms, users should refer to the manual or Bosch’s official website. Understanding the warranty helps owners utilize their coverage effectively and maintain their tool’s performance over time.

7.2 Contacting Bosch Customer Service

To contact Bosch customer service for the 4100 table saw, visit their official website or refer to the manual for contact details. Bosch provides multiple support channels, including phone, email, and live chat. Users can also access resources like FAQs and troubleshooting guides online; For warranty inquiries or technical assistance, reaching out through the Bosch website ensures prompt support. Additionally, Sears Parts Direct offers manual downloads and part diagrams, aiding in DIY repairs and maintenance. Bosch’s customer service team is available to address concerns, ensuring optimal performance and resolving issues efficiently.

husqvarna 128ld string trimmer manual

Product Overview

The Husqvarna 128LD is a versatile gas-powered string trimmer designed for residential use, offering efficient grass trimming with a powerful 28cc engine and 17-inch cutting width․

1․1 Key Features of the Husqvarna 128LD String Trimmer

The Husqvarna 128LD features a powerful 28cc, 2-cycle engine, delivering up to 8000 RPM for efficient cutting․ It includes a T25 semi-automatic trimmer head, Smart Start technology for easy starting, and a curved shaft design for better control․ The trimmer offers a variable cutting width and a robust line feed system․ Additionally, it includes a fuel pump for priming and a durable, braided cable drive, ensuring reliable performance for residential use․

1․2 Design and Build Quality

The Husqvarna 128LD string trimmer is built with durability and ergonomics in mind․ Featuring a robust curved shaft made of high-quality materials, it ensures excellent reach and maneuverability․ The trimmer boasts an ergonomic design with an adjustable handle, providing a comfortable grip and reduced user fatigue․ Its balanced construction minimizes vibration, offering better control and stability during operation․ These design elements contribute to a reliable and efficient trimming experience always․

Safety Precautions

Always wear protective gear, including gloves, goggles, and sturdy shoes․ Ensure proper handling of fuel and equipment, avoiding loose clothing that may catch during operation․ Adhere strictly to the manual’s guidelines for safe trimming practices and maintain a safe distance from bystanders and flammable materials․ Follow all safety instructions carefully to minimize risks and ensure secure operation․

2․1 General Safety Guidelines

Always read and follow the manual carefully before operating the trimmer․ Ensure you understand all safety precautions and operational instructions․ Maintain a safe distance from bystanders and keep children away․ Clear the area of obstacles, debris, and flammable materials․ Be aware of your surroundings to avoid accidents․ Never operate the trimmer near open flames or sparks․ Keep loose clothing tied back and avoid wearing jewelry that could get caught․ Ensure proper footing and balance while trimming․

2․2 Handling Fuel and Equipment Safely

When handling fuel, always do so in a well-ventilated area away from open flames or sparks․ Use approved containers to store and transport fuel, ensuring they are tightly sealed when not in use․ Never refuel the trimmer while it is hot or running․ Allow the engine to cool down before adding fuel․ Use the correct fuel type as specified in the manual to avoid damage․ Keep fuel out of reach of children and pets to prevent accidental ingestion or spills․

2․3 Protective Gear and Clothing

Always wear protective gear when operating the Husqvarna 128LD․ This includes safety glasses or goggles to protect your eyes from debris, gloves for a secure grip and hand protection, and long pants or sturdy clothing to prevent skin contact with the trimmer line․ Wear closed-toe, sturdy shoes to protect your feet from potential hazards․ Keep long hair tied back and avoid loose clothing that could get caught in the trimmer․ Ensure proper fit and comfort of all gear for safe operation․

Assembly and Initial Setup

Unpack and inventory all parts, attach the trimmer head and shaft securely, then perform initial fueling as outlined in the manual for proper setup․

3․1 Unpacking and Inventory of Parts

Begin by carefully unpacking the Husqvarna 128LD trimmer and all included accessories․ Inspect for any damage or missing components․ Verify the presence of the trimmer head, shaft, handle, fuel tank, and instruction manual․ Organize the parts to ensure nothing is misplaced․ Refer to the manual for a comprehensive list of components․ Check for any additional items like trimmer line or tools․ Ensure all parts are accounted for before proceeding with assembly․

3․2 Attaching the Trimmer Head and Shaft

Align the shaft with the trimmer head, ensuring proper connection points match․ Secure the shaft using the provided screws or clips as outlined in the manual․ Tighten firmly to maintain stability․ Next, attach the T25 semi-automatic trimmer head by aligning the retaining pins and twisting clockwise until it clicks into place․ Ensure all connections are tight and the head is properly seated for optimal performance and safety during operation․

3․4 Initial Fueling and Engine Preparation

Start by mixing fuel and oil in a 50:1 ratio, as specified in the manual․ Fill the tank with the prepared mixture, ensuring not to overfill․ Next, prime the engine by pressing the primer bulb 3-5 times until it becomes firm․ Finally, check for any fuel leaks and ensure the tank cap is securely tightened․ Always follow the manual’s guidelines for proper fueling and engine preparation to ensure safe and efficient operation․

Operating the Trimmer

Start the engine using the Smart Start system, then adjust the trimmer angle and line length as needed․ Operate with steady, controlled movements for optimal results․

4․1 Starting and Stopping the Engine

To start the Husqvarna 128LD, prime the engine by pressing the primer bulb 3-5 times․ Move the choke to the “start” position, grip the handle firmly, and pull the starter cord until the engine ignites․ Allow the engine to warm up for a few seconds before use․ To stop, move the choke to the “stop” position or turn off the engine via the kill switch, ensuring the trimmer line stops spinning․ Always follow manual guidelines for safe operation․

4․2 Threading the Trimmer Line

Threading the Husqvarna 128LD’s T25 semi-automatic trimmer head is straightforward․ Cut 10 feet of line to the recommended 0․095-inch diameter․ Insert one end into the eyelet, wind it clockwise around the spool, and leave 6 inches slack․ Secure the line by pulling gently․ The automatic feeding system advances the line when needed․ Always use approved trimmer lines to ensure proper function and safety during operation․

4․3 Adjusting the Trimming Angle

The Husqvarna 128LD allows easy adjustment of the trimming angle for precise cutting․ To adjust, rotate the trimmer head to your desired angle and secure it with the adjustment knob․ This feature is ideal for edging and trimming uneven terrain․ For optimal results, align the cutting line with the surface being trimmed․ Ensure the head is securely locked to maintain stability during operation․ Refer to the manual for specific angle settings and adjustments․

Maintenance and Care

Regular maintenance ensures optimal performance of the Husqvarna 128LD․ Clean the air filter, check the fuel line, and lubricate moving parts․ Store the trimmer in a dry place after use and follow the manual for detailed care instructions to extend its lifespan․

5․1 Routine Maintenance Practices

Regular maintenance is crucial for the Husqvarna 128LD’s performance․ Clean or replace the air filter as needed, inspect the fuel line for cracks, and lubricate moving parts․ After each use, wipe down the trimmer head and check for worn or damaged components․ Proper storage in a dry, cool place and following the manual’s guidelines will ensure long-term reliability and optimal functionality of the trimmer․

5․2 Refueling and Oil Changing

For the Husqvarna 128LD, use a 50:1 gasoline-to-oil mix․ Ensure the engine is cool before refueling to prevent accidents․ Locate the fuel tank, typically on the engine, and carefully pour in the mixture․ Avoid spills and tighten the cap securely․ For oil changes, check the manual for the recommended interval, usually every 20-50 hours․ Find the oil reservoir, drain it properly, and dispose of used oil responsibly․ Use the specified oil type and consider replacing the oil filter if applicable․ Prime the engine by pressing the primer bulb a few times after refueling for smooth startups․ Always follow manual instructions for precise steps to maintain engine health and performance․

5․3 Cleaning and Storage Tips

Regularly clean the Husqvarna 128LD to maintain performance․ Use a soft brush or cloth to remove grass clippings from the trimmer head and exterior․ Check the air filter and clean or replace it as needed․ Store the trimmer in a dry, cool place, away from direct sunlight․ Drain the fuel tank before long-term storage to prevent residue buildup․ Ensure all parts are secure and inspect for damage before storing․ Proper storage ensures optimal performance for the next season․

Technical Specifications

The Husqvarna 128LD features a 28cc, 2-cycle engine, delivering up to 8000 RPM, with a 17-inch cutting width for efficient trimming performance․

6․1 Engine and Performance Details

The Husqvarna 128LD is equipped with a powerful 28cc, 2-cycle gas engine, delivering up to 8000 RPM for efficient cutting performance․ It features Smart Start technology for easy starting and a fuel pump to ensure reliable engine priming․ Designed for durability, the engine provides consistent power for trimming tough grass and weeds, making it suitable for residential use․ Its performance is optimized for both light and heavy-duty tasks, ensuring versatility in various trimming scenarios․

6․2 Cutting Capacity and Line Diameter

The Husqvarna 128LD offers a generous 17-inch cutting swath, ideal for efficient trimming of large areas․ It utilizes a semi-automatic T25 trimmer head, accepting line diameters up to 0․095 inches․ This flexibility allows users to tackle both light grass and thicker weeds effectively․ The trimmer is compatible with Husqvarna’s original cutting line for optimal performance and durability, ensuring reliable results across various trimming conditions and terrains․

6․3 Weight and Ergonomic Features

The Husqvarna 128LD weighs approximately 10․5 lbs, offering a balanced design for reduced fatigue; Its semi-automatic T25 trimmer head and straight shaft provide excellent control․ The ergonomic handle with a comfort grip and adjustable shoulder strap enhances usability․ Designed for ease of use, the trimmer ensures precise maneuverability, making it suitable for extended trimming sessions without discomfort․

Troubleshooting Common Issues

Common issues include engine starting problems, line feeding difficulties, and vibration․ Refer to the manual for diagnostic steps and solutions to ensure optimal performance and safety․

7․1 Engine Not Starting or Running Roughly

If the engine fails to start or runs unevenly, check the fuel quality, air filter, and spark plug․ Ensure proper choke operation and verify fuel pump function․ Clean or replace the air filter and spark plug if necessary․ Check for loose connections or blockages in the fuel line․ Refer to the manual for detailed diagnostic steps to resolve these common issues and restore smooth engine performance․

7․2 Trimmer Line Not Feeding Properly

If the trimmer line isn’t feeding correctly, ensure it’s loaded properly according to the manual․ Check for tangles or knots in the line․ Verify the correct line diameter is used, as specified in the manual․ Clean the trimmer head to remove debris․ If issues persist, refer to the manual for instructions on adjusting the line feeding mechanism or replacing worn components to restore proper function and efficiency․

7․3 Vibration or Balance Problems

If vibration or balance issues occur, inspect the trimmer head for damage or uneven wear․ Ensure the cutting line is properly installed and not uneven․ Check for loose screws or components and tighten them as needed․ Excessive vibration may indicate an unbalanced head or incorrect line diameter․ Refer to the manual for proper line replacement and balancing instructions to restore stability and optimal performance during operation․

Accessories and Replacement Parts

Explore a range of accessories, including trimmer lines, blades, and engine parts, to enhance performance․ Visit Fix․com for OEM Husqvarna 128LD parts and expert support․

8․1 Recommended Trimmer Lines and Blades

The Husqvarna 128LD is compatible with a variety of trimmer lines and blades․ For optimal performance, use Husqvarna’s T25 semi-automatic trimmer head with 0․095-inch diameter line․ Metal blades are not recommended for this model․ Always refer to the operator’s manual for specific guidelines on loading and using trimmer lines․ Using approved accessories ensures safety and maximizes cutting efficiency․

8․2 Replacement Engine Parts and Filters

For the Husqvarna 128LD, replacement parts like air filters, spark plugs, and piston rings are available․ Genuine Husqvarna parts ensure optimal performance and warranty compliance․ Regularly replace the air filter to maintain engine efficiency․ Spark plugs should be replaced every 100 hours of use․ Always refer to the operator’s manual for part numbers and installation instructions․ Use OEM parts to avoid voiding the warranty and ensure reliability․

8․3 Optional Attachments and Upgrades

The Husqvarna 128LD supports optional attachments like the T25 semi-automatic trimmer head for easy line reloading and multi-purpose cutting attachments for edging or pruning․ Upgrades include a Smart Start system for easier engine starts and interchangeable cutting heads for versatility․ These accessories enhance functionality and adaptability, allowing the trimmer to tackle various yard tasks efficiently․ Always use Husqvarna-approved attachments to ensure compatibility and maintain performance․

pizza bagel microwave instructions

Transform a simple bagel into a delicious mini pizza quickly using your microwave. This easy method requires minimal prep and offers a satisfying snack in minutes.

Overview of Pizza Bagels

Pizza bagels are a delicious and convenient snack that combines the simplicity of a bagel with the flavors of pizza. They consist of a bagel base topped with pizza sauce, cheese, and various toppings, offering a quick and satisfying meal. Perfect for both kids and adults, pizza bagels are versatile and can be customized with favorite ingredients. They are ideal for busy days, providing a tasty solution with minimal preparation. Whether made from scratch or using pre-made options, pizza bagels are a popular choice for their ease and flavor. This section explores the basics of pizza bagels and their appeal as a microwave-friendly option.

Importance of Microwave Cooking for Pizza Bagels

Microwave cooking is a game-changer for pizza bagels, offering unmatched convenience and speed. It allows for quick melting of cheese and heating of toppings without the need for an oven, making it perfect for those short on time. The microwave ensures that pizza bagels are ready in just a few minutes, maintaining their texture and flavor. This method is ideal for reheating leftovers, cooking frozen pizza bagels, and achieving a perfectly toasted crust. Its efficiency and ease make microwave cooking a preferred choice for preparing pizza bagels, ensuring a delicious and satisfying snack every time with minimal effort required.

Ingredients and Preparation

Gather essential ingredients like bagels, pizza sauce, mozzarella cheese, and toppings of your choice. Preheat and prepare the bagels by slicing them in half for even cooking.

Necessary Ingredients for Pizza Bagels

Pizza bagels require just a few simple ingredients. Start with fresh or frozen bagels, preferably sturdy ones for holding toppings. Add pizza sauce for the base flavor, shredded mozzarella cheese for creaminess, and your favorite toppings like pepperoni, mushrooms, or olives. Optional additions include herbs like oregano or basil for extra flavor. For frozen pizza bagels, ensure they’re properly thawed or follow package instructions. These ingredients combine to create a quick, delicious snack that’s customizable to your taste preferences; Keep it simple or get creative—either way, it’s a perfect microwave meal.

Preparation Steps Before Microwaving

Before microwaving, slice the bagel in half horizontally and place it cut-side-up on a microwave-safe plate. Spread a tablespoon of pizza sauce evenly on each half, leaving a small border around the edges. Add toppings like pepperoni, mushrooms, or olives, followed by a sprinkle of shredded mozzarella cheese. For frozen bagels, ensure they’re thawed or follow package thawing instructions. Arrange the bagels in a single layer to avoid overcrowding, which can affect even cooking. Keep toppings balanced to prevent sogginess. Proper preparation ensures a crispy base and perfectly melted cheese, making your pizza bagel ready for a quick microwave session.

Microwave Instructions

Cook pizza bagels in the microwave for 1-2 minutes on high power. Adjust time based on quantity and desired crispiness for a perfectly cooked snack every time.

Cooking Pizza Bagels from Scratch

Creating pizza bagels from scratch in the microwave is quick and easy. Start by slicing a fresh bagel in half and placing it cut-side-up on a microwave-safe plate. Spread 1-2 tablespoons of pizza sauce evenly over each half. Sprinkle shredded mozzarella cheese generously, then add your preferred toppings like pepperoni slices or diced vegetables. Microwave on high for 30-45 seconds, or until the cheese melts and the bagel is toasted; For crispier results, cook in intervals, checking after each interval to avoid overcooking. This method ensures a freshly made, customizable snack ready in just minutes.

Cooking Frozen Pizza Bagels

Cooking frozen pizza bagels in the microwave is a convenient option for a quick snack. Place the desired number of frozen bagels on a microwave-safe plate, leaving space between them for even heating. Follow the package instructions for recommended cooking times, typically 2 to 3 minutes on high power. After microwaving, allow the bagels to stand for 1 to 2 minutes to ensure the cheese sets properly. For larger quantities, adjust cooking time slightly, but avoid overcrowding the plate. This method ensures a crispy exterior and a melted, cheesy interior, perfect for satisfying your pizza cravings in just a few minutes.

Ensuring Even Cooking

To achieve even cooking when microwaving pizza bagels, arrange them in a circular pattern on a microwave-safe plate, leaving space between each to allow heat to circulate evenly. Cook in short intervals, such as 30 seconds, and check progress to prevent overcooking; Rotate the plate halfway through cooking if your microwave doesn’t have a turntable. For frozen bagels, follow package guidelines for spacing and timing. After cooking, let the bagels stand for 30 seconds to 1 minute to ensure the cheese sets and the bagel crisps up evenly. This method ensures a consistent texture and prevents some areas from burning while others remain undercooked.

Reheating Leftover Pizza Bagels

To reheat leftover pizza bagels in the microwave, place them on a paper towel-lined plate to absorb excess moisture. Microwave on high in 20-30 second intervals until warmed through, checking after each interval to avoid overheating. For crispiness, wrap the bagel in a damp paper towel during reheating. Ensure even heating by rotating the bagel halfway through. If the bagel becomes soggy, try crisping it in a toaster oven for a few minutes after microwaving. Proper reheating restores the bagel’s texture and flavor, making leftovers as enjoyable as freshly cooked ones. This method ensures a quick and satisfying snack any time of day.

Customization Ideas

Elevate your pizza bagels with diverse toppings like pepperoni, mushrooms, or olives. Explore dietary options such as gluten-free bagels or vegan cheese for personalized flavors easily.

Various Toppings and Combinations

Enhance your pizza bagels with a variety of toppings to suit every taste. Classic combinations include pepperoni, mozzarella, and marinara sauce, while adventurous options might feature mushrooms, olives, or even pineapple. For a meat-lovers version, add sausage or bacon bits. Veggie enthusiasts can opt for roasted vegetables like bell peppers or zucchini. Experiment with different cheeses, such as cheddar or parmesan, for unique flavor profiles. Additionally, herbs like oregano or basil can add a fresh touch. The key to perfect pizza bagels is balancing toppings to ensure even cooking and a delicious, cohesive taste experience in every bite.

Dietary Restrictions and Alternatives

Accommodate various dietary needs with versatile pizza bagel options. For vegetarians, skip meat toppings and add roasted vegetables or plant-based pepperoni. Vegans can use dairy-free cheese and plant-based sauces. Gluten-free bagels are perfect for those with gluten intolerance. Low-sodium options include using salt-free sauce and reduced-sodium cheese. For keto diets, opt for low-carb bagels and load with protein-rich toppings like pepperoni or sausage. Dairy-free alternatives like vegan mozzarella ensure everyone can enjoy this snack. Experiment with these modifications to create a pizza bagel that fits your dietary preferences while maintaining great flavor and texture.

Advantages of Microwave Cooking

Microwave cooking offers a quick, convenient way to prepare pizza bagels with minimal effort, retaining flavor and texture while saving time, ideal for any occasion.

Time Efficiency

Microwave cooking simplifies pizza bagel preparation, offering a swift solution for hunger. With cooking times ranging from 30 seconds to 2 minutes, it’s ideal for busy schedules. This method ensures a quick transformation from raw ingredients to a hot, cheesy snack, perfect for lunch or a fast dinner. By eliminating the need for preheating or lengthy cooking processes, microwave cooking saves valuable minutes, making it a practical choice for those seeking a speedy yet satisfying meal. Additionally, it allows for easy reheating of leftovers, maintaining freshness and flavor without extra effort or time.

Ease of Use

Microwave cooking for pizza bagels is incredibly straightforward, requiring minimal effort and expertise; Simply place the bagel on a microwave-safe plate, add your desired toppings, and set the timer. The process is intuitive, making it accessible to everyone, including those new to cooking. Cleanup is also hassle-free, as it involves just a plate and utensils. This convenience makes microwave pizza bagels a stress-free option for any time of day. The simplicity of the method ensures consistent results, allowing you to enjoy a perfectly cooked snack without the complexity of traditional oven methods. It’s a user-friendly approach that delivers delicious outcomes effortlessly.

Troubleshooting Common Issues

Identify common problems like uneven heating or overcooking. Adjust cooking times and check for even melting to ensure perfectly cooked pizza bagels every time.

Preventing Overcooking

To prevent overcooking, cook pizza bagels in short intervals and check their progress. Start with 30 seconds, then rotate and add time as needed. Using lower power levels can help avoid burning. Ensure even heating by spacing bagels apart on the plate. Overcrowding can lead to uneven cooking; If using frozen bagels, follow package instructions but reduce time slightly. Keep an eye on cheese melt and crispiness to avoid a dry texture. Letting them stand for a minute after microwaving helps retain moisture. Adjust cooking times based on your microwave’s wattage for optimal results.

Maintaining Crispiness

To maintain crispiness in pizza bagels, toast the bagel halves in a toaster or toaster oven for 1 minute before adding toppings. This ensures a firmer base. When microwaving, use medium power to prevent sogginess. Avoid overcrowding the plate, as this can trap steam and soften the bagel. For frozen bagels, bake in the oven for crispiness or microwave briefly to avoid overcooking. Let the bagels stand for 30 seconds after microwaving to retain texture. These steps help preserve the crunch while melting the cheese perfectly.

Health Considerations

Pizza bagels can be a balanced snack if made with whole-grain bagels, low-sodium sauce, and moderate cheese. They provide carbs, some protein, and calcium, but watch portion sizes to manage calorie intake.

Nutritional Value of Pizza Bagels

Pizza bagels are a convenient snack that offers a mix of carbohydrates, protein, and fat; A typical pizza bagel contains around 250-300 calories, with carbohydrates from the bagel, protein from cheese, and some fat from toppings. Whole-grain bagels provide fiber and B vitamins, while cheese adds calcium. Toppings like vegetables increase vitamin and mineral content. However, they can be high in sodium due to sauce and processed toppings. Moderation is key to maintaining a balanced diet. Pairing with a side of greens or a salad can enhance nutritional value. Overall, pizza bagels are a satisfying snack when prepared mindfully.

Portion Control

Pizza bagels are an ideal snack due to their manageable size, making portion control straightforward. A single pizza bagel typically counts as one serving, providing a balanced mix of carbs, protein, and fat. To maintain healthy eating habits, stick to the recommended serving size, usually 1-2 bagels per person. Be mindful of calorie intake, as toppings can increase the nutritional content. For a balanced meal, pair pizza bagels with a side salad or vegetables to offset the richness. Avoid overeating by setting clear boundaries and savoring each bite. This approach ensures enjoyment without excessive calorie consumption, keeping your snack satisfying yet healthy.

Microwaving pizza bagels offers a quick, delicious, and customizable snack solution. With minimal prep and short cooking times, it’s perfect for busy schedules. Whether using fresh or frozen bagels, the microwave ensures even cooking. Experiment with various toppings to suit your taste, and maintain crispiness by adjusting intervals. Reheating leftovers is easy, keeping them warm and flavorful. Health-conscious options and portion control make this a guilt-free choice. By following these simple steps, you can enjoy a tasty, satisfying meal or snack in minutes, ideal for any time of day. This method is both practical and enjoyable for all.

ge he turbo washer manual

Welcome to the GE HE Turbo Washer Manual! This guide provides essential information for safe and efficient operation of your high-efficiency washing machine. Read carefully to ensure optimal performance and longevity.

1.1 Overview of the GE HE Turbo Washer

The GE HE Turbo Washer is a high-efficiency, eco-friendly washing machine designed for optimal cleaning performance. It features advanced Turbo Wash technology for faster cycles and superior stain removal. With Energy Star certification, it ensures energy and water savings. This washer combines innovative design, quiet operation, and user-friendly controls, making it a practical choice for modern households seeking reliability and efficiency in laundry care.

1.2 Importance of Reading the Manual

Reading the GE HE Turbo Washer Manual is crucial for safe and effective use. It provides detailed guidelines for operation, maintenance, and troubleshooting. Understanding the manual ensures optimal performance, prevents damage, and helps you customize settings for better results. It also highlights safety precautions and warranty terms, making it an essential resource for maximizing your washer’s efficiency and longevity while avoiding common mistakes.

Key Features of the GE HE Turbo Washer

The GE HE Turbo Washer boasts advanced features like High Efficiency (HE) technology, Turbo Wash for faster cleaning, and Energy Star certification for eco-friendly operation, ensuring superior performance and savings.

2.1 High Efficiency (HE) Technology

The GE HE Turbo Washer utilizes High Efficiency (HE) technology to optimize water and energy usage. Designed for eco-friendly performance, it requires HE detergents to minimize suds and ensure proper rinsing; This advanced system reduces energy consumption while maintaining powerful cleaning capabilities, making it ideal for those seeking both efficiency and effectiveness in their laundry routine.

2.2 Turbo Wash Functionality

The Turbo Wash feature enhances cleaning efficiency by increasing water flow and rotation speed. This advanced setting reduces cycle times while ensuring thorough soil removal, especially for heavily soiled loads. It’s designed to maintain energy savings while delivering exceptional cleaning performance, making it a convenient option for busy households seeking faster, effective wash cycles. Proper detergent usage is recommended to maximize results.

2.3 Energy Star Certification

The GE HE Turbo Washer holds an Energy Star Certification, ensuring it meets strict energy efficiency standards set by the U.S. EPA. This certification guarantees lower energy and water consumption, reducing utility bills and environmental impact. By using advanced HE technology, the washer achieves superior cleaning while maintaining eco-friendly performance, making it a sustainable choice for modern households.

Installation and Setup

Ensure the installation site is level and has proper drainage. Connect water supply lines securely and verify electrical connections. Level the washer to prevent vibration and ensure stable operation.

3.1 Pre-Installation Requirements

Before installing your GE HE Turbo Washer, ensure the site is level and has proper drainage. Check water supply lines for leaks and ensure they match the washer’s specifications. Verify electrical connections meet the required voltage and power ratings. Ensure the floor is sturdy to support the washer’s weight and operate smoothly. Prepare necessary tools and accessories as outlined in the manual for a seamless setup process.

3.2 Step-by-Step Installation Guide

Position the GE HE Turbo Washer on a level, stable surface. Connect the water supply lines to the washer’s inlet ports, ensuring they are securely tightened. Attach the drain hose to a nearby standpipe, keeping it elevated to prevent backflow. Plug the power cord into a grounded outlet matching the washer’s voltage requirements. Double-check all connections for leaks and test the washer with a short cycle to ensure proper function.

Safety Guidelines

Always use High Efficiency (HE) detergents to prevent excessive sudsing. Avoid overloading the washer, as this can cause imbalance. Keep children away from the washer during operation. Never use bleach or other cleaners, as they may damage the machine. Refer to the manual for specific safety precautions.

4.1 General Safety Precautions

For safe operation, always read the GE HE Turbo Washer Manual thoroughly. Ensure children stay away from the washer during use. Avoid overloading, as it may cause imbalance. Never use bleach or unauthorized cleaners, as they can damage the machine. Keep the washer on a stable, level surface to prevent accidents. Regularly inspect hoses for signs of wear. Follow all recommended maintenance procedures to ensure optimal performance and longevity.

4.2 Proper Use of Detergents

For optimal performance, use High Efficiency (HE) detergents specifically designed for your GE HE Turbo Washer. Place detergent in the designated dispenser to ensure even distribution. Avoid overloading with detergent, as it may cause poor cleaning results or excessive suds. Follow the recommended dosage on the detergent packaging. Always refer to the GE HE Turbo Washer Manual for specific guidelines on detergent usage to maintain efficiency and prevent damage.

Operating the GE HE Turbo Washer

Operating the GE HE Turbo Washer involves selecting the right cycle, customizing settings, and using the Turbo function for enhanced cleaning efficiency and faster wash times.

5.1 Choosing the Right Cycle

Selecting the appropriate cycle on your GE HE Turbo Washer ensures optimal cleaning for different fabric types and soil levels. Choose from options like Normal, Heavy Duty, or Delicates. For tougher stains, the Turbo Wash feature accelerates cleaning. Always consider load size and fabric care labels to prevent damage. This ensures efficient and gentle washing, preserving your clothes while maintaining energy efficiency.

5.2 Customizing Wash Settings

Customize your wash experience by adjusting settings like temperature, spin speed, and soil level. For heavily soiled clothes, enable the Turbo Wash feature for faster cleaning; Use the Steam option to tackle tough stains. Adjust water temperature based on fabric type—hot for sturdy fabrics, cold for delicates. Ensure detergent dosage matches load size for optimal results. Refer to the manual for specific setting combinations tailored to your needs.

5.3 Using the Turbo Function

The Turbo function enhances cleaning power for heavily soiled loads. Activate it for tougher stains or bulky items. Use High Efficiency detergents for optimal results. Note: Avoid using Turbo during quick wash cycles without dishes. Always follow manual guidelines to prevent damage and ensure efficiency. Proper usage ensures better cleaning and machine longevity.

Troubleshooting Common Issues

Identify error codes and address common problems like poor cleaning or noise. Refer to the manual for detailed solutions and maintenance tips to restore optimal performance quickly.

6.1 Identifying Error Codes

GE HE Turbo Washer error codes are displayed on the control panel. Codes like E1 or E2 indicate issues such as drainage problems or sensor malfunctions. Refer to the manual for specific code meanings. Restarting the machine or checking connections often resolves issues. For persistent errors, contact GE support for professional assistance. Regular maintenance can prevent recurring problems and ensure smooth operation.

6.2 Resolving Common Operational Problems

Common issues with the GE HE Turbo Washer include poor drainage, vibration, or improper detergent use. Check for blockages in the drain hose or filter. Ensure the machine is level to reduce vibration. Use HE detergents to avoid suds buildup. Restart the washer after addressing the issue. For persistent problems, refer to the troubleshooting section or contact GE support for assistance. Regular maintenance helps prevent these issues.

Maintenance and Care

Regular maintenance ensures optimal performance of your GE HE Turbo Washer. Clean the drain pump filter monthly and leave the lid open after cycles to dry the interior. Check for wear on parts and ensure proper detergent usage for longevity.

7.1 Regular Cleaning Recommendations

Regular cleaning is crucial for maintaining your GE HE Turbo Washer’s performance. Clean the drain pump filter monthly to prevent clogs. Leave the lid open after cycles to dry the interior and reduce odor buildup. Wipe down the gasket and detergent dispenser regularly. Run a cleaning cycle with HE detergent monthly to remove residue and ensure optimal functionality.

7.2 Checking and Replacing Parts

Regularly inspect the drain pump filter, gasket, and detergent dispenser for buildup or damage. Check the tub for residue and clean as needed. Replace worn parts like hoses, seals, or belts promptly. Use genuine GE parts to ensure compatibility and performance. Refer to the manual for diagrams and instructions. Always disconnect power before performing maintenance.

Energy Efficiency and Cost Savings

The GE HE Turbo Washer is designed to save energy and reduce costs. With Energy Star certification, it uses less water and electricity. Using high-efficiency detergents and running full loads maximizes efficiency. Regular maintenance and proper settings further enhance energy savings, lowering utility bills over time.

8.1 Understanding Energy Efficiency Ratings

Energy efficiency ratings measure how effectively the GE HE Turbo Washer uses resources. Higher ratings indicate lower energy and water consumption. These ratings are determined by factors like energy use per cycle and water efficiency. The Energy Star certification ensures the washer meets strict efficiency standards. Understanding these ratings helps consumers make eco-friendly choices and reduces long-term energy costs. Always check the rating to maximize savings and environmental benefits.

8.2 Tips for Maximizing Energy Savings

To maximize energy savings with your GE HE Turbo Washer, always use High Efficiency (HE) detergents and avoid overloading the machine. Select cycles that match load sizes and soil levels. Use the Turbo Wash feature for faster cycles, reducing energy consumption. Regular maintenance, like cleaning filters, ensures optimal performance. Running full loads and using steam settings can also enhance efficiency, lowering overall energy use and costs.

Warranty and Support

Your GE HE Turbo Washer is backed by a comprehensive warranty. For details, refer to the manual or contact GE Customer Support for assistance and inquiries.

9.1 Warranty Coverage Details

The GE HE Turbo Washer is covered by a limited warranty that includes parts and labor for defective components. The warranty duration varies depending on the model and usage. Proper registration and adherence to maintenance guidelines are required to maintain coverage. For specific details, refer to the warranty section in your manual or contact GE Appliances directly for clarification.

9.2 Contacting GE Customer Support

For assistance with your GE HE Turbo Washer, visit the official GE Appliances website or call their customer support hotline at 1-800-626-2005. Additional resources, such as owner manuals and troubleshooting guides, are available online. Ensure you have your model number ready for efficient support. Representatives are available to address inquiries, repair requests, and warranty-related concerns.

Common Mistakes to Avoid

Avoid overloading the washer and using incorrect detergents, as these common mistakes can reduce efficiency and damage the machine. Proper usage ensures optimal performance.

10.1 Overloading the Washer

Overloading the GE HE Turbo Washer can lead to inefficient washing, poor fabric care, and potential machine damage. Ensure clothes have enough space to move freely during cycles. Avoid filling the drum beyond the recommended capacity, as this can cause imbalance and reduce performance. Proper loading ensures optimal cleaning and maintains your washer’s longevity.

10.2 Using Incorrect Detergents

Using incorrect detergents in the GE HE Turbo Washer can reduce cleaning efficiency and potentially damage the machine. Always use High Efficiency (HE) detergents, as regular detergents can cause excessive sudsing. Avoid using household cleaners or bleach, as they may harm the washer or fabrics. Follow the recommended detergent guidelines in this manual to ensure optimal performance and maintain your washer’s longevity.

Thank you for choosing the GE HE Turbo Washer! By following this manual, you’ll maximize efficiency, extend the machine’s life, and ensure excellent cleaning results. Remember to use HE detergents, avoid overloading, and follow maintenance tips. Refer to this guide for troubleshooting and care instructions. Happy washing with your high-performance, energy-efficient GE HE Turbo Washer!

catholic confession guide for adults pdf

Catholic confession is a vital sacrament for spiritual renewal, offering adults a pathway to forgiveness and reconciliation with God and the Church. Resources like Fr. Mike Schmitz’s Pocket Guide to the Sacrament of Reconciliation and Catholic Answers’ Examination of Conscience provide practical tools for a meaningful confession experience.

1.1 Understanding the Sacrament of Reconciliation

The Sacrament of Reconciliation, also known as Confession, is a sacred ritual where Catholics seek forgiveness for their sins. It restores their relationship with God and the Church, fostering spiritual healing. Through this sacrament, believers acknowledge their wrongdoings, express remorse, and receive absolution. Resources like The Pocket Guide to the Sacrament of Reconciliation by Fr. Mike Schmitz highlight how the Holy Spirit guides individuals to recognize their sins and embrace God’s mercy. This sacrament is not just about confessing faults but also about spiritual renewal and Strength, enabling adults to live a more virtuous and grace-filled life. It is a cornerstone of Catholic spirituality.

1.2 Importance of Regular Confession for Spiritual Growth

Regular Confession plays a pivotal role in fostering spiritual growth among adults. It provides an opportunity for self-reflection, accountability, and healing, allowing individuals to confront their sins and seek divine mercy. Guides like The Catholic Answers Guide to an Examination of Conscience emphasize how regular confession helps in identifying patterns of sin and cultivating a deeper understanding of God’s love. By confessing regularly, adults can experience a renewed sense of peace, clarity, and purpose in their faith journey. This practice strengthens their relationship with God, enabling them to live a more authentic and grace-filled life. Regular confession is thus essential for ongoing spiritual development.

Preparing for Confession

Effective preparation for confession involves prayerful reflection and self-examination, guided by resources like Fr. Mike Schmitz’s pocket guide, to ensure a heartfelt and meaningful experience.

2.1 Examining Your Conscience: A Step-by-Step Guide

Examining your conscience is a prayerful process that begins with asking the Holy Spirit for clarity and humility. Start by reflecting on your actions, words, and thoughts, using the Ten Commandments as a guide. Consider how you have lived out your faith, honored relationships, and treated others. Identify specific sins, such as unkindness, dishonesty, or neglect of prayer. Reflect on how these actions have impacted your relationship with God and others. Examine patterns of sin and their root causes, such as fear, pride, or lack of trust in God. Use guides like Fr. Mike Schmitz’s Pocket Guide or Catholic Answers’ resources to structure your examination. This step-by-step approach ensures a thorough and honest self-reflection, preparing you to confess your sins sincerely.

2.2 Reflecting on Sins and Their Impact on Your Life

Reflecting on your sins involves prayerfully considering how they have affected your relationship with God, others, and yourself. Begin by asking the Holy Spirit to reveal areas where you have fallen short. Examine specific instances where you may have acted selfishly, hurt others, or neglected your faith commitments. Consider how these actions have strained relationships, weakened your spiritual life, or led to emotional turmoil. Use resources like Catholic Answers’ Examination of Conscience to guide your reflection. This process helps you understand the gravity of your sins and fosters a deeper desire for reconciliation. Honest reflection leads to genuine sorrow and a commitment to change.

The Sacrament of Confession

The Sacrament of Confession offers adults a sacred encounter with God’s mercy, enabling spiritual healing and renewal through the forgiveness of sins. As highlighted in the Pocket Guide to the Sacrament of Reconciliation by Fr. Mike Schmitz, this sacrament restores one’s relationship with God and the Church. By acknowledging and confessing sins, individuals experience liberation from guilt and receive grace to live a more virtuous life. The sacrament is a vital component of Catholic spirituality, offering a pathway to reconciliation and deeper union with Christ.

3.1 The Rite of Confession: What to Expect

The rite of confession begins with a greeting by the priest, followed by a brief conversation or prayer to set a spiritual tone.

  • The penitent then states their sins, being as specific as possible, while maintaining humility and honesty.
  • The priest offers guidance, words of encouragement, and assigns a penance to aid in spiritual growth.
  • The sacrament concludes with the penitent expressing sorrow through an act of contrition and receiving absolution from the priest.

Resources like Fr. Mike Schmitz’s guide emphasize the importance of preparation and sincerity, ensuring a meaningful encounter with God’s mercy during the rite.

3.2 How to Confess Your Sins Effectively

Confessing sins effectively involves prayerful preparation, honesty, and clarity.

  • Begin by examining your conscience, using guides like Catholic Answers’ Examination of Conscience to identify specific sins and their impact.
  • Express your sins clearly and succinctly, avoiding vague terms, to ensure a meaningful confession.
  • Take responsibility for your actions and express genuine sorrow, demonstrating your commitment to spiritual growth.

Fr. Mike Schmitz’s Pocket Guide encourages penitents to approach confession with humility, fostering a deeper encounter with God’s mercy and grace.

Common Challenges and Solutions

Overcoming fear and embarrassment during confession can be addressed through prayer and reflection, while forgetting sins can be resolved by remaining calm and seeking guidance from confession guides.

4.1 Overcoming Fear or Embarrassment During Confession

Fear and embarrassment are common feelings when approaching confession, but remembering God’s merciful love can ease anxiety. Guides like Fr. Mike Schmitz’s Pocket Guide emphasize that confession is a safe space for healing. Reflecting on the sacrament’s purpose—to receive forgiveness and grow closer to God—can shift focus from self-consciousness to spiritual renewal. Additionally, understanding that priests are there to support, not judge, helps build confidence. Prayer before confession, asking the Holy Spirit for courage, can also alleviate nervousness, making the experience more meaningful and transformative.

4.2 What to Do If You Forget Your Sins During Confession

Forgetting sins during confession can be unsettling, but it’s important to remain calm and trust in God’s grace. Guides suggest that if this happens, one should inform the priest, who may offer prompts or reflections to jog memory. It’s also advisable to pray for the Holy Spirit’s guidance during the sacrament. After confession, if more sins come to mind, they can be confessed in a future session. Remember, sincerity and effort in preparing for confession are what matter most, not perfection. This approach ensures a fruitful experience, fostering spiritual growth and a deeper connection with Christ.

Resources for a Deeper Understanding

Explore guides like The Pocket Guide to the Sacrament of Reconciliation and Catholic Answers’ Examination of Conscience for practical insights. Online communities, such as r/Catholicism, offer additional support and discussions.

5.1 Recommended Guides and Prayer Books for Adults

For a deeper understanding, consider The Pocket Guide to the Sacrament of Reconciliation by Fr. Mike Schmitz, offering practical insights into the sacrament. Catholic Answers’ Examination of Conscience provides a comprehensive review of sins, covering commandments, sacraments, and daily life. These resources are ideal for adults seeking to enrich their confession experience. Additionally, prayer books like Prayer Companion for Confession offer reflective prayers to prepare your heart. Online PDF guides, such as those shared on platforms like Reddit’s r/Catholicism, compile multiple resources for a holistic approach to confession and spiritual growth.

5.2 Online Materials and Communities for Support

Online resources offer invaluable support for adults preparing for confession. Websites like Catholic Answers provide downloadable PDF guides, such as their Examination of Conscience, to help identify sins. Fr. Mike Schmitz’s Pocket Guide to the Sacrament of Reconciliation is also available online, offering spiritual reflections. Additionally, communities like Reddit’s r/Catholicism share user-compiled confession guides, fostering a supportive environment for discussion and encouragement. These online materials and forums empower adults to deepen their faith and approach confession with confidence and clarity.

Catholic confession empowers adults to embrace spiritual renewal and reconciliation through transformative grace, fostering a deeper connection with God and His Church.

6.1 The Transformative Power of Confession in Daily Life

The transformative power of confession in daily life lies in its ability to bring healing and renewal. By acknowledging and surrendering sins, individuals experience a deeper sense of freedom and grace. This sacrament fosters personal growth, strengthens relationships with God, and enhances spiritual resilience. Guides like Fr. Mike Schmitz’s Pocket Guide to the Sacrament of Reconciliation emphasize how regular confession can lead to a more authentic, faith-filled life. Through confession, adults can embrace a life of purpose and joy, living as children of God in a world that often challenges their faith.

coffee grinding guide

Coffee grinding is a foundational step in coffee preparation, transforming raw beans into a liquid experience. Proper grinding enhances flavor, aroma, and overall coffee quality, making it essential for any coffee lover to master.

Why Grinding Your Own Coffee Matters

Grinding your own coffee is crucial for preserving flavor and aroma, as pre-ground coffee loses its essence quickly. It offers control over grind size, suiting various brewing methods like French press or espresso. Burr grinders provide consistent grinds without heat damage, ensuring balanced extraction. Investing in a grinder can be cost-effective and allows exploration of different beans and roasts, enhancing your coffee experience through experimentation and customization.

The Benefits of Freshly Ground Coffee

Freshly ground coffee delivers vibrant flavors and aromas, as grinding releases essential oils locked in beans. Pre-ground coffee loses these qualities quickly, often oxidizing and becoming stale. By grinding at home, you control the process, ensuring maximum freshness. This enhances the overall taste, making every brew more satisfying. Whether using blade or burr grinders, freshly ground beans provide a richer experience, allowing you to explore the full potential of your coffee. It’s a simple step that significantly elevates your daily ritual, making it worth the extra effort for coffee enthusiasts seeking the best flavor.

Types of Coffee Grinders

Coffee grinders come in various styles, including blade, burr, and manual or electric models. Each type offers unique benefits, catering to different needs and preferences for coffee enthusiasts.

Blade Grinders vs. Burr Grinders

Blade grinders use spinning blades to chop coffee beans, offering convenience and affordability. However, they can generate heat, potentially altering the coffee’s flavor. Burr grinders, on the other hand, crush beans between two surfaces, ensuring consistent grind sizes without heat buildup. This makes burr grinders ideal for preserving coffee’s aroma and flavor. While blade grinders are suitable for casual use, burr grinders are preferred by coffee enthusiasts for their precision and ability to customize grind sizes for various brewing methods like espresso or pour-over. The choice between them depends on personal preference, budget, and desired coffee quality. Choose wisely for your perfect cup.

Conical Burr vs. Flat Burr Grinders

Conical and flat burr grinders differ in design and performance. Conical burrs feature a cone-shaped design, offering excellent heat dissipation and consistent grind sizes, ideal for home use. Flat burrs, with their parallel surfaces, are often used in commercial settings, delivering high-speed grinding but potentially generating more heat. Conical burrs are generally quieter, easier to clean, and require less maintenance, while flat burrs excel in precision and durability for heavy-duty use. Both options produce high-quality grinds, but the choice depends on your brewing needs, budget, and preference for convenience versus performance. Each has its strengths, catering to different coffee enthusiasts’ requirements.

Understanding Grind Size and Distribution

Grind size and distribution are critical for optimal coffee extraction. The right grind size varies by brewing method, ensuring balanced flavor and aroma. Even distribution ensures consistency.

Common Grind Sizes for Different Brewing Methods

Coffee grind size varies significantly depending on the brewing method. Espresso requires a fine grind for high-pressure extraction, while French press needs a coarse grind to prevent over-extraction. Pour-over and Aeropress methods typically use a medium-coarse grind, allowing for optimal water flow and flavor extraction. Drip coffee makers often use a medium grind, similar to kosher salt, for balanced extraction. Cold brew, on the other hand, uses an extra-coarse grind to steep for extended periods without bitterness. Understanding these grind sizes ensures the perfect balance of flavors for any brewing technique.

The Importance of Even Grind Distribution

Even grind distribution is crucial for achieving balanced extraction in coffee. Uneven particles can lead to under-extracted or over-extracted flavors, resulting in a bitter or sour taste. Proper distribution ensures all grounds are in contact with water uniformly, maximizing flavor potential. This consistency is especially vital in methods like espresso and pour-over, where precise control over extraction is key. Even distribution also prevents channeling, where water flows unevenly through the coffee bed, bypassing some grounds entirely. By ensuring an even grind, you can unlock the full flavor profile of your coffee beans and enjoy a more satisfying brewing experience.

How to Choose the Right Grinder for Your Needs

Selecting the ideal grinder involves considering your brewing methods, budget, and preferences. Whether you opt for manual or electric, ensure it suits your daily coffee routine.

Factors to Consider When Buying a Coffee Grinder

When purchasing a coffee grinder, prioritize features like grind size adjustability, consistency, and durability. Consider your budget and whether you prefer manual or electric operation. Blade grinders are affordable but may generate heat, affecting flavor. Burr grinders, while pricier, offer precise control and uniform grinds. Additionally, assess the grinder’s capacity, ease of cleaning, and noise level. For espresso enthusiasts, a high-quality burr grinder is essential. Read reviews to ensure the grinder aligns with your brewing methods and lifestyle, ensuring optimal performance for your coffee-making needs.

Manual vs. Electric Grinders: Pros and Cons

Manual grinders are cost-effective, portable, and produce consistent grinds with minimal noise. They require manual effort and are ideal for small batches. Electric grinders are faster, handle larger quantities, and are convenient for daily use. However, they can be noisy and more expensive. Manual grinders suit those who value simplicity and control, while electric grinders appeal to those seeking efficiency. Consider your budget, lifestyle, and brewing habits when deciding. Both options offer unique advantages, so choose based on what aligns with your coffee-making routine and preferences.

Best Practices for Grinding Coffee

Consistency is key for optimal flavor. Adjust grind size based on brewing method, from fine espresso to coarse French press. Store beans properly and clean grinders regularly for freshness and hygiene.

How to Achieve the Perfect Grind for Espresso

Achieving the perfect espresso grind requires precision. The grind must be fine, almost powdery, to ensure proper extraction. Use a burr grinder for consistency, as blade grinders can generate heat, damaging beans. Adjust the grind setting to match your espresso machine’s requirements. Testing is crucial—pull a shot and observe the flow. If it’s too slow, the grind is too fine; too fast, and it’s too coarse. Store beans in an airtight container to preserve freshness and flavor. Regularly clean and maintain your grinder to prevent old coffee oils from affecting taste. Experimentation is key to finding your ideal grind.

Grind Settings for Pour-Over, French Press, and Other Methods

Grind size varies significantly across brewing methods. For pour-over, a medium-coarse grind is ideal to ensure proper water flow and extraction. French press requires a coarse grind to prevent grounds from passing through the press. Aeropress works best with a fine to medium grind, while drip coffee makers typically use a medium grind. Cold brew, on the other hand, needs an extra-coarse grind for steeping. Adjusting your grinder for each method is key to achieving balanced flavor. Use a burr grinder for consistency, as blade grinders can generate heat and uneven particles. Experiment with settings to find the perfect grind for your preferred brewing technique.

Maintenance and Care of Your Grinder

Regularly clean your grinder with a soft brush or cleaning solution to remove residue. Lubricate moving parts and sharpen or replace burrs as needed for optimal performance.

How to Clean and Maintain Your Coffee Grinder

Cleaning your coffee grinder regularly is essential to remove residual coffee oils and dust. Use a soft brush or a cleaning solution specifically designed for grinders. For manual grinders, disassemble and wipe down parts with a damp cloth. Electric grinders may require descaling to prevent mineral buildup. Always unplug before cleaning and avoid harsh chemicals that could damage components. For stubborn residue, grind a small amount of rice to absorb oils. Regular maintenance ensures optimal performance and prevents stale flavors. Check for static cling in burrs and lubricate moving parts if necessary. A well-maintained grinder lasts longer and brews better coffee.

Sharpening and Replacing Burr Sets

Sharpening and replacing burr sets is crucial for maintaining your grinder’s performance. Over time, burrs wear down, leading to inconsistent grinds. Sharpening can extend their life, but eventually, replacement is necessary. For manual grinders, check if burrs are adjustable or removable for sharpening. Electric grinders often require specialized tools or professional servicing. When replacing, ensure new burrs match your grinder’s specifications. High-quality burrs improve grind consistency and flavor. Always follow the manufacturer’s instructions for sharpening or replacing to avoid damaging your grinder. Regular maintenance ensures optimal grinding and prevents costly repairs down the line.

Troubleshooting Common Grinding Issues

Identify and address issues like inconsistent grinds, clogged grinders, or motor overheating; Regular cleaning, burr maintenance, and adjusting grind settings can resolve most common problems effectively.

Dealing with Inconsistent Grinds

Inconsistent grinds can ruin your coffee experience. Blade grinders often cause uneven particles, while burr grinders are more precise. To fix this, ensure your grinder is clean and free of old coffee residue. Adjust the grind settings carefully, as different brewing methods require specific particle sizes. For example, espresso needs a fine, even grind, while French press requires a coarser texture. If using a burr grinder, check for worn-out burrs and sharpen or replace them as needed. Regular maintenance and proper calibration can significantly improve consistency and flavor in your coffee.

Fixing Clogged Grinders and Other Common Problems

Clogged grinders are a common issue, often caused by oil from coffee beans or improper cleaning. To fix this, unplug the grinder and brush out any residue. For stubborn clogs, soak removable parts in warm soapy water. Regularly cleaning your grinder prevents buildup and ensures smooth operation. Other issues like uneven grinds can be resolved by adjusting settings or sharpening burrs. Proper maintenance, such as descaling and lubricating moving parts, extends the life of your grinder. Always refer to the manufacturer’s guidelines for specific troubleshooting steps to keep your grinder functioning optimally.

Mastering coffee grinding unlocks the full flavor and aroma of your beans, elevating every brew. Experiment, explore, and refine your skills to find your perfect cup every time.

Summarizing the Key Points of Coffee Grinding

Coffee grinding is a crucial step that significantly impacts the flavor and quality of your brew. Freshly ground beans ensure optimal aroma and taste, while pre-ground coffee often lacks freshness. Burr grinders are preferred over blade grinders for consistency and even extraction. Understanding grind sizes is essential, as different brewing methods require specific textures, from fine espresso grinds to coarse French press. Regular maintenance, including cleaning and sharpening burrs, ensures longevity and performance. Experimentation with grind settings and techniques can elevate your coffee experience, helping you achieve the perfect cup tailored to your preferences.

Encouraging Experimentation and Exploration

Experimentation is the heart of mastering coffee grinding. Try different beans, roast levels, and grind sizes to discover unique flavors. Adjust settings for each brewing method to find your perfect balance. Keep a journal to track what works and refine your technique. Don’t be afraid to explore new tools or methods—each can reveal new dimensions in your coffee experience. Remember, coffee is a journey, and every cup is an opportunity to learn and enjoy something new. Embrace the process and savor the creativity that comes with crafting your ideal brew.